Creating a Camera Application
If you come across any mistakes or bugs in this tutorial, please let us know by sending emails to dev@dji.com. Please feel free to send us Github pull request and help us fix any issues.
This tutorial is designed for you to gain a basic understanding of the DJI Mobile SDK. It will implement the FPV view and two basic camera functionalities: Take Photo and Record video.
You can download the tutorial's final sample project from this Github Page.
We use Mavic Pro as an example to make this demo.
Importing and Activating the SDK
Now, let's create a new project in Xcode, choose Single View Application template for your project and press "Next", then enter "FPVDemo" in the Product Name field and keep the other default settings.
Once the project is created, let's delete the "ViewController.h" and "ViewController.m" files created by Xcode by default. Create a new ViewController named "DJICameraViewController".
Now, let's install the DJISDK.framework in the Xcode project using Cocoapods and implement the SDK activation process in the "DJICameraViewController.m" file. If you are not familiar with the process of installing and activating DJI SDK, please check the Github source code and this tutorial: Importing and Activating DJI SDK in Xcode Project for details.
Application Activation and Aircraft Binding in China
For DJI SDK mobile application used in China, it's required to activate the application and bind the aircraft to the user's DJI account.
If an application is not activated, the aircraft not bound (if required), or a legacy version of the SDK (< 4.1) is being used, all camera live streams will be disabled, and flight will be limited to a zone of 100m diameter and 30m height to ensure the aircraft stays within line of sight.
To learn how to implement this feature, please check this tutorial Application Activation and Aircraft Binding.
Implementing the First Person View
Importing the DJIWidget
1. We use the FFMPEG decoding library (found at http://ffmpeg.org) to do software video decoding here. For the hardware video decoding, we provide a H264VTDecode decoding library. You can find them in the DJIWidget/DJIWidget/VideoPreviewer folder, which you can download it from DJIWidget Github Repository.
DJIWidget is available through CocoaPods. To install it, simply add the following line to your Podfile:
pod 'DJIWidget', '~> 1.6.2' |
Note: Remember to add
use_frameworks!in the pod file to use DJIWidget as a dynamic framework in Swift project.
Working on the DJICameraViewController
1. Let's open the FPVDemo.xcworkspace file in Xcode and open the Main.storyboard, add a new View Controller and set DJICameraViewController as the Class for it:

Add a UIView inside the View Controller. Then, add two UIButtons and one UISegmentedControl at the bottom of the View Controller as shown below:

Go to "DJICameraViewController.m" file and import the DJISDK and DJIVideoPreviewer header files. Next implement four delegate protocols and set the IBOutlets and IBActions for the UI we just create in Main.storyboard as shown below:
|
2. Furthermore, let's create the setupVideoPreviewer and resetVideoPreviewer methods as shown below:
- (void)setupVideoPreviewer { |
In the setupVideoPreviewer method, we set the fpvPreviewView instance variable as the superview of the MovieGLView in the DJIVideoPreviewer class to show the Video Stream first, then create a DJIBaseProduct object from the DJISDKManager and use an if statement to check its model property.
If the product is A3, N3, Matrice 600 or Matrice 600 Pro, we invoke the addListener:withQueue: method of DJIVideoFeeder class to add DJICameraViewController as the listener of the secondaryVideoFeed for video feed, otherwise, we add DJICameraViewController as the listener of the primaryVideoFeed instance for video feed. Lastly, we invoke the start method of DJIVideoPreviewer instance to start the video decoding.
Moreover, in the resetVideoPreview method, we invoke the unSetView method of DJIVideoPreviewer instance to remove the MovieGLView of the DJIVideoPreviewer class from the fpvPreviewView instance first. Then also check the current product's model using an if statement.
If the product is A3, N3, Matrice 600 or Matrice 600 Pro, we invoke the removeListener: method of DJIVideoFeeder class to remove the DJICameraViewController listener from the secondaryVideoFeed for video feed, otherwise, we remove the DJICameraViewController listener from the primaryVideoFeed for video feed.
3. Once you finished the above steps, let's implement the DJISDKManagerDelegate delegate methods and the viewWillDisappear method as shown below:
- (DJICamera*) fetchCamera { |
Firstly, we create the - (DJICamera*) fetchCamera method to fetch the updated DJICamera object. Before we get the return DJICamera object, we need to check if the product object of DJISDKManager is kind of DJIAircraft of DJIHandheld class. Since the camera component of the aircraft or handheld device may be changed or disconnected, we need to fetch the camera object everytime we want to use it to ensure we get the correct camera object.
Then invoke the setupVideoPreviewer method to setup the DJIVideoPreviewer in the productConnected delegate method. Lastly, reset the camera instance's delegate to nil and invoke the resetVideoPreview method to reset the videoPreviewer in the productDisconnected and viewWillDisappear methods.
4. Lastly, let's implement the "DJIVideoFeedListener" and "DJICameraDelegate" delegate methods, as shown below:
|
Here, we use the -(void)videoFeed:(DJIVideoFeed *)videoFeed didUpdateVideoData:(NSData *)videoData method to get the live H264 video feed data and send them to the DJIVideoPreviewer to decode.
Moreover, the -(void) camera:(DJICamera*)camera didUpdateSystemState:(DJICameraSystemState*)systemState method is used to get the camera state from the camera on your aircraft. It will be invoked frequently, so you can update your user interface or camera settings accordingly here.
Connecting to the Aircraft or Handheld Device
Please check this Connect Mobile Device and Run Application guide to run the application and view the live video stream from your DJI product's camera based on what we've finished of the application so far!
Enjoying the First Person View
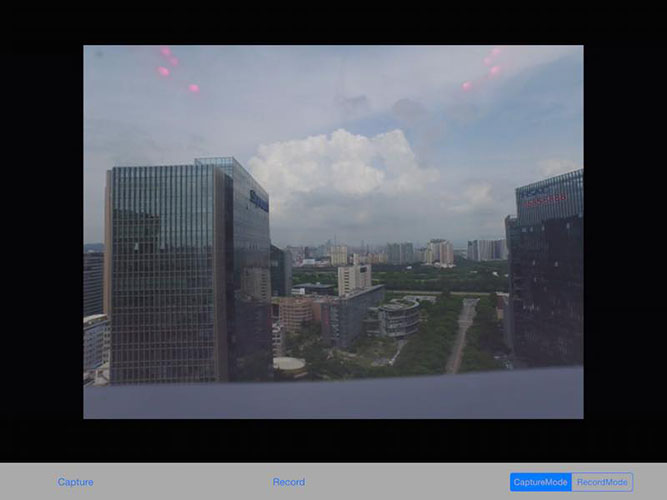
If you can see the live video stream in the application, congratulations! Let's move forward.
Implementing the Capture function
Let's implement the captureAction IBAction method as shown below:
- (IBAction)captureAction:(id)sender { |
In the code above, we firstly invoke the following method of DJICamera to set the shoot photo mode to DJICameraShootPhotoModeSingle:
- (void)setShootPhotoMode:(DJICameraShootPhotoMode)mode withCompletion:(DJICompletionBlock)completion; |
Normally, once an operation is finished, the camera still needs some time to finish up all the work. It's safe to delay the next operation after an operation is finished. So let's enqueue the block which may invoke the following method with 1 second delay to control the camera to shoot a photo:
- (void)startShootPhotoWithCompletion:(DJICompletionBlock)completion;
You can check the shoot photo result from the DJICompletionBlock.
Build and run your project and then try the shoot photo function. If the screen flash after your press the Capture button, your capture fuction should work now.
Implementing the Record function
1. Switching Camera Mode
Before we implement the record function, we need to switch the camera work mode firstly.
Let's check the DJICameraMode enum in DJICameraSettingsDef.h file.
/** |
You can see from above that there are 5 types of DJICameraMode. Here we use the first two types.
Remember we create a UISegment Control in the storyboard? We can update the state of the segmented control when switching between DJICameraModeShootPhoto and DJICameraModeRecordVideo using the previous delegate method like this:
-(void) camera:(DJICamera*)camera didUpdateSystemState:(DJICameraSystemState*)systemState |
Now we can implement the changeWorkModeAction IBAction method as follows:
|
In the code above, we invoke the
- (void)setMode:(DJICameraMode)mode withCompletion:(DJICompletionBlock)completion; method of DJICamera to change the camera mode. Here we add two UIAlertViews to show warnings when the user set DJICameraMode failed.
2. Working on the Record Action
Firstly, let's go to Main.storyboard and drag a UILabel on top of the screen, set up the Autolayout constraints for it and create an IBOutlet named currentRecordTimeLabel in the DJICameraViewController.m file.
Then add a BOOL variable isRecording in the class extension part of DJICameraViewController. Be sure to hide the currentRecordTimeLabel in the viewDidLoad method.
- (void)viewDidLoad { |
We can update the bool value for isRecording and currentRecordTimeLabel's text value in the following delegate method:
|
Because the text value of currentRecordingTime is counted in seconds, so we need to convert it to "mm:ss" format like this:
- (NSString *)formattingSeconds:(int)seconds |
Next, add the following codes to the recordAction IBAction method as follows:
- (IBAction)recordAction:(id)sender { |
In the code above, we implement the startRecordVideoWithCompletion and stopRecordVideoWithCompletion methods of the DJICamera class based on the isRecording property value. And show an alertView when an error occurs.
Now, let's build and run the project and check the functions. You can try to play with the Record and Switch Camera WorkMode functions, if everything goes well, you should see the screenshot like this:
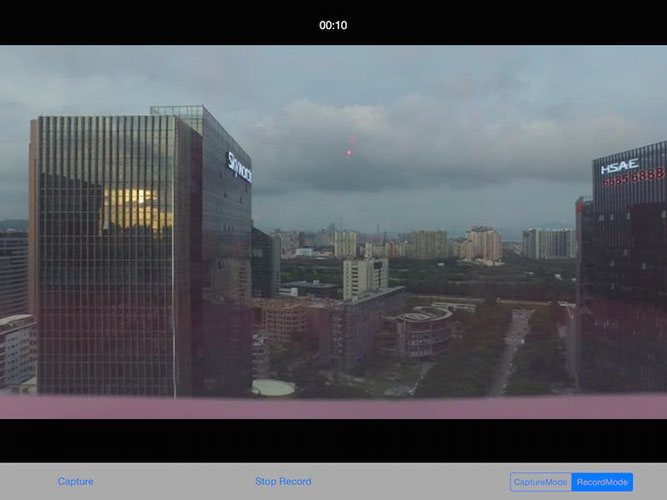
Congratulations! Your Aerial FPV iOS app is complete, you can now use this app to control the camera of your Mavic Pro.
Summary
In this tutorial, you’ve learned how to use DJI Mobile SDK to show the FPV View from the aircraft's camera and control the camera of DJI's Aircraft to shoot photo and record video. These are the most basic and common features in a typical drone mobile app: Capture and Record. However, if you want to create a drone app which is more fancy, you still have a long way to go. More advanced features should be implemented, including previewing the photo and video in the SD Card, showing the OSD data of the aircraft and so on. Hope you enjoy this tutorial, and stay tuned for our next one!