Creating a TapFly and ActiveTrack Missions Application
In this tutorial, you will learn how to use the TapFly and ActiveTrack Missions of DJI Android SDK to create a cool application for Mavic Pro. Also, you will get familiar with ActiveTrackOperator, TapFlyMissionOperator and using the Simulator of DJI Assistant 2 for testing, which is convenient for you to test the missions indoor. We will use Android Studio 3.0 version for demo here. So let's get started!
You can download the tutorial's final sample code project from this Github Page.
Introduction
The TapFly and ActiveTrack missions bring you a more autonomous flying experience. They are originally supported by Phantom 4, now they are also supported by Mavic Pro, Phantom 4 Pro, Phantom 4 Advanced, Spark, M200 and Inspire 2.
TapFly Mission
Given a coordinate in the live video stream (which can come from a user tap), the aircraft will calculate and fly towards the coordinate's direction in the real world. During a flight, the aircraft will automatically detect and avoid obstacles. Also, the aircraft will stop flying in the direction if it reaches its radius limitation, the mission is stopped, the user pulls back on the pitch stick or if it comes to an obstacle it cannot bypass.
During the mission, you can use the remote controller's yaw stick to adjust the heading of the aircraft, which also adjusts the direction of flight to the new yaw.
Here is a video for you to get the first impression of the TapFly Mission.
ActiveTrack Mission
An ActiveTrack Mission allows an aircraft to track a moving subject using the vision system and without a GPS tracker on the subject. To use an ActiveTrack mission:
The main camera is used to track the target, so the gimbal cannot be adjusted during an ActiveTrack mission. During the mission, the aircraft can be manually flown with pitch, roll and throttle to move around the subject being tracked.
Here is a video for you to get the first impression of the ActiveTrack Mission.
Application Activation and Aircraft Binding in China
For DJI SDK mobile application used in China, it's required to activate the application and bind the aircraft to the user's DJI account.
If an application is not activated, the aircraft not bound (if required), or a legacy version of the SDK (< 4.1) is being used, flight will be limited to a cylinder of 100m diameter and 30m height to ensure the aircraft stays within line of sight.
To learn how to implement this feature, please check this tutorial Application Activation and Aircraft Binding.
Implementing the UI of Application
Now that you know the details of the two missions, we can start working on the application.
Importing Maven Dependency
Open Android Studio and select File -> New -> New Project to create a new project, named 'P4MissionsDemo'. Enter the company domain and package name(Here we use "com.dji.P4MissionsDemo") you want and press Next. Set the minimum SDK version as API 19: Android 4.4 (KitKat) for "Phone and Tablet" and press Next. Then select "Empty Activity" and press Next. Lastly, leave the Activity Name as "MainActivity", and the Layout Name as "activity_main", Press "Finish" to create the project.
In our previous tutorial Importing and Activating DJI SDK in Android Studio Project, you have learned how to import the Android SDK Maven Dependency and activate your application. If you haven't read that previously, please take a look at it and implement the related features. Once you've done that, continue to implement the next features.
Building the Layouts of Activities
1. Implementing MApplication and DJIDemoApplication
You can check the Creating an Camera Application tutorial and the sample project of this tutorial for the detailed implementations of the MApplication and DJIDemoApplication.
2. Implementing DemoBaseActivity Class
Similarly, create a new Empty Activity class with the name of "DemoBaseActivity" in the com.dji.p4MissionsDemo package. Remember to deselect the "Generate Layout File". Replace the code with the following, remember to import the related classes as Android Studio suggested:
public class DemoBaseActivity extends FragmentActivity implements SurfaceTextureListener { |
We will use this activity class as our base class later. More details of the implementation will be done later.
3. Creating the MainActivity
Working on the MainActivity Class
For the implementation of the "MainActivity.java class, please check the Creating an Camera Application tutorial and the sample project of this tutorial.
Implementing the MainActivity Layout
Open the activity_main.xml layout file and replace the code with the following:
<LinearLayout xmlns:android="http://schemas.android.com/apk/res/android" |
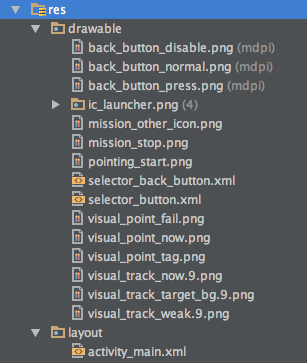
In the xml file, firstly, we implement the RelativeLayout element. We declare an ImageButton(id: ReturnBtnMain) element to exit the application, and a TextView(id: ConnectStatusTextView) element to show the connection status text. Next, create a TextView(id:version_tv) element to show the firmware version and a ListView(id:listView) element to show the list items.
Next, copy all the image files from this Github sample project to the drawable folders inside the res folder.
Moreover, open the AndroidManifest.xml file and update the ".MainActivity" activity element with several attributes as shown below:
<activity |
Furthermore, open the "strings.xml" file in values folder and add the following string content:
<string name="title_activity_mainactivity">P4MissionsDemo</string> |
Lastly, let's create a new xml file named "demo_info_item.xml" in the layout folder by right-clicking on the "layout" folder and select New->XML->Layout XML File. Then replace the code of the file with the following:
|
This xml file will help to setup the two TextViews with "title" and "desc" ids for the convertView of DemoListAdapter.
Now, if you check the activity_main.xml file, you can see the preview screenshot of MainActivity as shown below:
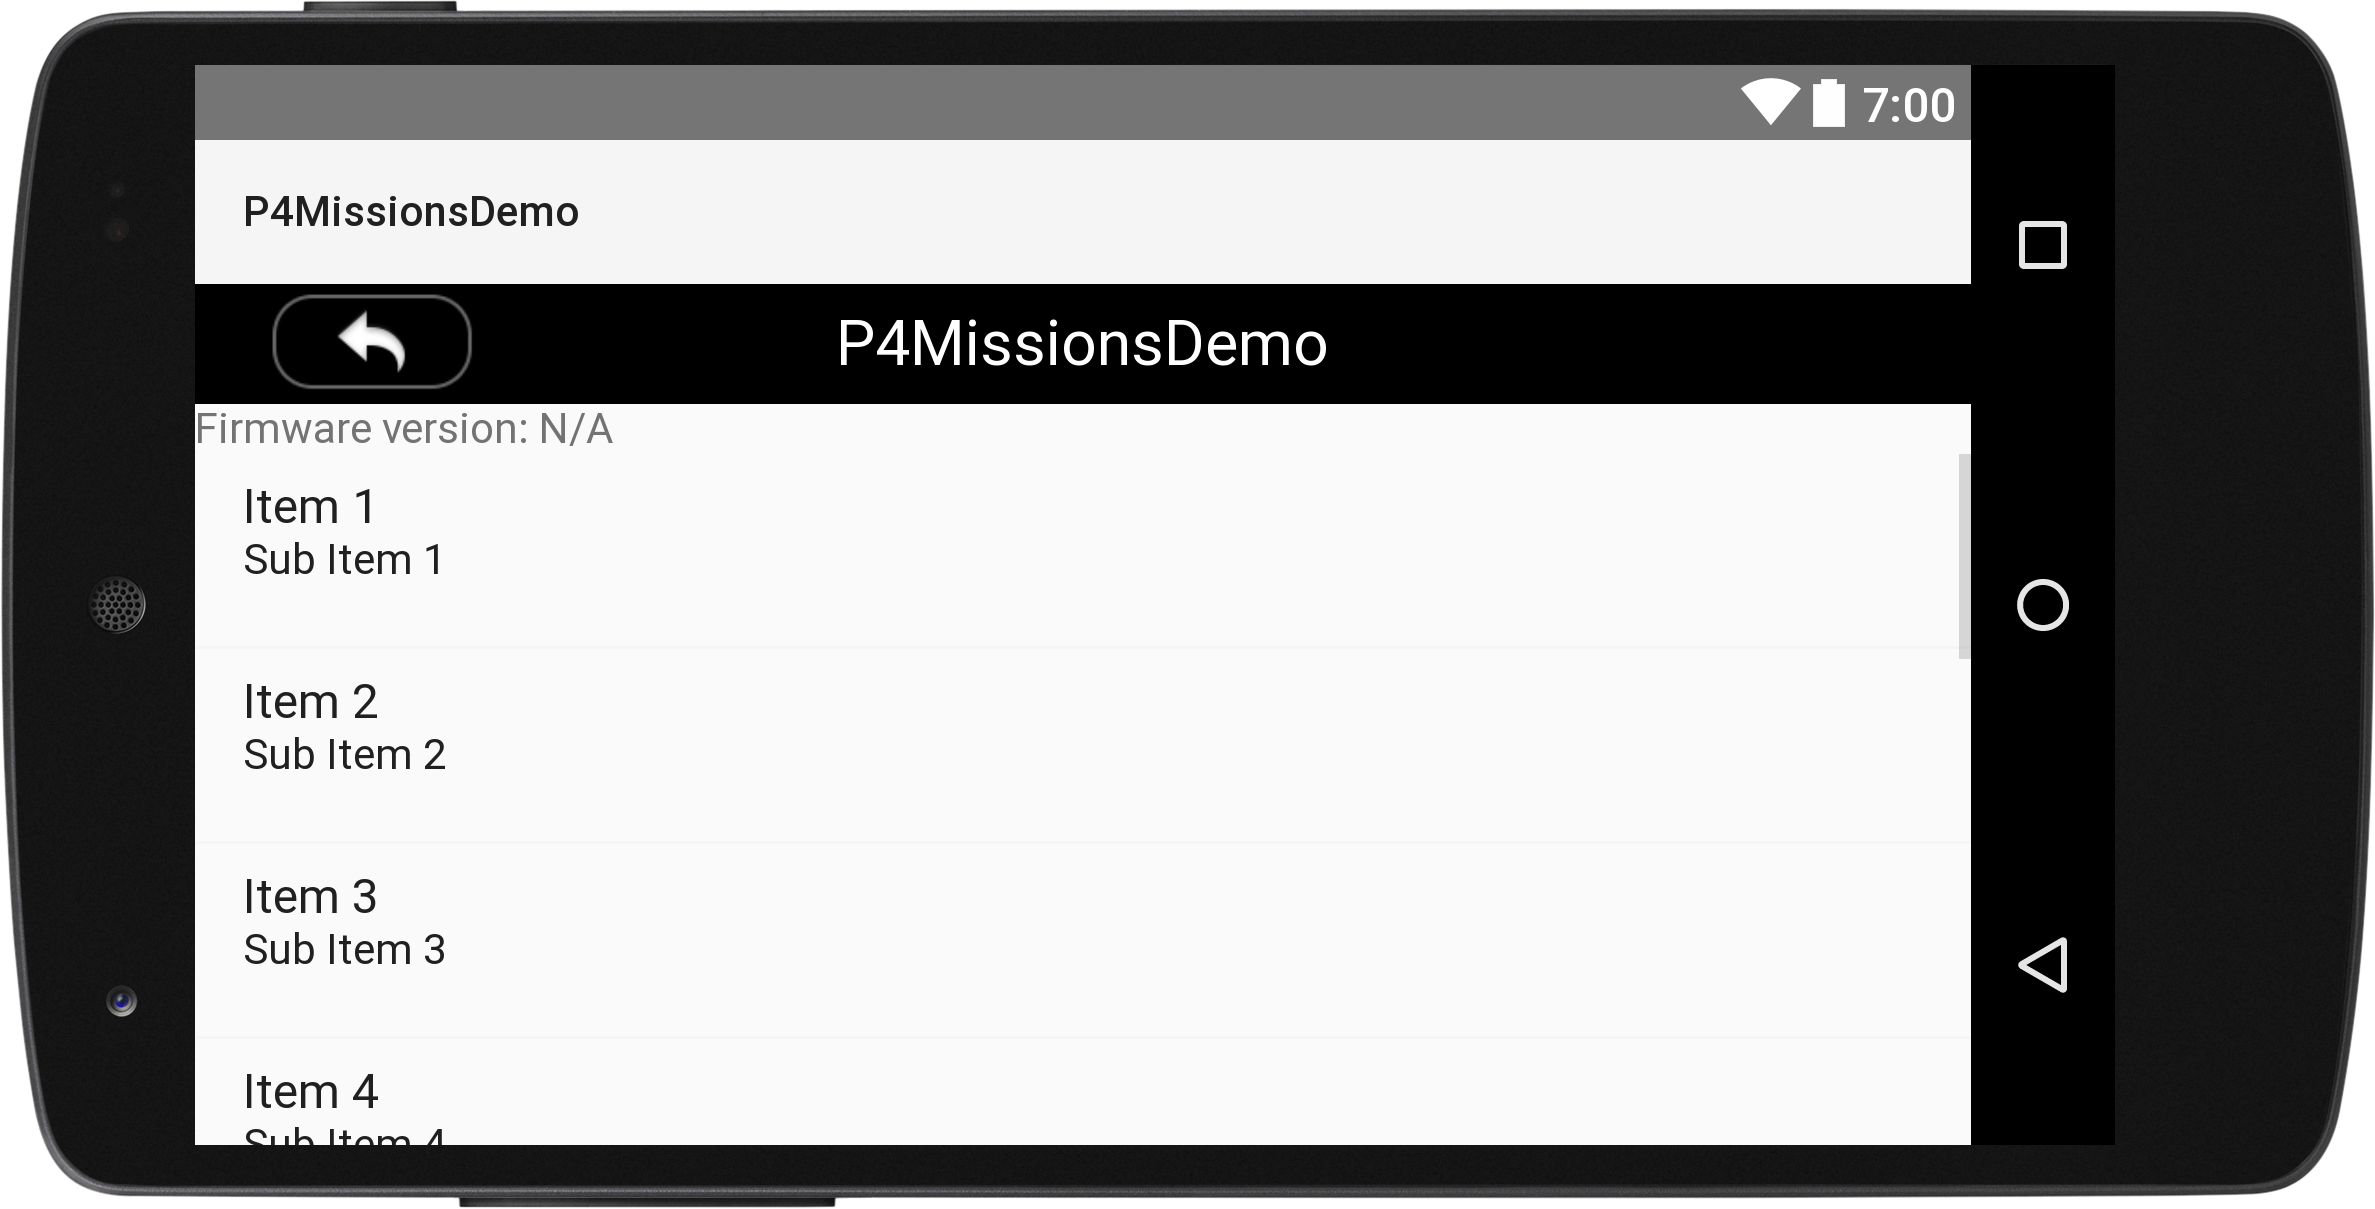
For more details, please check the source code of this tutorial's Github sample project.
4. Creating the PointingTestActivity
Implementing the PointingTestActivity Class
Let's create a new Empty Activity class with the name of "PointingTestActivity" in the com.dji.p4MissionsDemo package. Replace the code with the following, remember to import the related classes as Android Studio suggested:
public class PointingTestActivity extends DemoBaseActivity implements TextureView.SurfaceTextureListener, View.OnClickListener { |
Here, we implement several features:
1. Declare the UI member variables like ImageButton, TextView, SeekBar, etc. Then override the onCreate() method to invoke the initUI() method to initialize the UI elements of the Activity.
2. In the initUI() method, we create the member variables by invoking the fineViewById() method and passing the related id value declared in the associated layout xml file. Then call the setOnClickListener() method by assigning "this" to it for all the Button member variables. Next implement the SeekBar's setOnSeekBarChangeListener() method and override the three interface methods of OnSeekBarChangeListener. Here we update the text value of SeekBar in the onProgresshanged() method.
3. Lastly, we override the onClick() method to implement the click action of the mPushDrawerIb ImageButton. When you press the mPushDrawerIb, it will add animations when open and close the mPushDrawerSd, which is a SlidingDrawer.
Working on PointingTestActivity Layout
Open the colors.xml file in the values folder and replace the content with the following:
|
Here, we add button press and normal colors, white and black colors.
Moreover, add the two new string elements to the strings.xml file:
<string name="push_info">Push Info</string> |
Then, update the styles.xml with the following code:
<resources> |
Lastly, jump over to your associated layout in "layout/activity_ pointing_test.xml" file and replace everything with the same xml file from the tutorial's Github Sample Project, since the xml file's content is too much, we don't show them here.
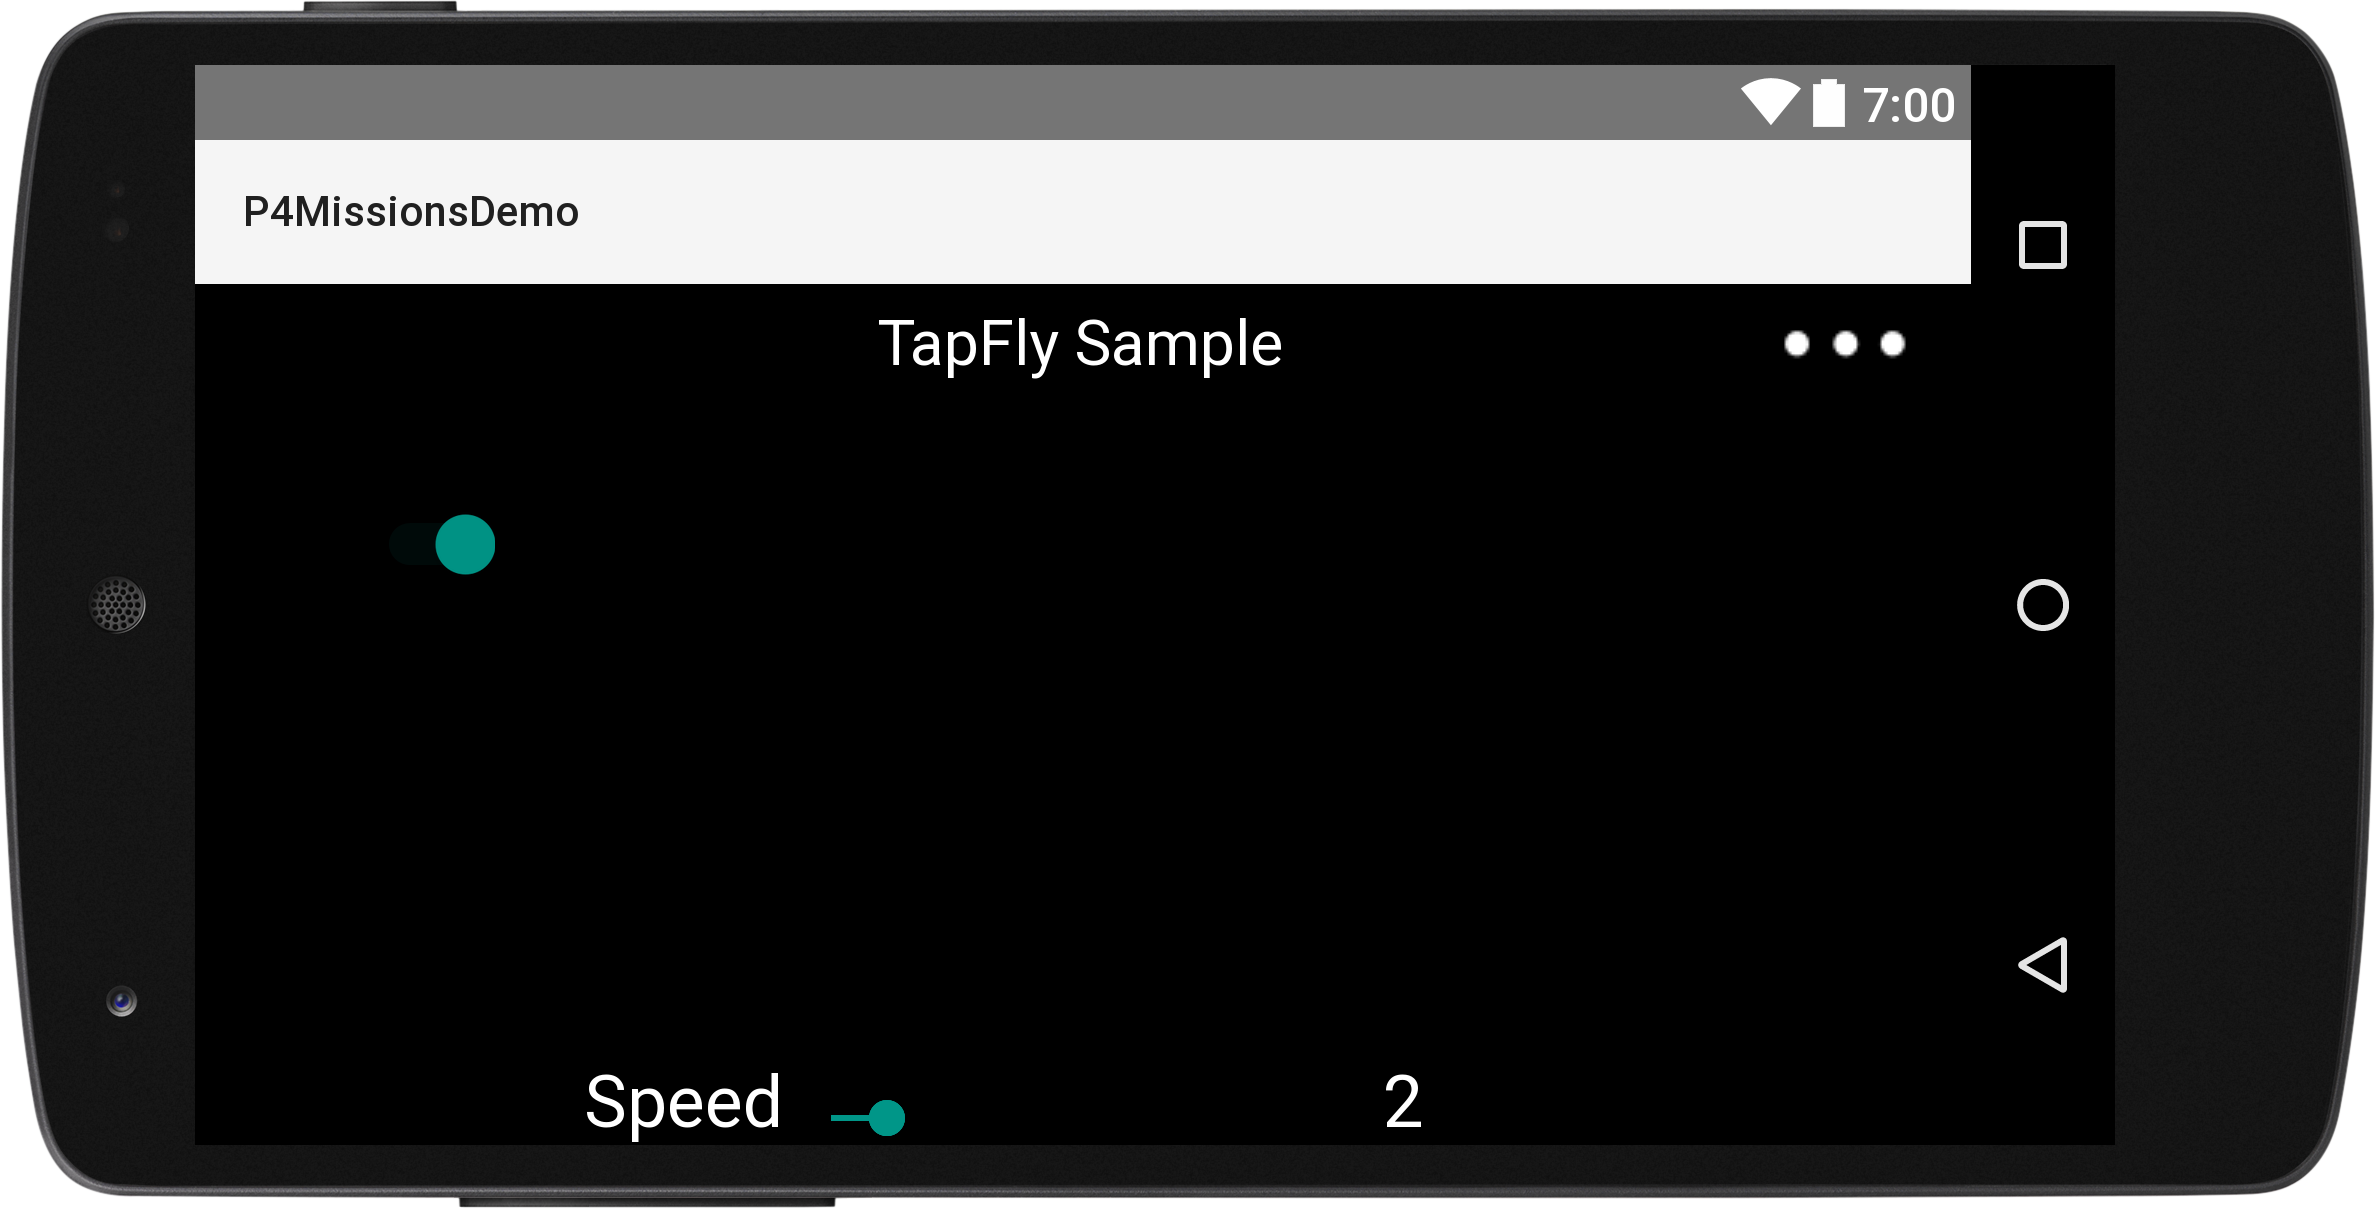
For the UI, we declare a main title, a return button, a connect status text view, a pointing button, etc. Here is a screenshot of the preview of PointingTestActivity:
5. Creating the TrackingTestActivity
Working on TrackingTestActivity Class
Once you finish the steps above, let's create a new Empty Activity class with the name of "TrackingTestActivity" in the com.dji.p4MissionsDemo package. Replace the code with the following:
public class TrackingTestActivity extends DemoBaseActivity implements SurfaceTextureListener, OnClickListener, View.OnTouchListener { |
Here, we implement several features:
1. Declare the UI member variables like ImageButton, SlidingDrawer, SeekBar, etc. Then override the onCreate() method to invoke the initUI() method to initialize the UI elements of the Activity.
2. In the initUI() method, we create the member variables by invoking the fineViewById() method and passing the related id value declared in the associated layout xml file. Then call the setOnClickListener() method by assigning "this" to it for all the Button member variables.
3. Lastly, we override the onClick() method to implement the click action of the mStopBtn, mConfigBtn, mConfirmBtn, mRejectBtn and mPushDrawerIb member variables. When you press the mPushDrawerIb ImageButton, it will add animation to open and close the mPushInfoSd.
Next, open the strings.xml file and add the following code:
<string name="title_activity_tracking_test">ActiveTrack Sample</string> |
Finally, jump over to your associated layout in layout/activity_ tracking_test.xml and replace everything with the same xml file from the tutorial's Github Sample Project, since the xml file's content is a lot, we don't show them here. For more details, please check the related xml file from the Github Sample Project of the demo project.
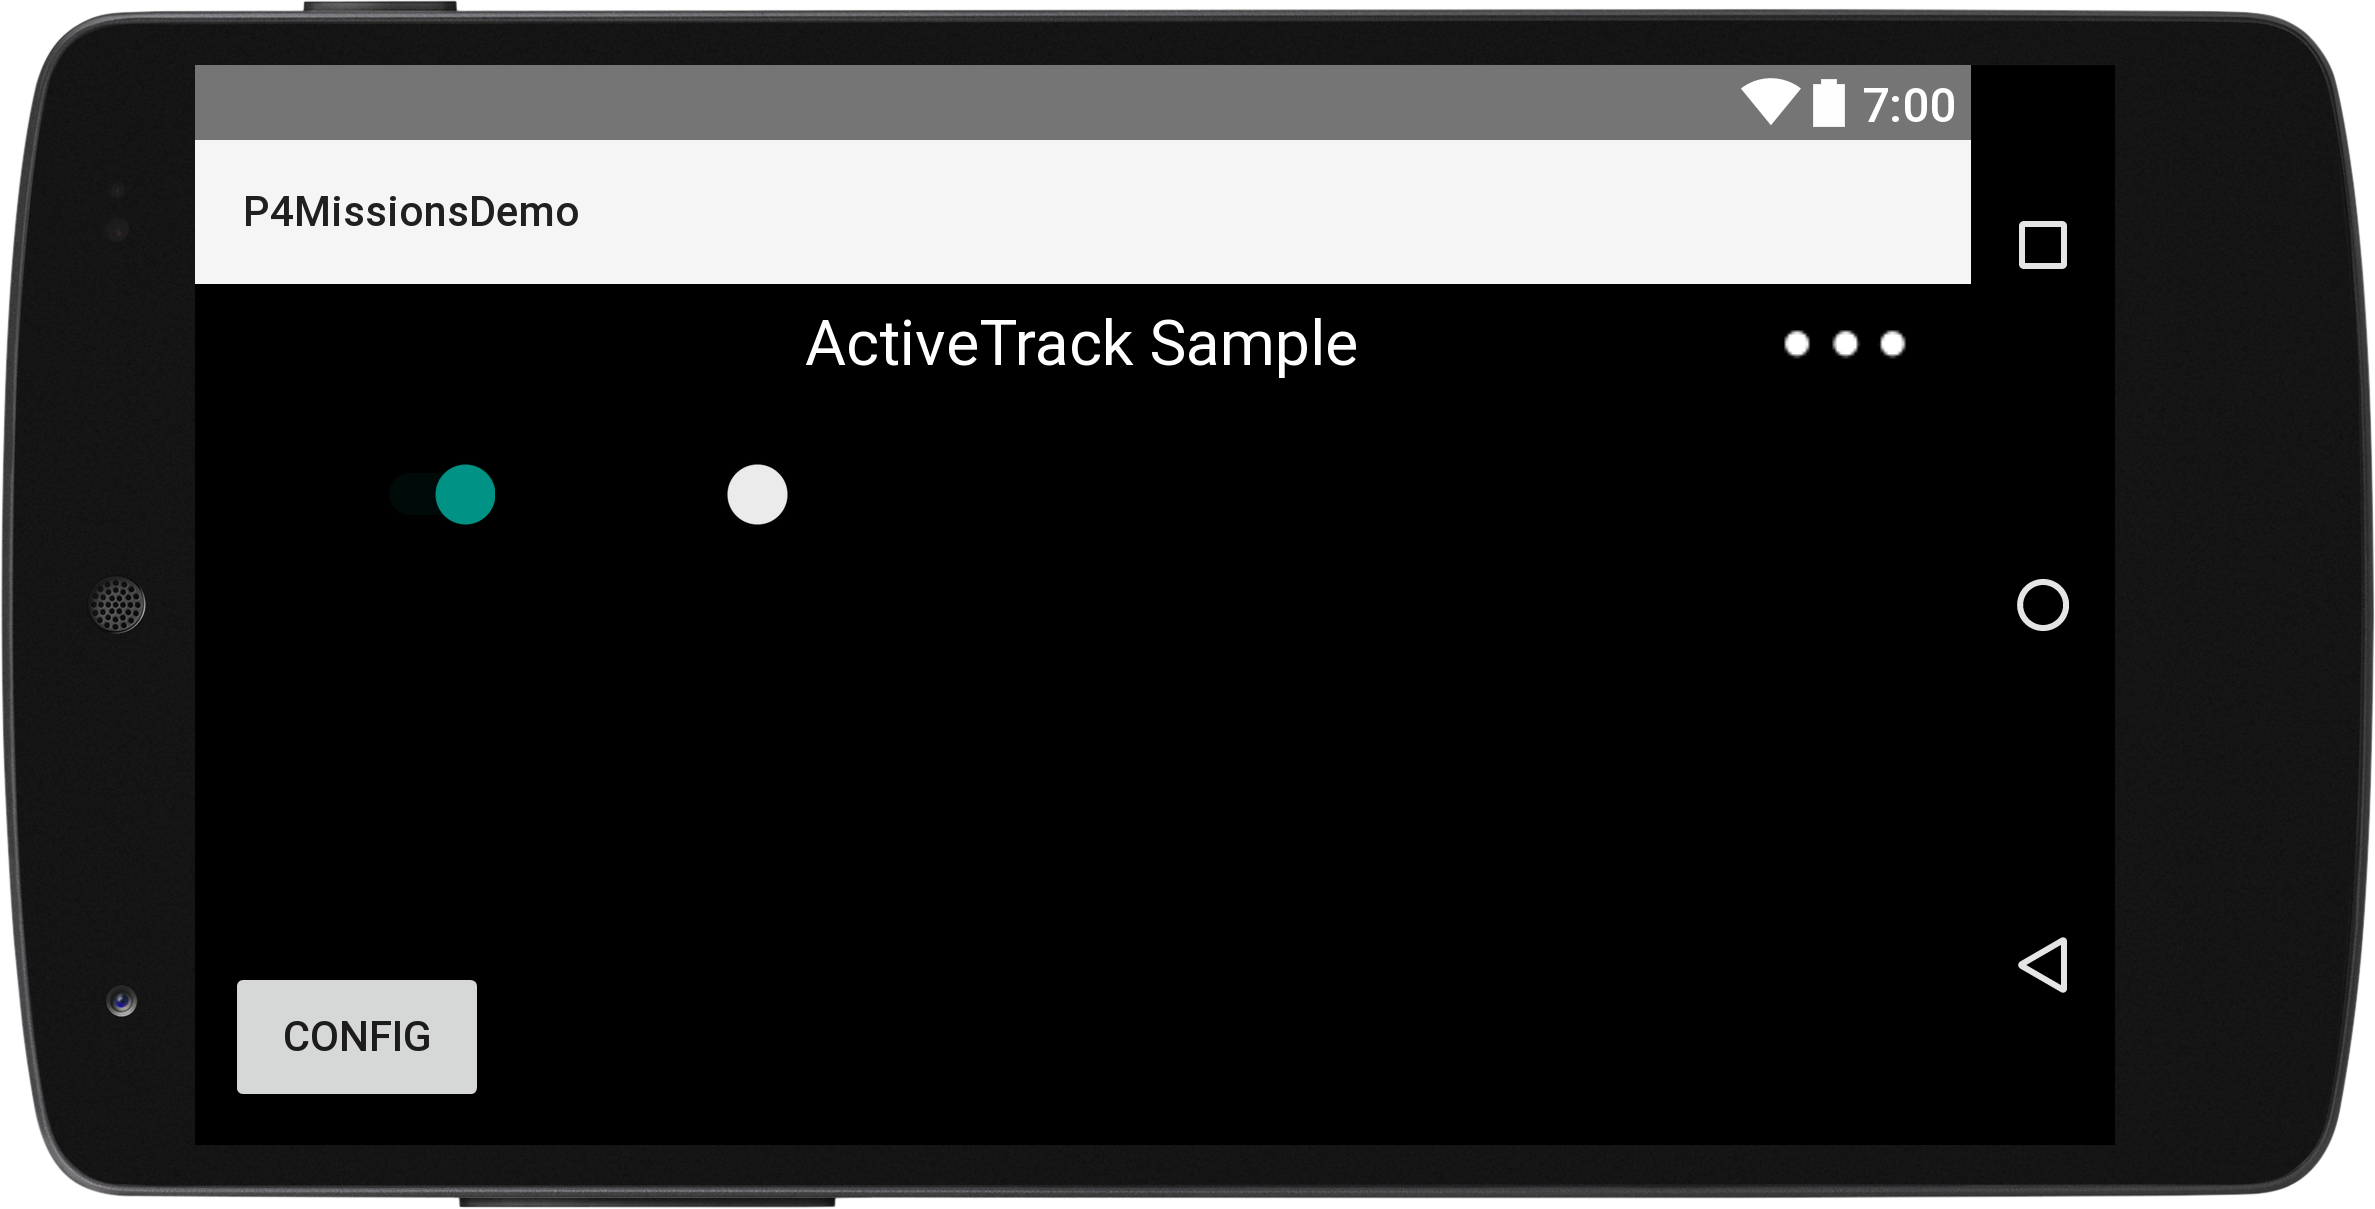
For the UI, we declare a main title, a return button, a connect status text view, a TextureView to show live video stream, an ImageView to show the tracking rectangle, etc. Here is a screenshot of the preview of TrackingTestActivity:
6. Preview the UI of the Application
Now, let's open the dimens.xml file and replace the code with the following:
|
Next, open the AndroidManifest.xml file and modify the .PointingTestActivity and .TrackingTestActivity elements as shown below:
<activity |
In the code above, we modify the label, launchMode, screenOrientation and theme attributes for the two Activities.
We have gone through a long process to setup the UI of the application. Now, let's build and run the project and install it in your Android device to test it. If everything goes well, you may see something similar to the following animation:
Registering the Application
After you finish the above steps, let's register our application with the App Key you apply from DJI Developer Website. If you are not familiar with the App Key, please check the Get Started.
Now let's open the "AndroidManifest.xml" file and add the following elements above the application element:
<uses-permission android:name="android.permission.BLUETOOTH" /> |
Here, we add uses permissions and uses features for the app. They are required for registration.
Then add the following elements above the MainActivity activity element:
<!-- DJI SDK --> |
In the code above, we enter the App Key of the application under the android:name="com.dji.sdk.API_KEY" attribute. For more details of the "AndroidManifest.xml" file, please check the Github source code of the demo project.
Since we have implemented the registration logics in the "DJIDemoApplication.java" and "MainActivity.java" files previously, we don't explain the details here.
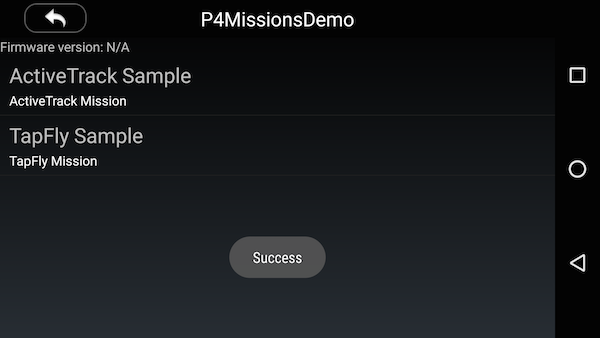
Now, let's build and run the project and install it in your Android device to test it. If everything goes well, you should see the "success" textView like the following screenshot when you register the app successfully.
Coordinate Transformations for Missions
Before we dive into the implementation of two missions, let's learn something about the special coordinate transformations of them.
TapFly Mission Coordinate Transformation
If we check the TapFlyExecutionState class, you can see the following two public methods:
|
1. The getDirection () method returns a DJIVector object, which represents a cartesian vector in 3D space. You can get the actual flying direction of the aircraft using the N-E-D(North-East-Down) coordinate system when the aircraft is executing a TapFly mission.
2. The getImageLocation () method returns a PointF object, which represents the image point from the live video stream where the vision system should calculate the flight direction from. The image point is normalized to [0,1] where (0,0) is the top left corner and (1,1) is the bottom right.
Here is a diagram to show the coordinate transformation of the mission:
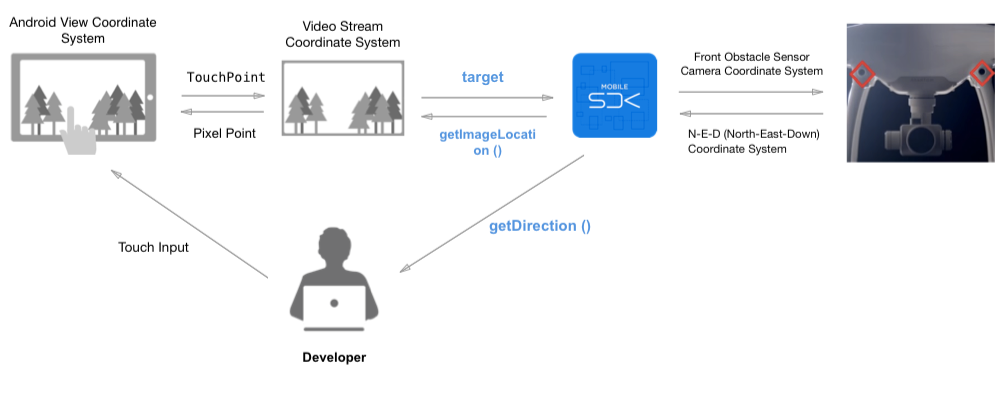
As the diagram shown above, you can see the process of transformation.
-
The
targetobject shown above is transformed from TouchPoint (PointF) to a Video Stream Coordinate System PointF. -
The
getDirection()method shown above belongs to the N-E-D (North-East-Down) Coordinate System and you can invoke this method to get the field value from the SDK. -
The
imageLocation()method shown above belongs to the Video Stream Coordinate System and you can invoke this method to get the field value from the SDK.
So in our demo application, in order to implement the TapFly mission, we should transform the user's touch location (A PointF object) of Android View Coordinate System into the image location (A PointF object) of Video Stream Coordination System and pass it to the following target object of DJITapFlyMission:
/** |
ActiveTrack Mission Coordinate Transformation
Next, let's check the ActiveTrackTrackingState class, you may see the following public getter method:
public RectF getTargetRect() |
Check the ActiveTrackMission class, you can also see this method:
public void setTargetRect(RectF var1) |
1. You can invoke the getTargetRect () method to get a RectF object which is a rectangle in the live video stream view image that represents the target being tracked. The rectangle is normalized to [0,1] where (0,0) is the top left of the video preview and (1,1) is the bottom right.
2. By invoking the setTargetRect(RectF var1) method, you can set the target rect object, which is a RectF class object, it represents a bounding box for the target. The rectangle is normalized to [0,1] where (0,0) is the top left of the video preview and (1,1) is the bottom right.
If the mission is initialized with a PointF object, the vision system will try to recognize object around the point and return the representative rect in the MissionProgressStatusCallback.
Here is a diagram to show the coordinate transformation of the ActiveTrack mission:
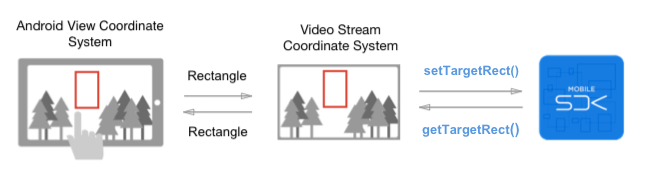
As the diagram shown above, you can see the process of transformation.
- The
getTargetRect()andsetTargetRect(RectF var1)methods shown above belongs to the Video Stream Coordinate System.
So in order to implement the ActiveTrack Mission, we should transform the user's touch rect (A RectF object) of Android View Coordinate System into the tracking rect (A RectF object) of Video Stream Coordination System and pass it to the setTargetRect(RectF var1) method of ActiveTrackMission. You can get the tracking rect object by invoking the getTargetRect() method of ActiveTrackTrackingState. And you can use it to update the rectangle on your screen.
Implementing the TapFly Mission
Updating the DemoBaseActivity
Before we implement the TapFly Mission, we should update the DemoBaseActivity.java class to configure the live video streaming feature. Let's open the file and add the following codes to it:
private static final String TAG = MainActivity.class.getName(); |
Here we declare a TextureView(mVideoSurface object) to show the live video stream data. We use the video_previewer_surface id from its layout xml file to create the object. This id should be the same as PointingTestActivity and TrackingTestActivity's layout settings. Then create the callback variable mReceivedVideoDataListener to implement the DJICamera's interface methods for receiving video data.
Moreover, we implement the initPreviewer() method as shown below to check product connection status and set the mReceivedVideoDataListener as the listener of VideoFeeder:
private void initPreviewer() { |
For more details of the implementation, please check the "DemoBaseActivity.java" file in this tutorial's Github sample project.
Working on the PointingTestActivity
Showing the Live Video Stream
Now let's come back to the "PointingTestActivity.java" class and override the onCreate() method firstly:
|
In the method shown above, we invoke the setContentView() method firstly to show the PointingTestActivity view. Then invoke the DemoBaseActivity class's onCreate() method to implement the live video stream showing methods. Lastly, invoke the initUI() to initialize all the UI elements.
Working on the TapFly Mission
Configure Mission
Before we start to create the TapFlyMission object, let's use the TapFlyMissionOperator to configure the following settings:
1. AutoFlightSpeed
You can set the aircraft's auto flight speed during the mission by invoking the setAutoFlightSpeed() method of TapFlyMissionOperator. The range for it is [1, 10] m/s.
2. isHorizontalObstacleAvoidanceEnabled
If you want to allow the aircraft to bypass or move around an obstacle by going to the left or right of the obstacle when executing TapFly mission, you can set this member variable to YES. Otherwise, the aircraft will only go over an obstacle to avoid it.
3. Target
This is where we should pass the coordinate transformation PointF object to, we can use the getTapFlyPoint() method to do the coordinate transformation and return the PointF object. It's the image point from the video feed where the vision system should calculate the flight direction from.
Now, let's implement the above settings in source code, in the initUI() method, let's improve the setOnSeekBarChangeListener() method of mSpeedSb as shown below:
mSpeedSb.setOnSeekBarChangeListener(new SeekBar.OnSeekBarChangeListener() { |
In the code above, we invoke the setAutoFlightSpeed() method of TapFlyMissionOperator in the onStopTrackingTouch() method of setOnSeekBarChangeListener() to configure the auto flight speed for TapFly mission.
Next, let's implement the initTapFlyMission() method to initialize the mTapFlyMission variable and set the isHorizontalObstacleAvoidanceEnabled boolean value as shown below:
private void initTapFlyMission() { |
Here we use FORWARD value of the TapFlyMode enum, for more details of the TapFlyMode, please check this documentation.
Moreover, let's implement the following two methods to manage the mission coordinate transformations:
private PointF getTapFlyPoint(View iv) { |
We can use the getTapFlyPoint() method to transform the tap point position of Android View coordinate system to the video stream coordinate system. In contrast, we use the showPointByTapFlyPoint() method to transform the tap point position(We use mRstPointIv to represent it) from video stream coordinate system back to the Android View coordinate system and show it on screen.
Lastly, let's override the onTouch() method to track the ACTION_UP gesture of MotionEvent:
|
Here, we update the mStartBtn's position to the position user press. Then we invoke the getTapFlyPoint() method to do the coordinate transformation and pass it to TapFlyMission's target member variable.
Start and Stop Mission
Next, let's override the onClick() method to implement the click action of mStartBtn and mStopBtn buttons to start and stop the DJITapFlyMission:
|
In the code above, we use a switch statement to identify the mStartBtn and mStopBtn buttons' click action. In the 'mStartBtn' click action case, we invoke the startMission() method of TapFlyMissionOperator to start the mission and update the visibilities of the mStartBtn button.
In the mStopBtn click action case, we invoke the stopMission() method of TapFlyMissionOperator to stop the mission.
Add Listener to Receive Mission Events
During the TapFly mission execution, we can add a listener to receive the mission events for status infos. You can use this status infos to inform users of the results or update the UI interface.
Now, let's add the following code at the bottom of onCreate() method:
|
In the code above, we implement the following features:
- Invoke the
addListener()method ofTapFlyMissionOperatorand implement theonUpdate()method to receive the TapFly mission events. - In the
onUpdate()method, we firstly get theTapFlyExecutionStateobjectexecutionStatefrom the updatedaggregationvariable. Next, check if theexecutionStateis null, if not, invoke theshowPointByTapFlyPoint()method to update the position of themRstPointIvimage View (A green circle) on screen. This green circle represents the direction which Mavic Pro will fly towards. - Moreover, store the TapFly execution state infos into the StringBuffer
sband show it on themPushTvTextView. - Lastly, we get the updated
TapFlyMissionStateand set visible property formRstPointIv,mStartBtnandmStopBtn.
For more implementation details of the PointingTestActivity class, please check the Github source code.
Now let's build and run the project to install the app to your Android device, if everything goes well, you should be able to use the TapFly mission of Mavic Pro now.
Important: Remember to switch the remote controller to P mode before you test the TapFly mission.
Here is a gif animation for you to get a better understanding of using the TapFly mission feature:
In the animation, when you tap on the screen, a green circle with a "GO" button appears, which is the direction you want Mavic Pro fly towards. Then, press the GO button, Mavic Pro will start to execute the TapFly mission and fly. When you want to stop the mission, just press the X button, Mavic Pro will stop immediately and hover there.
Implementing ActiveTrack Mission
Working on the TrackingTestActivity
Showing the Live Video Stream
Now let's go to TrackingTestActivity.java class and override the onCreate() method firstly:
|
In the method shown above, we invoke the setContentView() method firstly to show the TrackingTestActivity view. Then invoke the DemoBaseActivity class's onCreate() method to implement the live video stream showing methods. Lastly, invoke the initUI() to initialize all the UI elements.
Working on the ActiveTrack Mission
Configure Mission
Before we start to create the ActiveTrackMission object, let's use the ActiveTrackOperator to configure the following settings:
- Enable/Disable Gesture Mode
Gesture mode allows the subject to confirm tracking as well as take pictures using gestures. Raise your arms in a V, the human subject can accept the confirmation to track them. Gesture mode can only be enabled when the aircraft is flying but not tracking a target. If the aircraft is already tracking a target, disabling gesture mode will stop the ActiveTrack mission.
You can check this video to get a better understanding of the Gesture Mode.
Now let's implement the setChecked() and setOnCheckedChangeListener() methods of the mGestureModeSw switch at the bottom of the initUI() method as shown below:
mGestureModeSw.setChecked(getActiveTrackOperator().isGestureModeEnabled()); |
In the code above, we firstly invoke the isGestureModeEnabled() method of ActiveTrackOperator to check if the gesture mode is enabled and update the value of the mGestureModeSw switch. Next, invoke the setGestureModeEnabled() method of ActiveTrackOperator to set the gesture mode and inform users by showing a toast message in the completion callback.
- Enable/Disable Retreat
When retreat is enabled, the aircraft will retreat (fly backwards) when the target comes toward it. When it is disabled, the aircraft will not retreat and instead rotate the gimbal pitch down to track the target as it goes underneath. If the target goes beyond the gimbal's pitch stop, the target will be lost and the mission will stop.
Here, let's implement the setOnCheckedChangeListener() method of the mPushBackSw switch at the bottom of the initUI() method as shown below:
mPushBackSw.setOnCheckedChangeListener(new CompoundButton.OnCheckedChangeListener() |
As you see the code above, we invoke the setRetreatEnabled() method of ActiveTrackOperator to enable the retreat feature. Next, in the completion callback, inform users by showing a toast message.
- Set Recommended Configuration
Using this feature, we can set the recommended camera and gimbal configuration that optimizes performance for the ActiveTrack Mission in most environments.
Now, let's implement the onClick() method of the mConfigBtn button as shown below:
case R.id.recommended_configuration_btn: |
Here, we can invoke the setRecommendedConfiguration() method of ActiveTrackOperator to set the recommended camera and gimbal configuration. Then in the completion callback, show a toast message to inform users of the results.
Start the Mission
Once you finish the steps above, let's continue to implement the following methods to start the ActiveTrack mission:
private RectF getActiveTrackRect(View iv) { |
In the code above, we implement the following features:
- In the getActiveTrackRect() method, we transform the tracking rectangle of Android View coordinate system to the video stream coordinate system.
- Next, in the
calcManhattanDistance()method, we calculate the Manhattan distance between two points when drawing rect on the screen. - Moreover, we implement the
onTouch()method to handle theACTION_DOWN,ACTION_MOVEandACTION_UPMotionEvents. In theACTION_DOWNandACTION_MOVEevents, we mainly work on updating the size and position of the whitemSendRectIVrectangle on screen when user draws. - In the
ACTION_UPevent, we firstly invoke thegetActiveTrackRect()method and pass themSendRectIVvariable to transform the drawing rectangle to the video stream coordinate system. Next, check the value of theisDrawingRectand initialize themActiveTrackMissionvariable accordingly. Here, we use theTRACEmode of the ActiveTrackMode. Furthermore, invoke thestartTracking()method ofActiveTrackOperatorto start the ActiveTrack mission and inform users by showing a toast message. Lastly, we hide themSendRectIVimage view.
Accept and Reject Confirmation
When the vision system is not sure if the tracking rectangle is around the user's desired target, it will need confirmation before starting to fly relative to the target. Let's implement the onClick() method of the mConfirmBtn button as shown below:
case R.id.confirm_btn: |
Here, we invoke the acceptConfirmation() method of ActiveTrackOperator to accept the confirmation and show a toast message to inform users of the results.
If you want to stop the aircraft from following the target, and ask for user's confirmation again, you can implement the onClick() method of the mRejectBtn button as shown below:
case R.id.reject_btn: |
In the code above, we invoke the rejectConfirmation() method of ActiveTrackOperator to reject the confirmation and stop the aircraft from following the target. Then show a toast message to inform users of the results.
Add Listener to Receive Mission Events
During the ActiveTrack mission execution, we can add a listener to receive the mission events for status infos. You can use this status infos to inform users of the results or update the UI interface.
Now, let's implement the ActiveTrackMissionOperatorListener interface and add the following code at the bottom of the onCreate() method:
|
Here we add TrackingTestActivity as the listener to receive mission events. Next, let's implement the updateActiveTrackRect() method and onUpdate callback method as shown below:
|
In the code above, we implement the following features:
- In the
updateActiveTrackRect()method, we update themTrackingImageimage view's position and size based on the current target rect. Also, update the image resource of themTrackingImagevariable based on theActiveTrackTargetState. - Next, in the
onUpdate()method, we create a StringBuffersbobject and store the ActiveTrack execution state infos into it and show it on themPushInfoTvTextView. - Moreover, invoke the
updateActiveTrackRect()method to update the position of themTrackingImageimage View (A rectangle with different colors) on screen base on the updatedActiveTrackMissionEvent. - Lastly, get the updated
ActiveTrackStateobject and update the UI interfaces' visibility and clickable status.
Stop the Mission
Lastly, let's continue to implement the onClick() method of the mStopBtn button as shown below:
case R.id.tracking_stop_btn: |
Here, we invoke the stopTracking() method of ActiveTrackOperator to stop executing the ActiveTrack mission and show a toast message to inform users of the result.
For more implementation details of the TrackingTestActivity.java file, please check this tutorial's Github source code.
Now let's build and run the project, if everything goes well, you should be able to use the ActiveTrack mission of Mavic Pro now.
Important: Remember to switch the remote controller to P mode before you test the ActiveTrack mission.
Here are two gif animations for you to get a better understanding of using the ActiveTrack mission:
- TRACE Mode
Here we use the TRACE mode of ActiveTrackMode for demonstration. In the animation above, you can see there is a person riding a bicycle there, you can touch the screen to draw a white rectangle on him. Then the rectangle locks on him and turns purple when the ActiveTrackTargetState is WAITING_FOR_CONFIRMATION. Press the A button to accept the confirmation. After the confirmation, the rectangle turns green and the ActiveTrack mission starts. The person rides around and the green rectangle will follow him to track its movement.
Press the X button if you want to stop the ActiveTrack mission. By the way, you can try to switch on the "RetreatEnabled" switcher on the upper left corner of the screen to enable the Retreat feature. Once you go towards the Mavic Pro, it will fly backwards.
- Enable Gesture Mode
In the animation above, you can see there is a person standing there, when he raise his arms in a V, the Mavic Pro will accept the confirmation and start to track him automatically. Press the X button if you want to stop the ActiveTrack mission.
Using the DJI Assistant 2 for Mission Testing
Since most of our developers don't have a perfect testing environment, like a big indoor space, wide backyard, etc. If we need to go outdoors and bring our laptop to debug and test our application everytime, it's time-consuming and not efficient.
Luckily, we have a new DJI Assistant 2 (Includes the 3D Simulator) for you to test the mission easily on your Mac. The simulator creates a virtual 3D environment from flight data transmitted to the Mac.
You can check the Using DJI Assistant 2 Simulator for its basic usage.
Now you can connect your Android which is running the demo application to the remote controller, and start to test the TapFly and ActiveTrack missions on the simulator of DJI Assistant 2.
By the way, you can use Wireless Android Debug Bridge (adb) to debug the app using Android Studio when your android device is connecting to the remote controller. If you are not familiar with Android Debug Bridge, please check this link for details.
Summary
Congratulations! You've finished the demo project and implement the two cool TapFly and ActiveTrack missions using DJI Mobile SDK. It's easy and straightforward. You've learned how to use the DJITapFlyMission, DJIActiveTrackMission and DJIMissionControl to implement the features.
But, In order to make a cool TapFly and ActiveTrack mission application, you still have a long way to go. You can add more necessary features like showing the battery percentage, GPS signal quality, add a checklist like DJI Go app to check the aircraft status before flying, etc. Good luck and hope you enjoy this tutorial!