
Module Example
1. Sample Overview
The SDK interfaces provided by MSDK 5.20 are organized into independent modules, through which you can integrate with the Pilot platform:
- Add UI widgets to the floating window provided by Pilot
- Annotate information on the LiveView
- Project target points into the AR view
- Pop up dialogs to collect user input
- ......
The DJI Pilot Plugin Sample develops demo cases module by module; you can open them one by one and see the actual effect on a real device. The Sample is fully open-source, and each case marks the corresponding interface class and implementation code location, so you can copy and adapt it directly. This article is for developers new to Pilot Open capabilities. It introduces, per module, what each case demonstrates and what effect you will see, without covering interface call details.
To download or browse the project source, see Get the Sample Source Code at the end of this article.
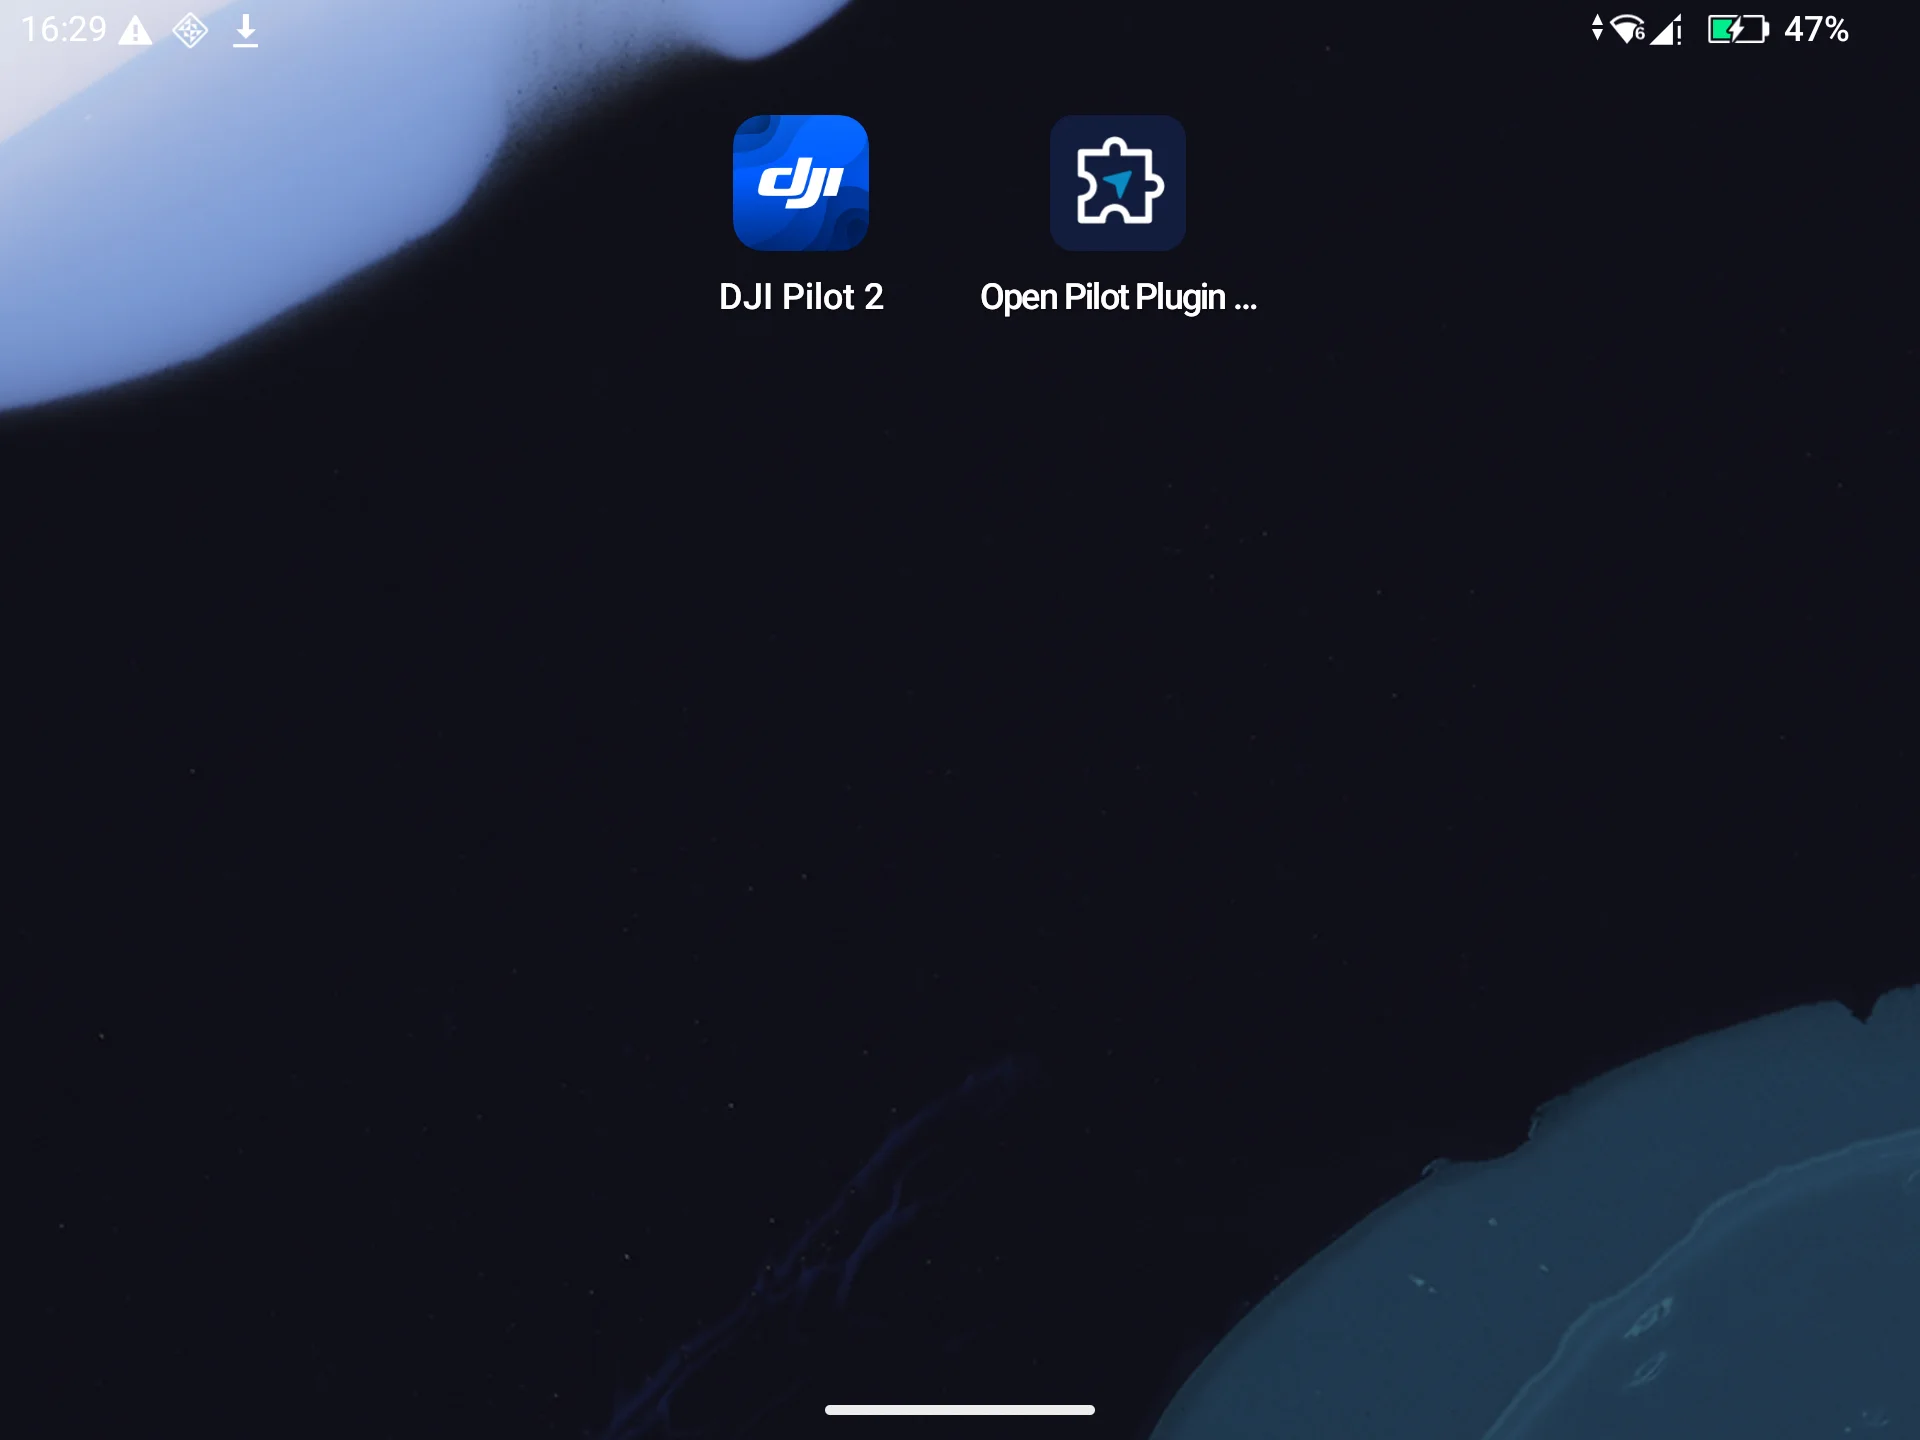
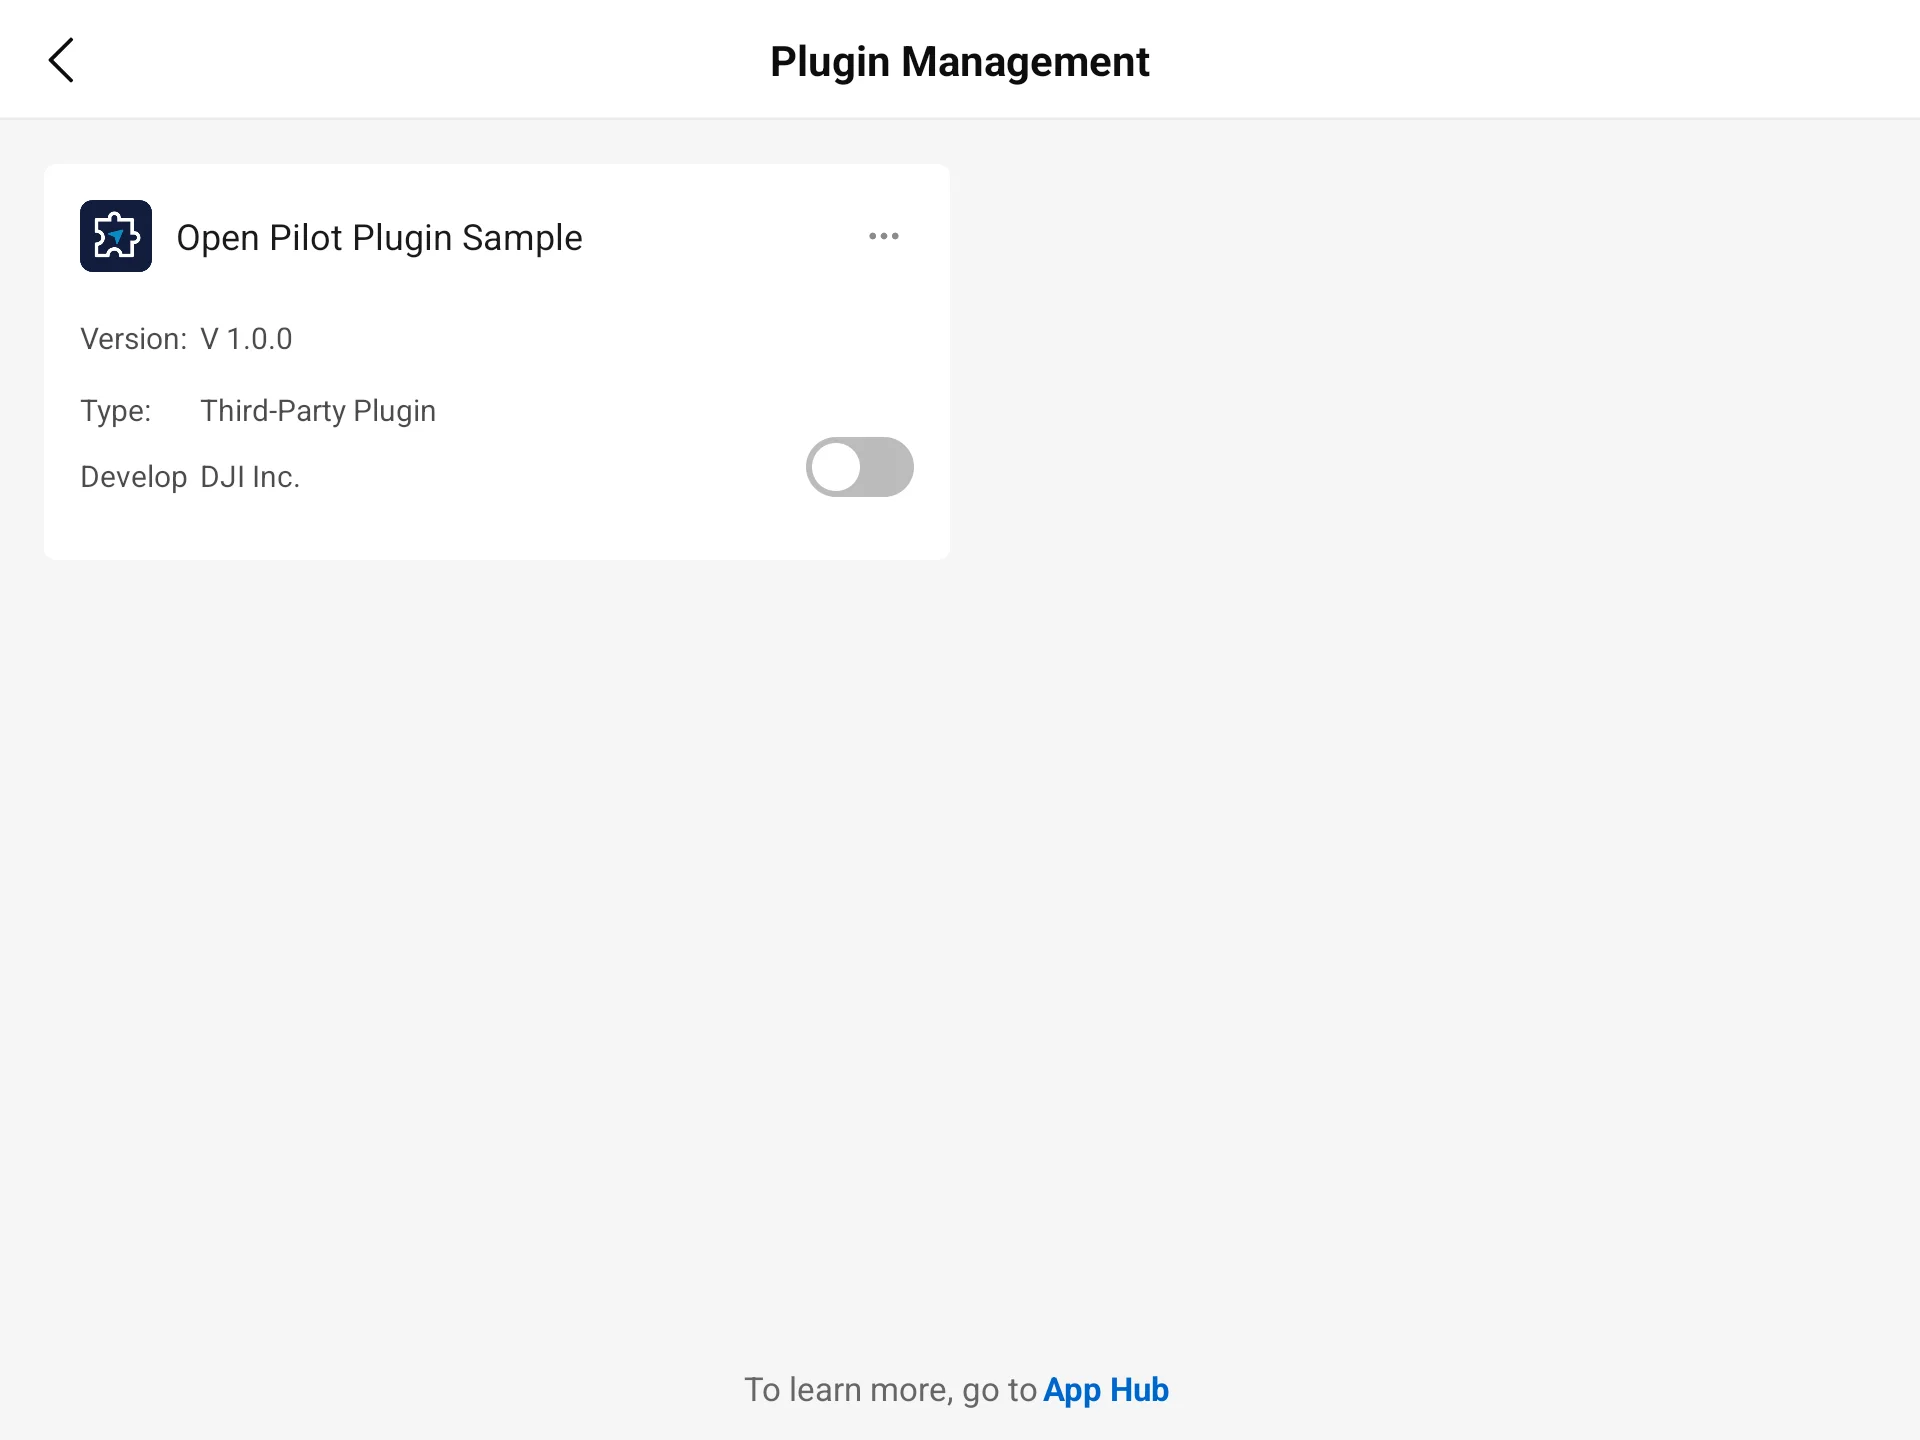
2. Prerequisites
Before trying out the module cases, you need to meet the following conditions.
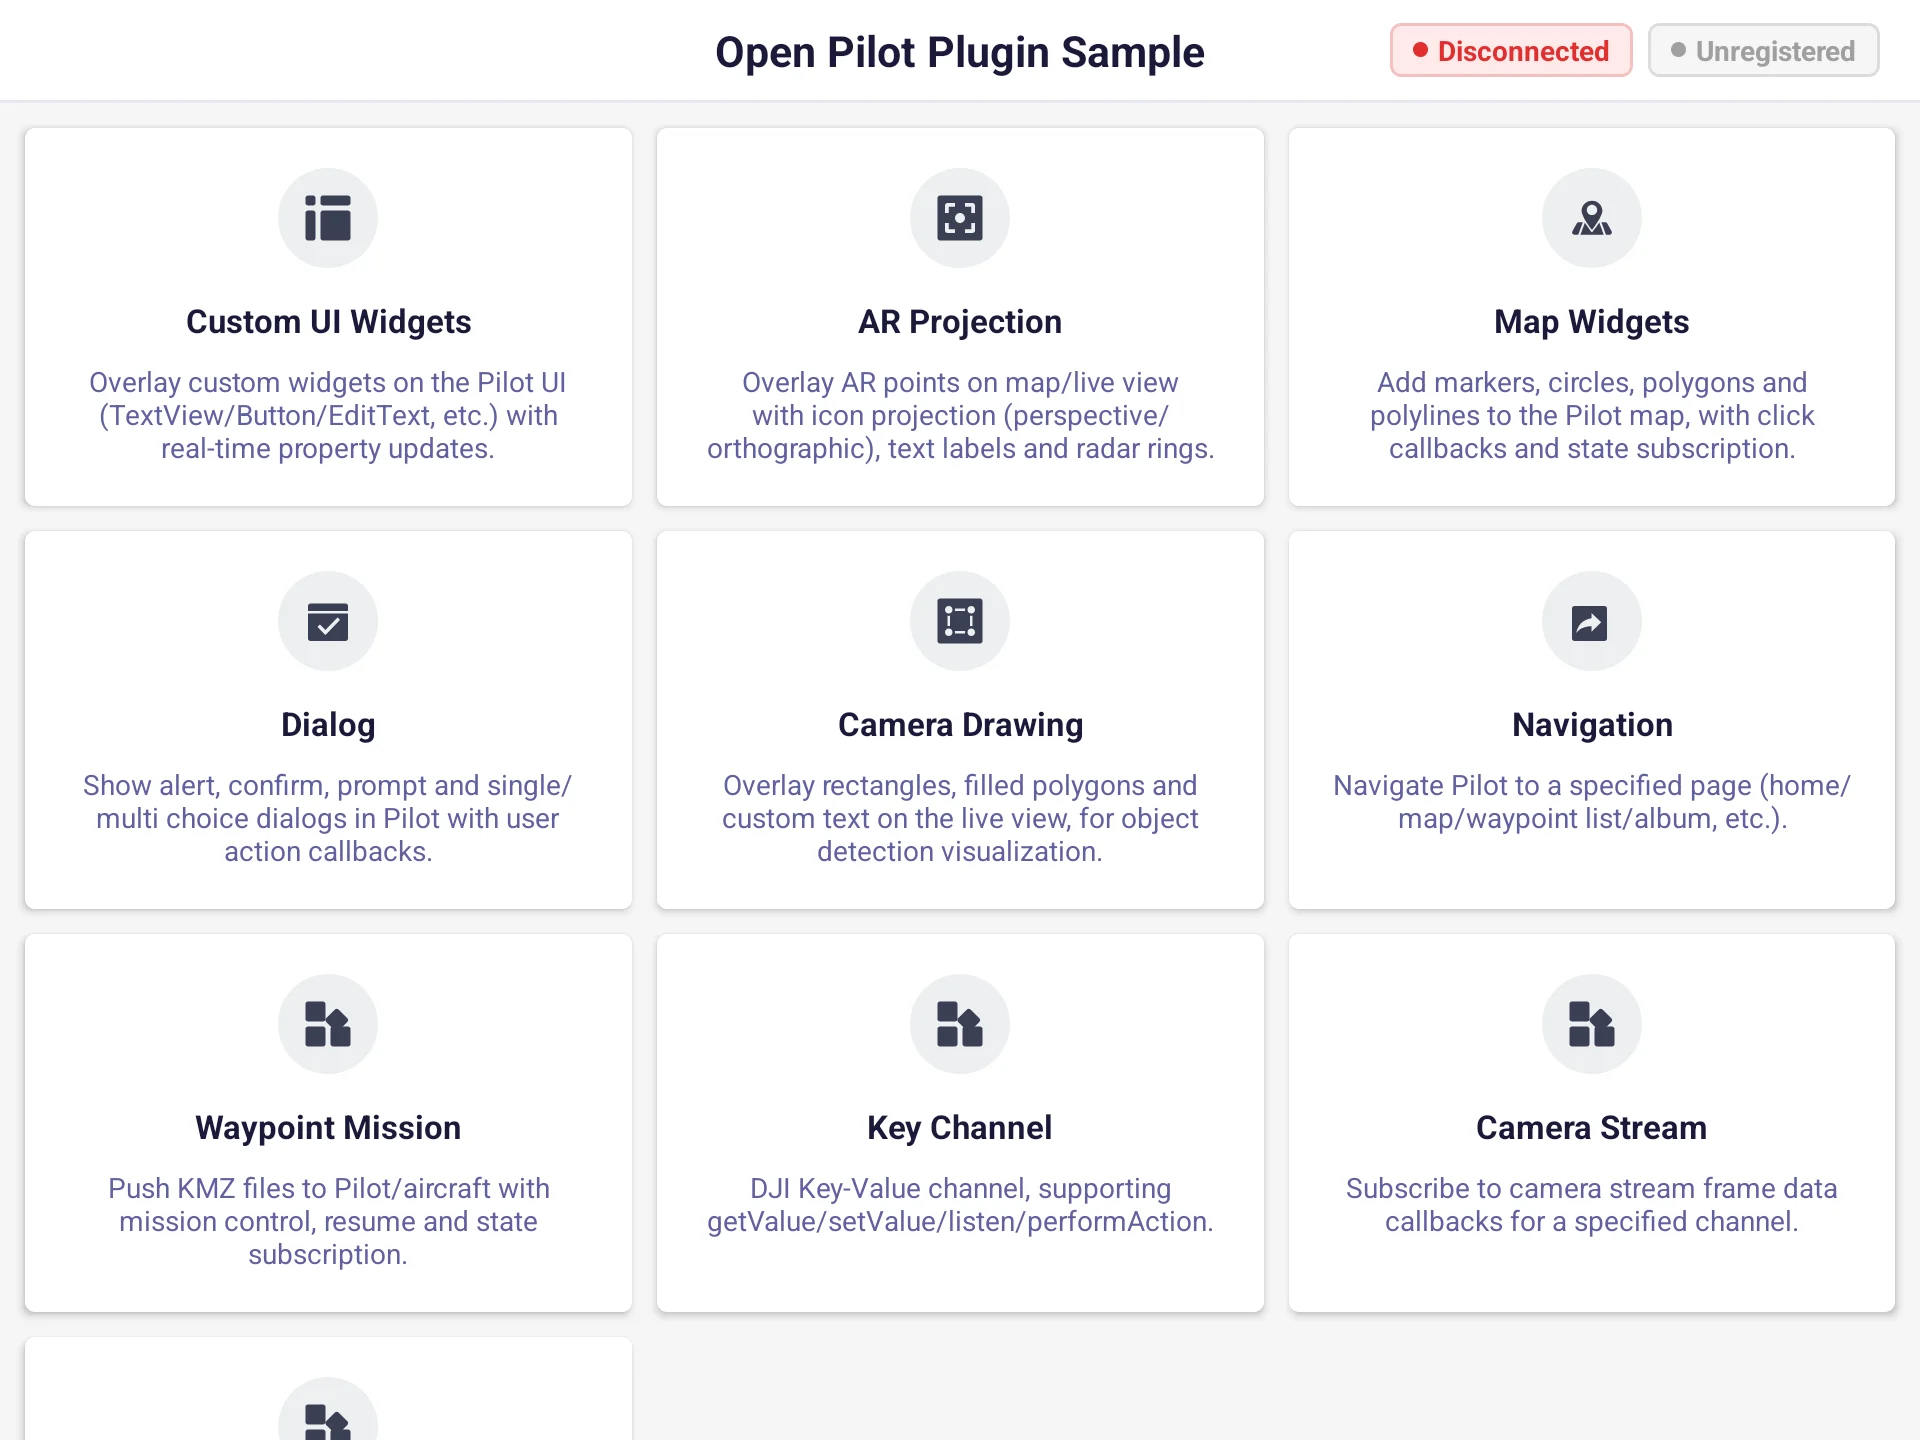
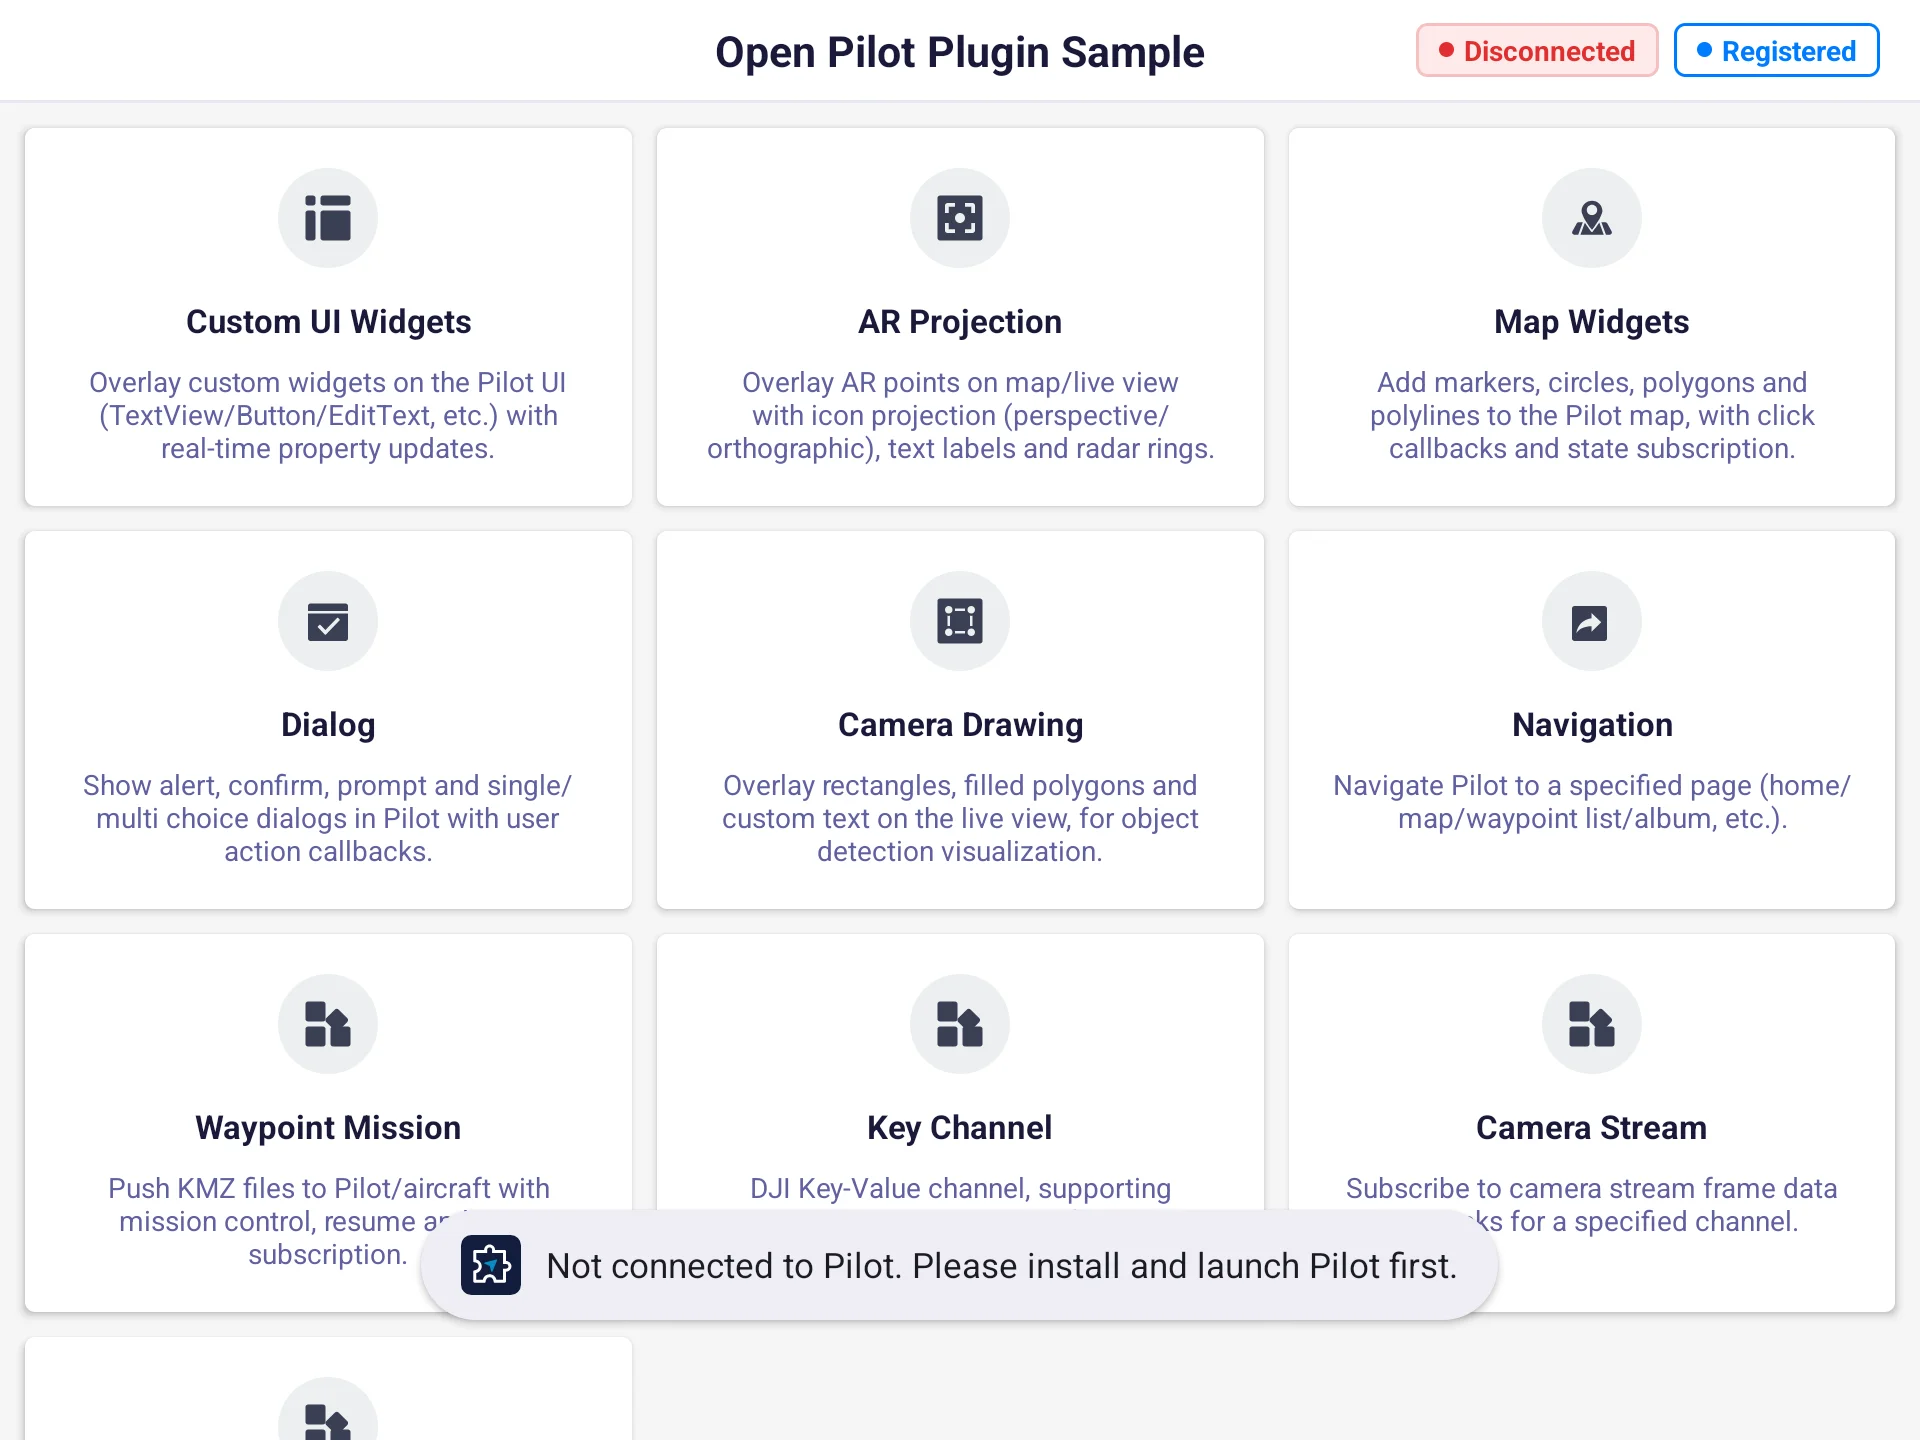
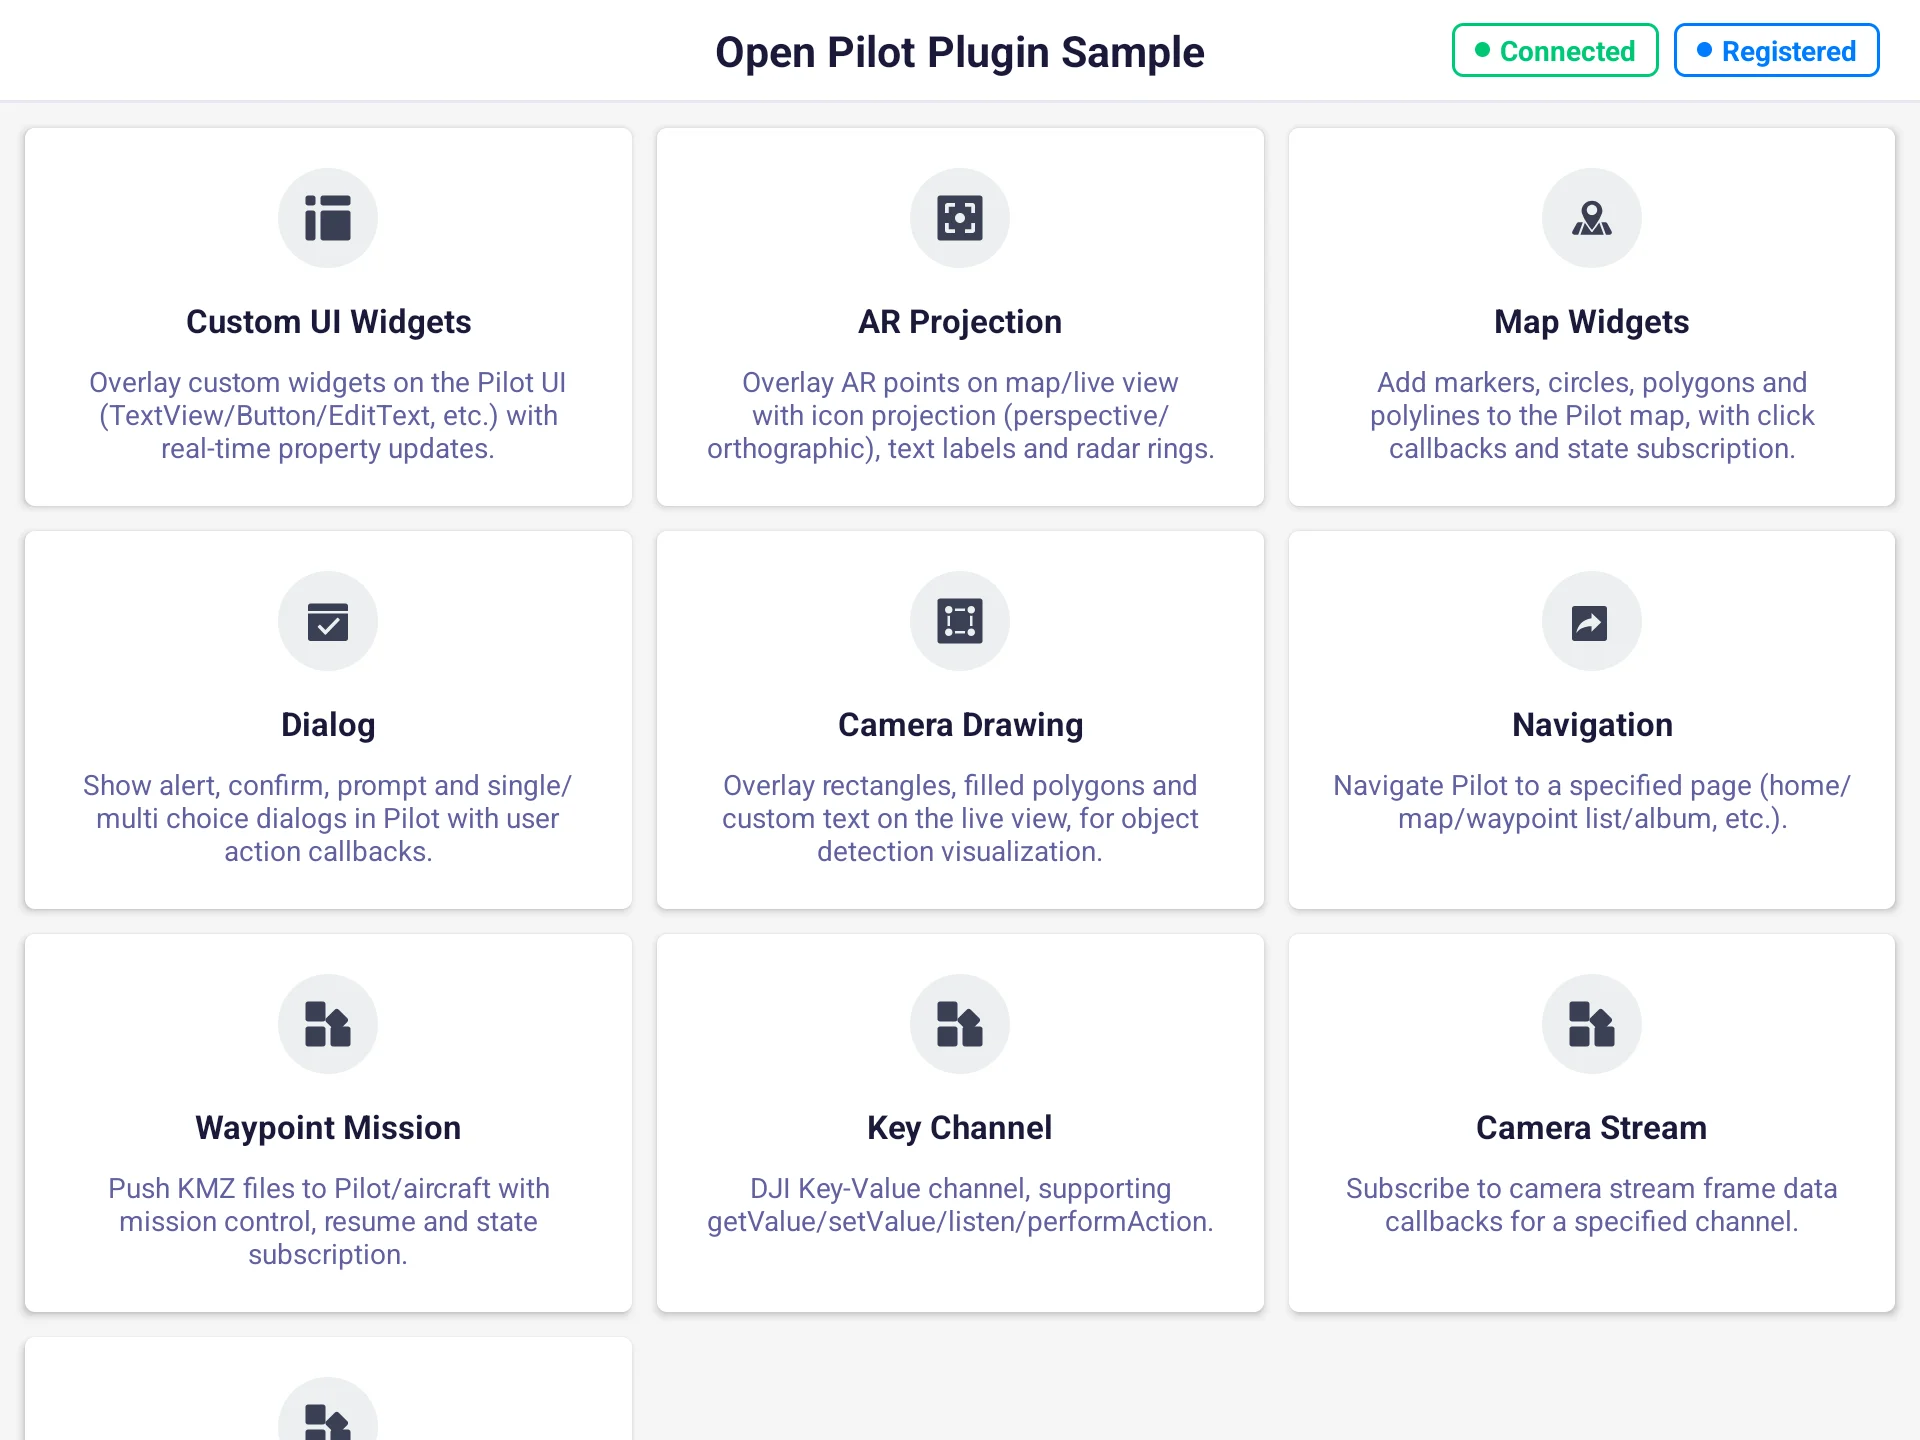
- The plugin is registered online
- The plugin is connected to the Pilot server
- The aircraft is connected
- Permissions granted (some modules depend on permissions such as file access)
The module cards on the main screen are clickable only when connected and registered. If the status is not ready, tapping a card prompts you to complete the connection first.
3. Common Experience Path
Except for "Wayline Mission", most modules follow the same experience path:
- Tap a module card on the main screen to enter that module's Demo page.
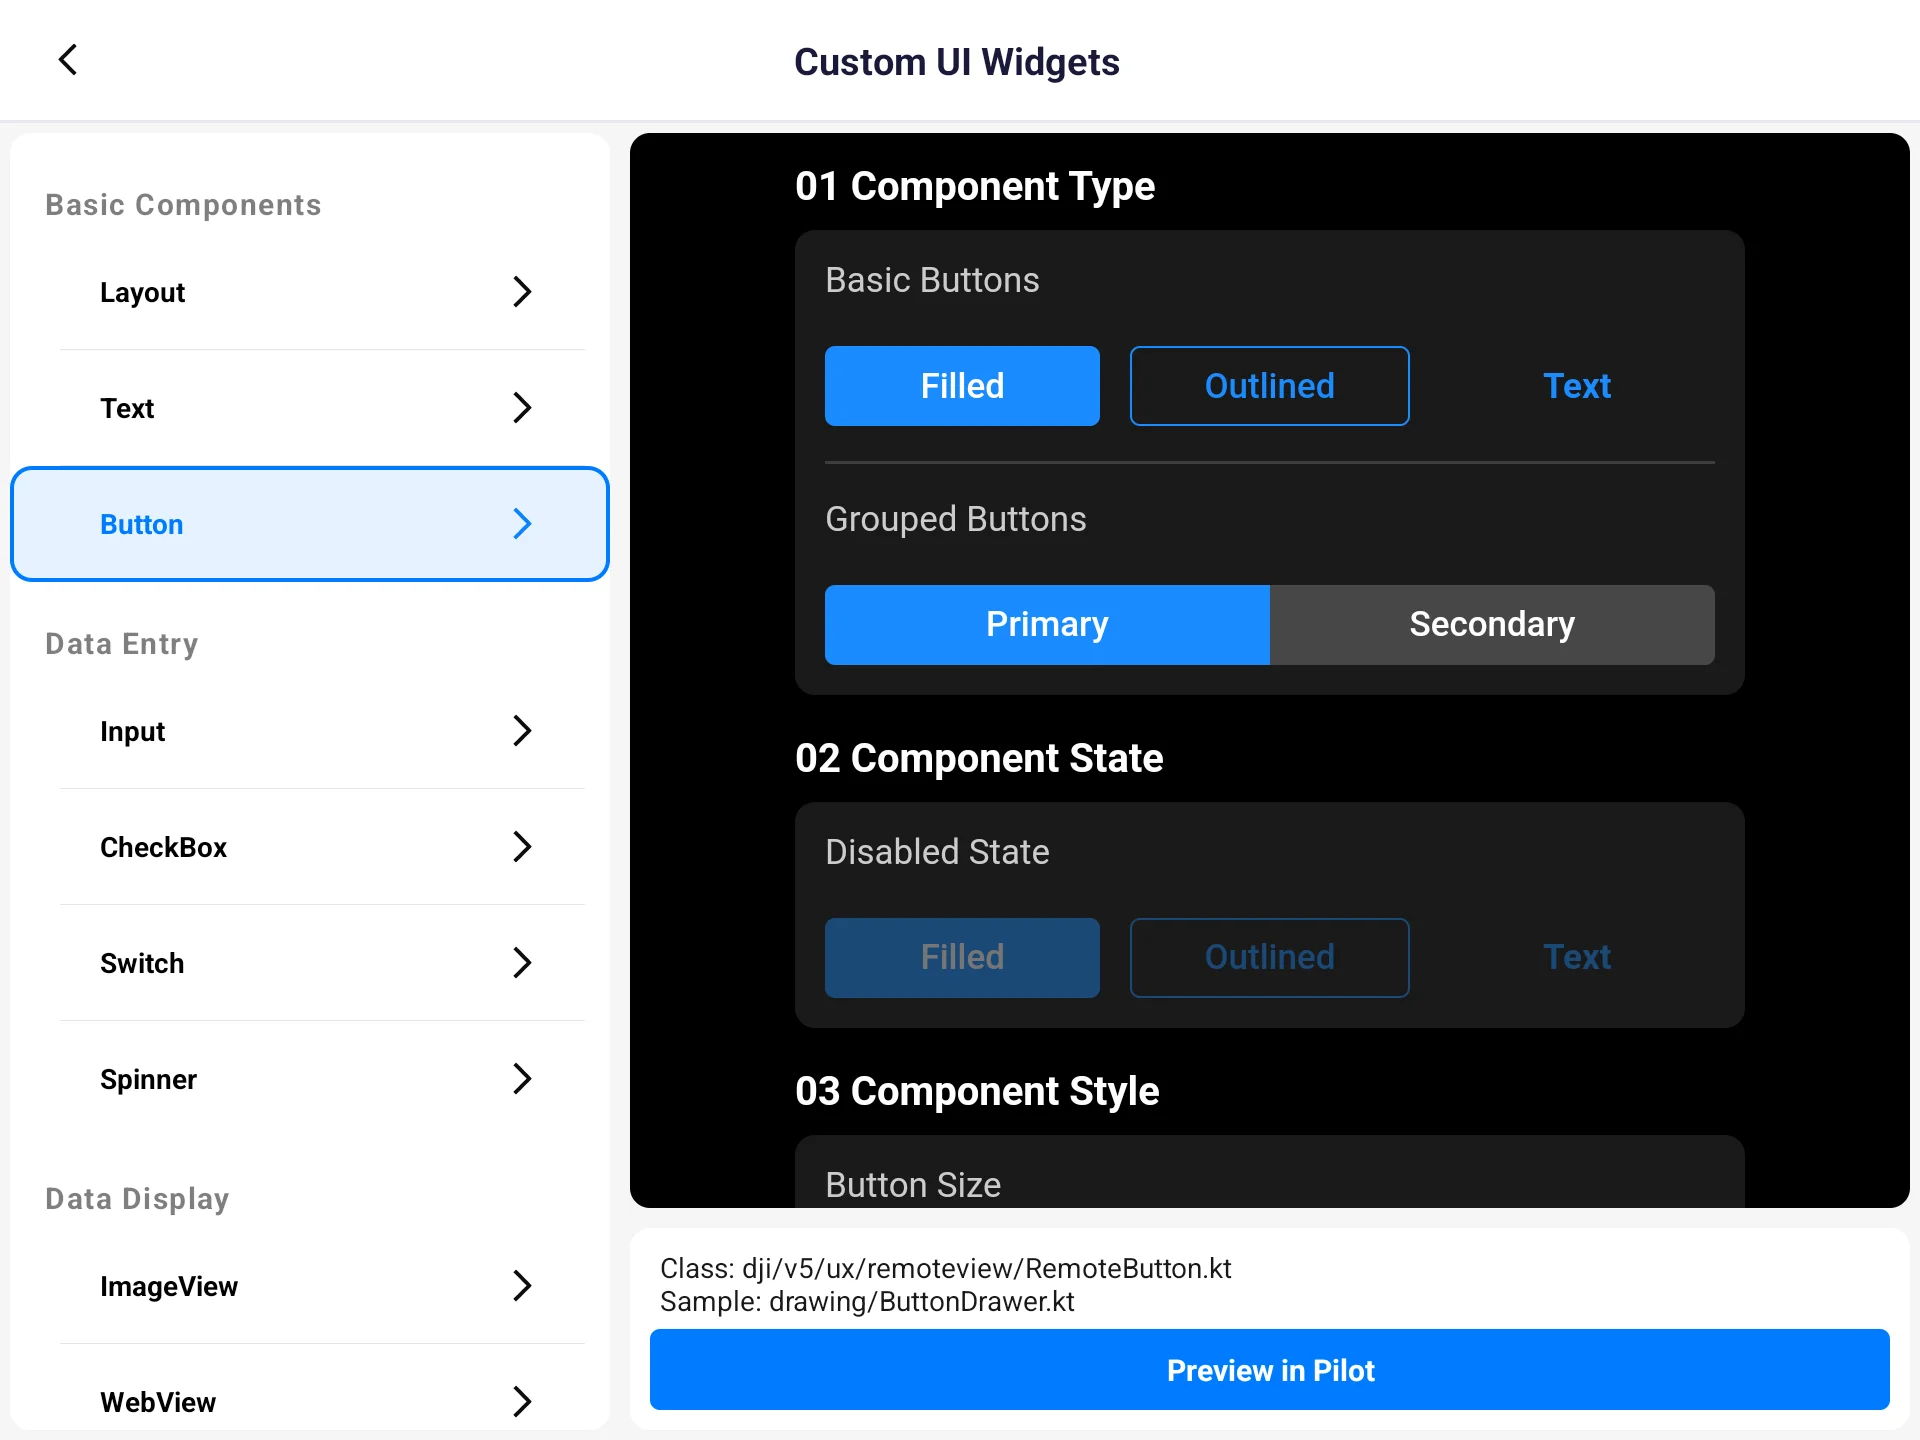
- On the Demo page, select a case from the left menu; the right side shows the case's description and preview.
- Tap the "View Effect" button on the right, and the screen switches to Pilot automatically.
- Operate in the floating window on Pilot's UI, and the actual effect is presented directly on Pilot's map, video feed, or UI.
- Tap "Back to Plugin App" at the bottom of the floating window to return to the plugin and continue with the next case.
The top navigation bar of the floating window has left/right arrows, letting you quickly switch between different cases of the same module without returning to the plugin repeatedly.
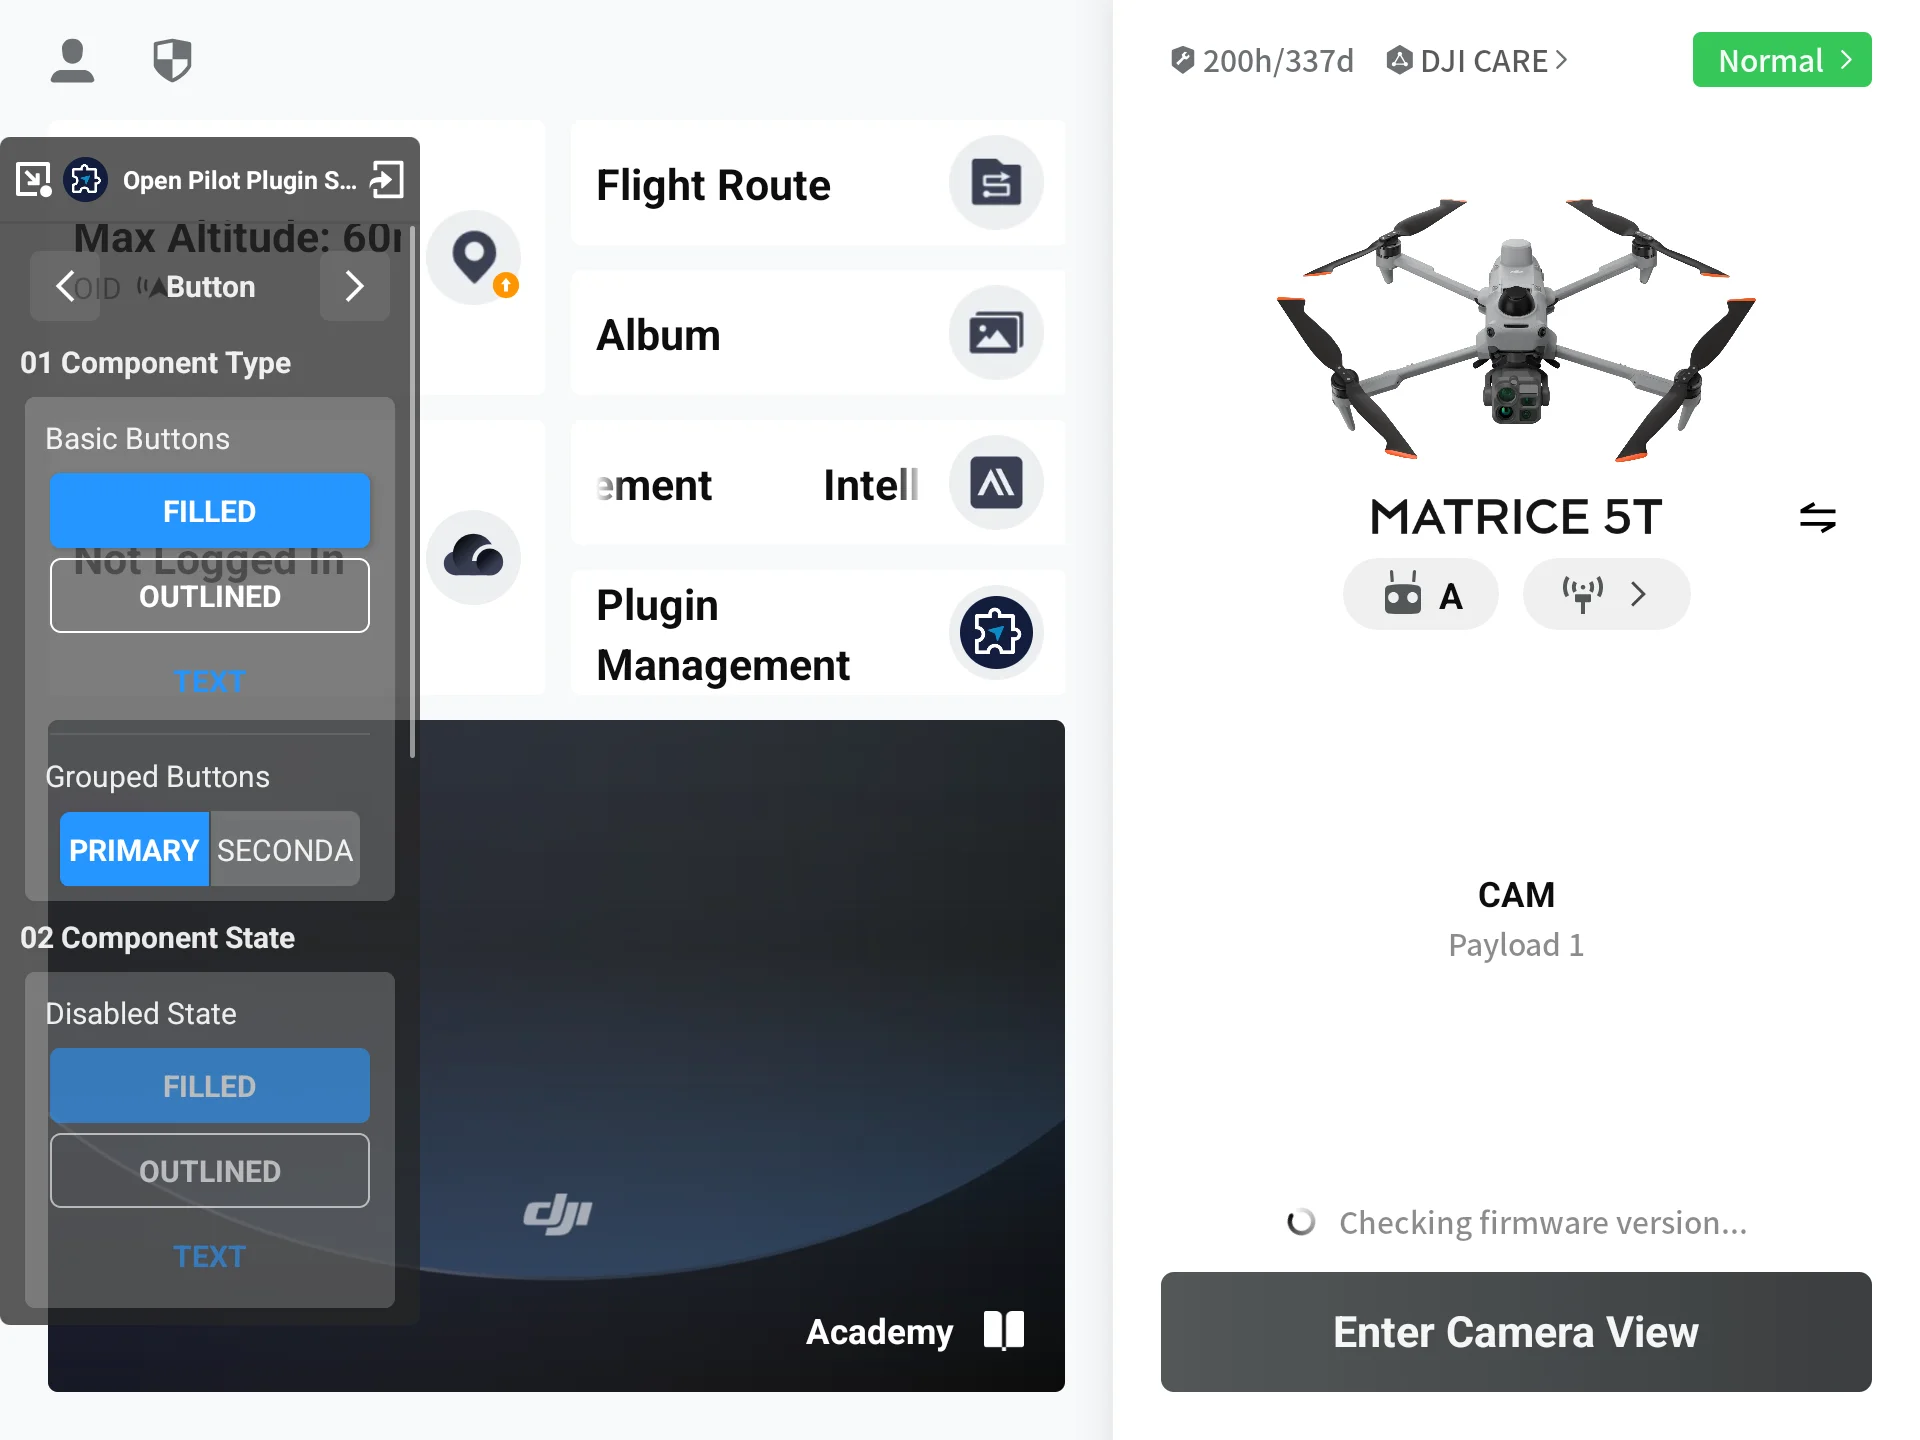
Note: The floating window is globally unique. When you switch from one module to another, the floating window content is redrawn and overwritten by the new module—this is expected behavior, not an anomaly.
4. How to Find the Corresponding Code
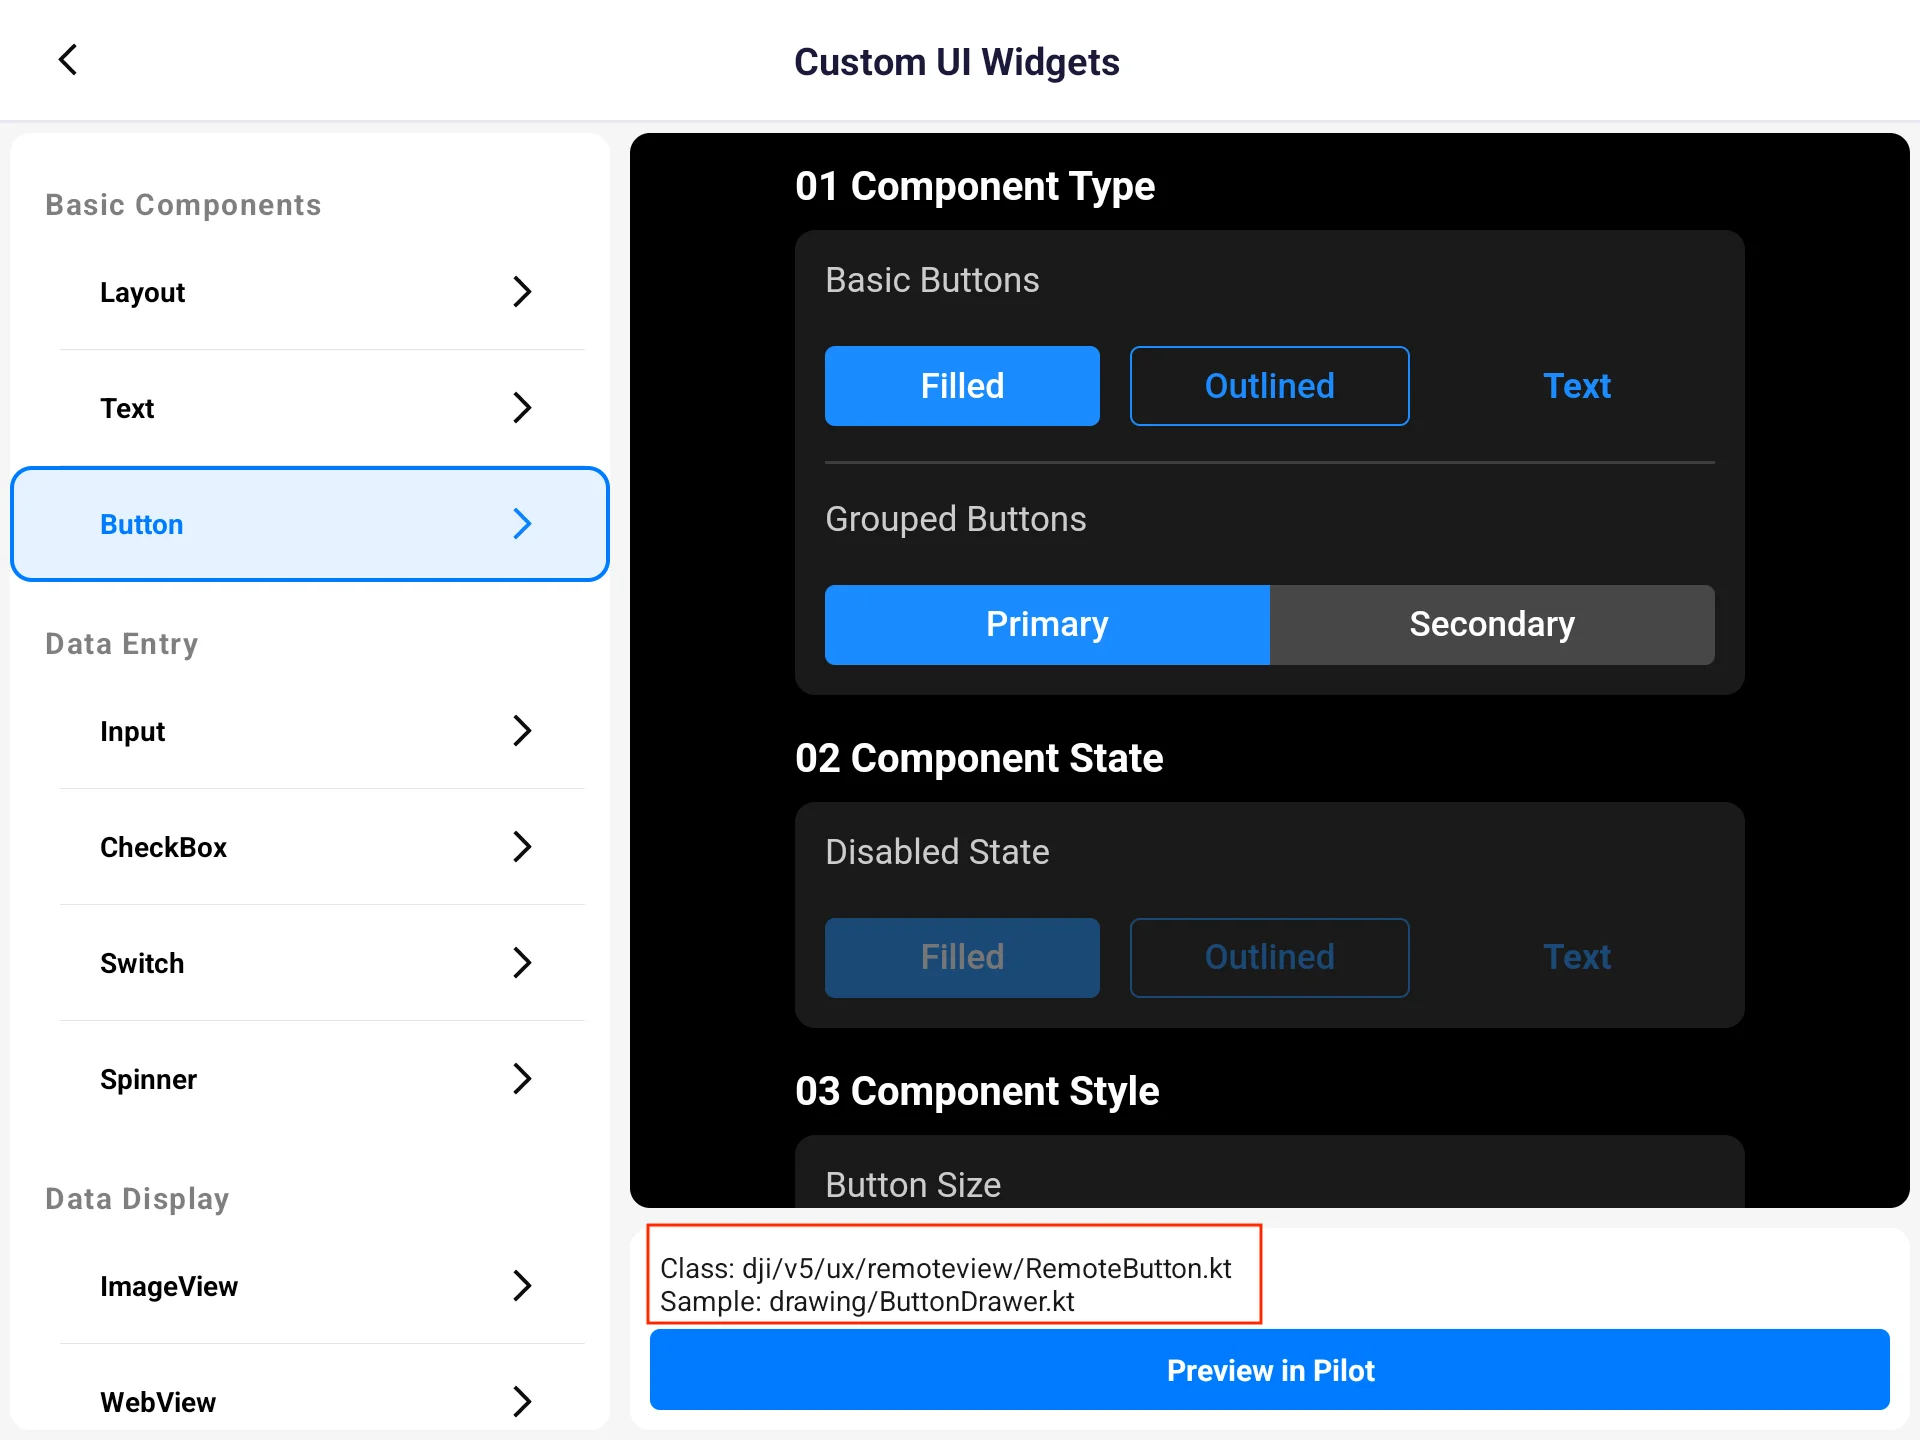
On the right-side card of each case, two path lines are shown right above the "View Effect" button:
Interface class: dji/open/pilot/client/interfaces/IARManager.java
Reference code: sampleitem/armanager/drawing/ARPointDrawer.kt
The meaning of the two lines:
- Interface class: where the open interface called by this case is located, used to look up the interface definition and parameter descriptions. Widgets in the "Custom UI Components" module don't go through an interface class, so this line shows a wrapper class pointing to the widget's wrapper implementation.
- Reference code: the source location that actually implements this case in the Sample, relative to the plugin project's source root.
When you see an effect in the plugin and want to know how it's made, just follow these two path lines into the project—no global search needed.
5. Module Overview
| Module | Capability | Cases | Tutorial |
|---|---|---|---|
| Custom UI Components | Overlay your own widgets on Pilot's UI, covering 11 types such as layout, text, button, input, switch, image, and list | 25 | Custom UI Components doc |
| AR Projection | Project points, lines, polygons, and circles into the AR view, and enable the radar scan range | 5 | AR Projection doc |
| Dialog | Pop up five types of standard dialogs in Pilot: tip, confirm, input, single-choice, multi-choice | 5 | Dialog doc |
| Camera View Drawing | Overlay detection boxes, polygon areas, and real-time text on the video feed | 3 | Camera View Drawing doc |
| Page Navigation | Navigate Pilot to designated pages such as home, map, wayline, and album | 8 | Page Navigation doc |
| Wayline Mission | Import a local KMZ wayline file into Pilot | 1 | — |
6. Custom UI Components
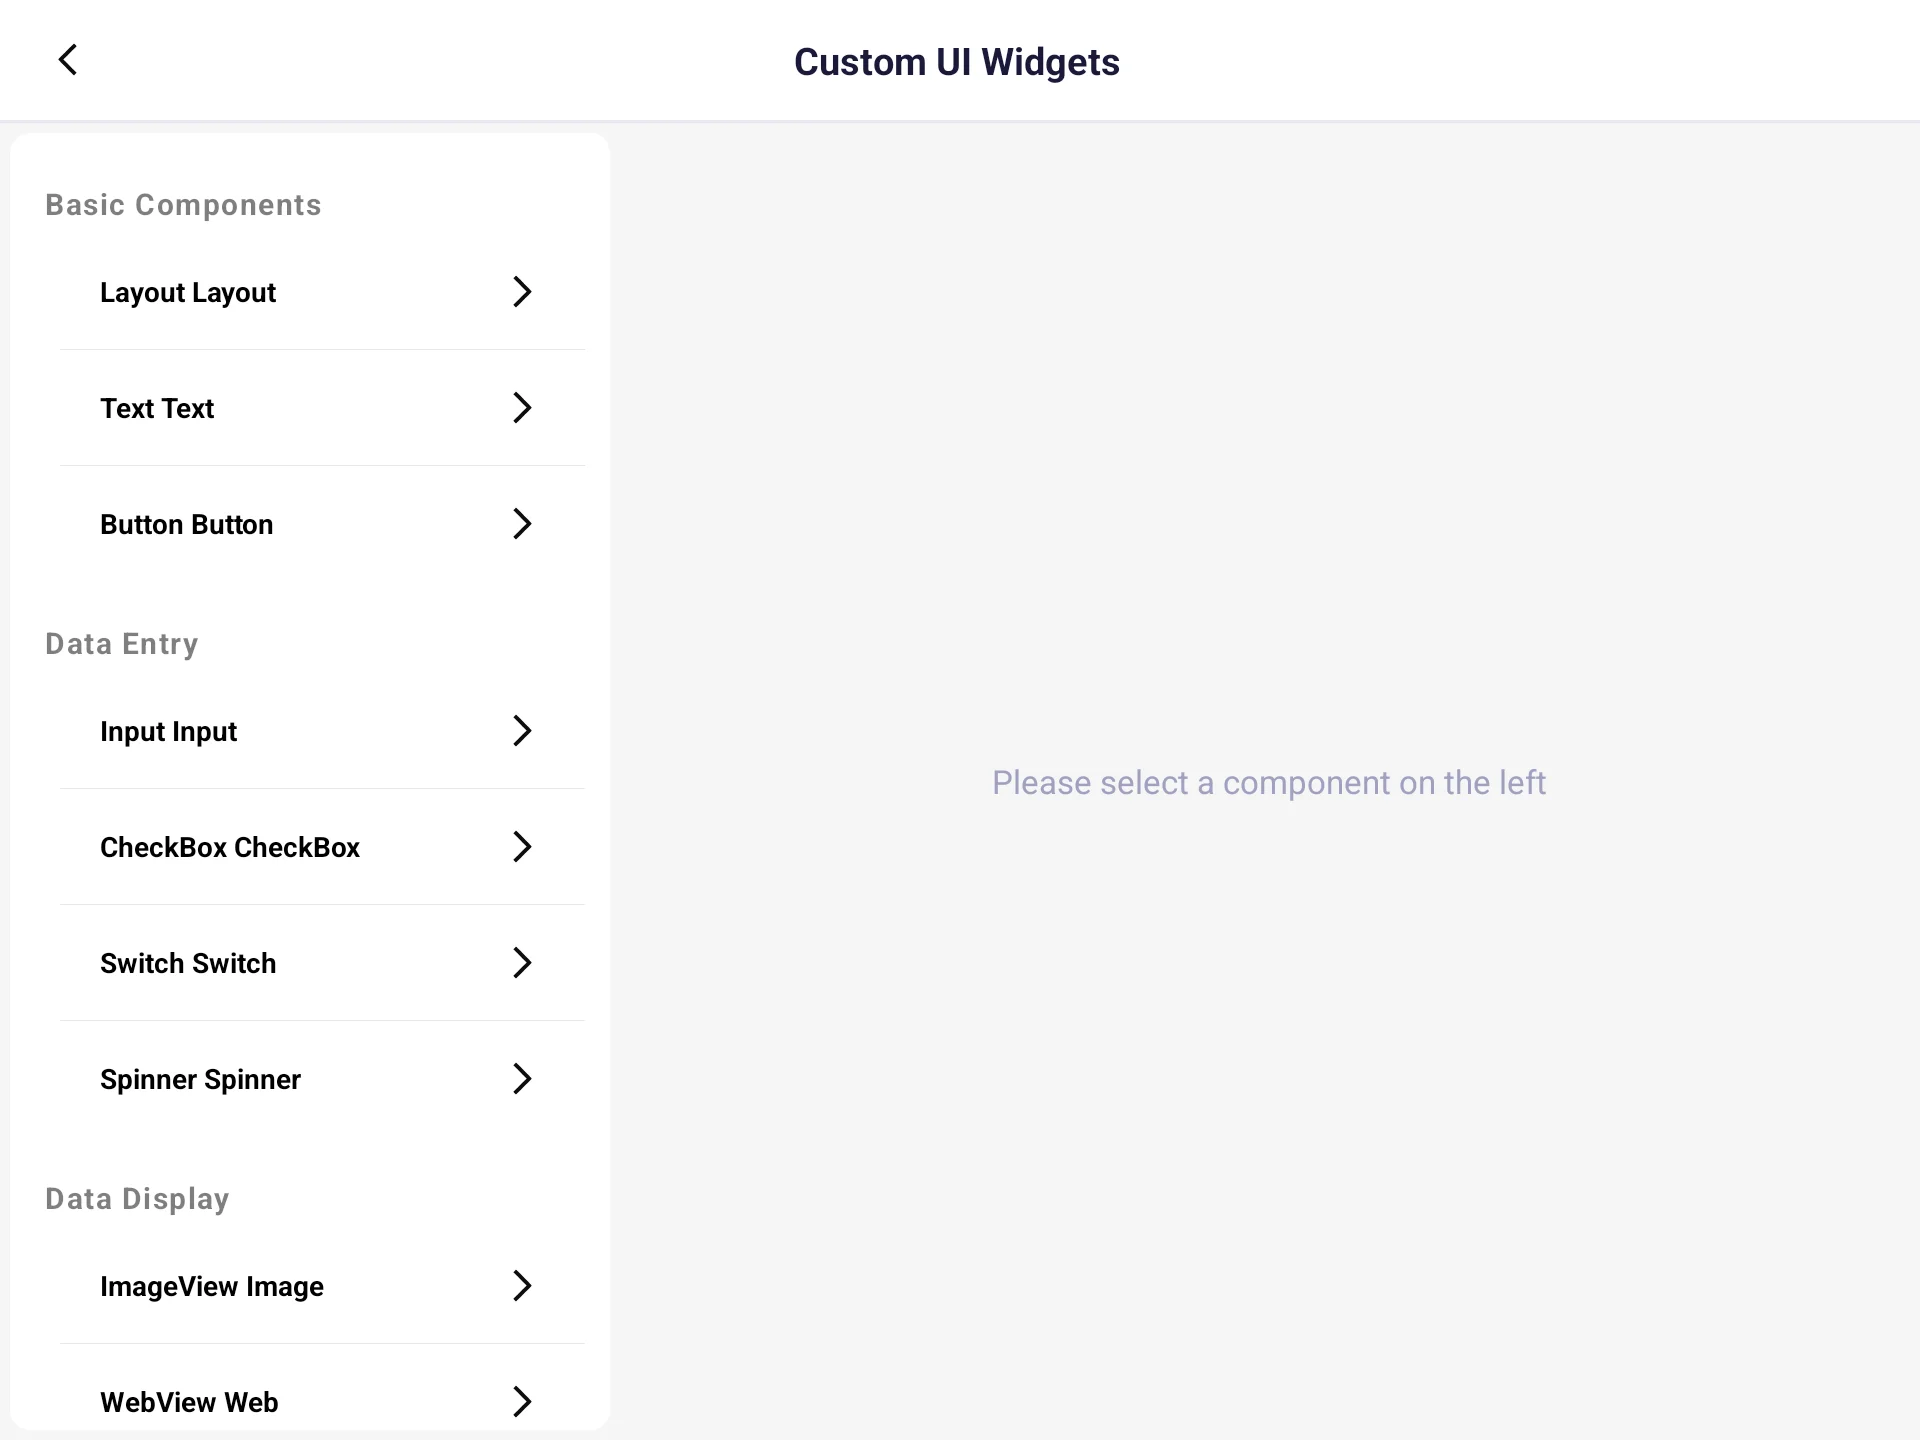
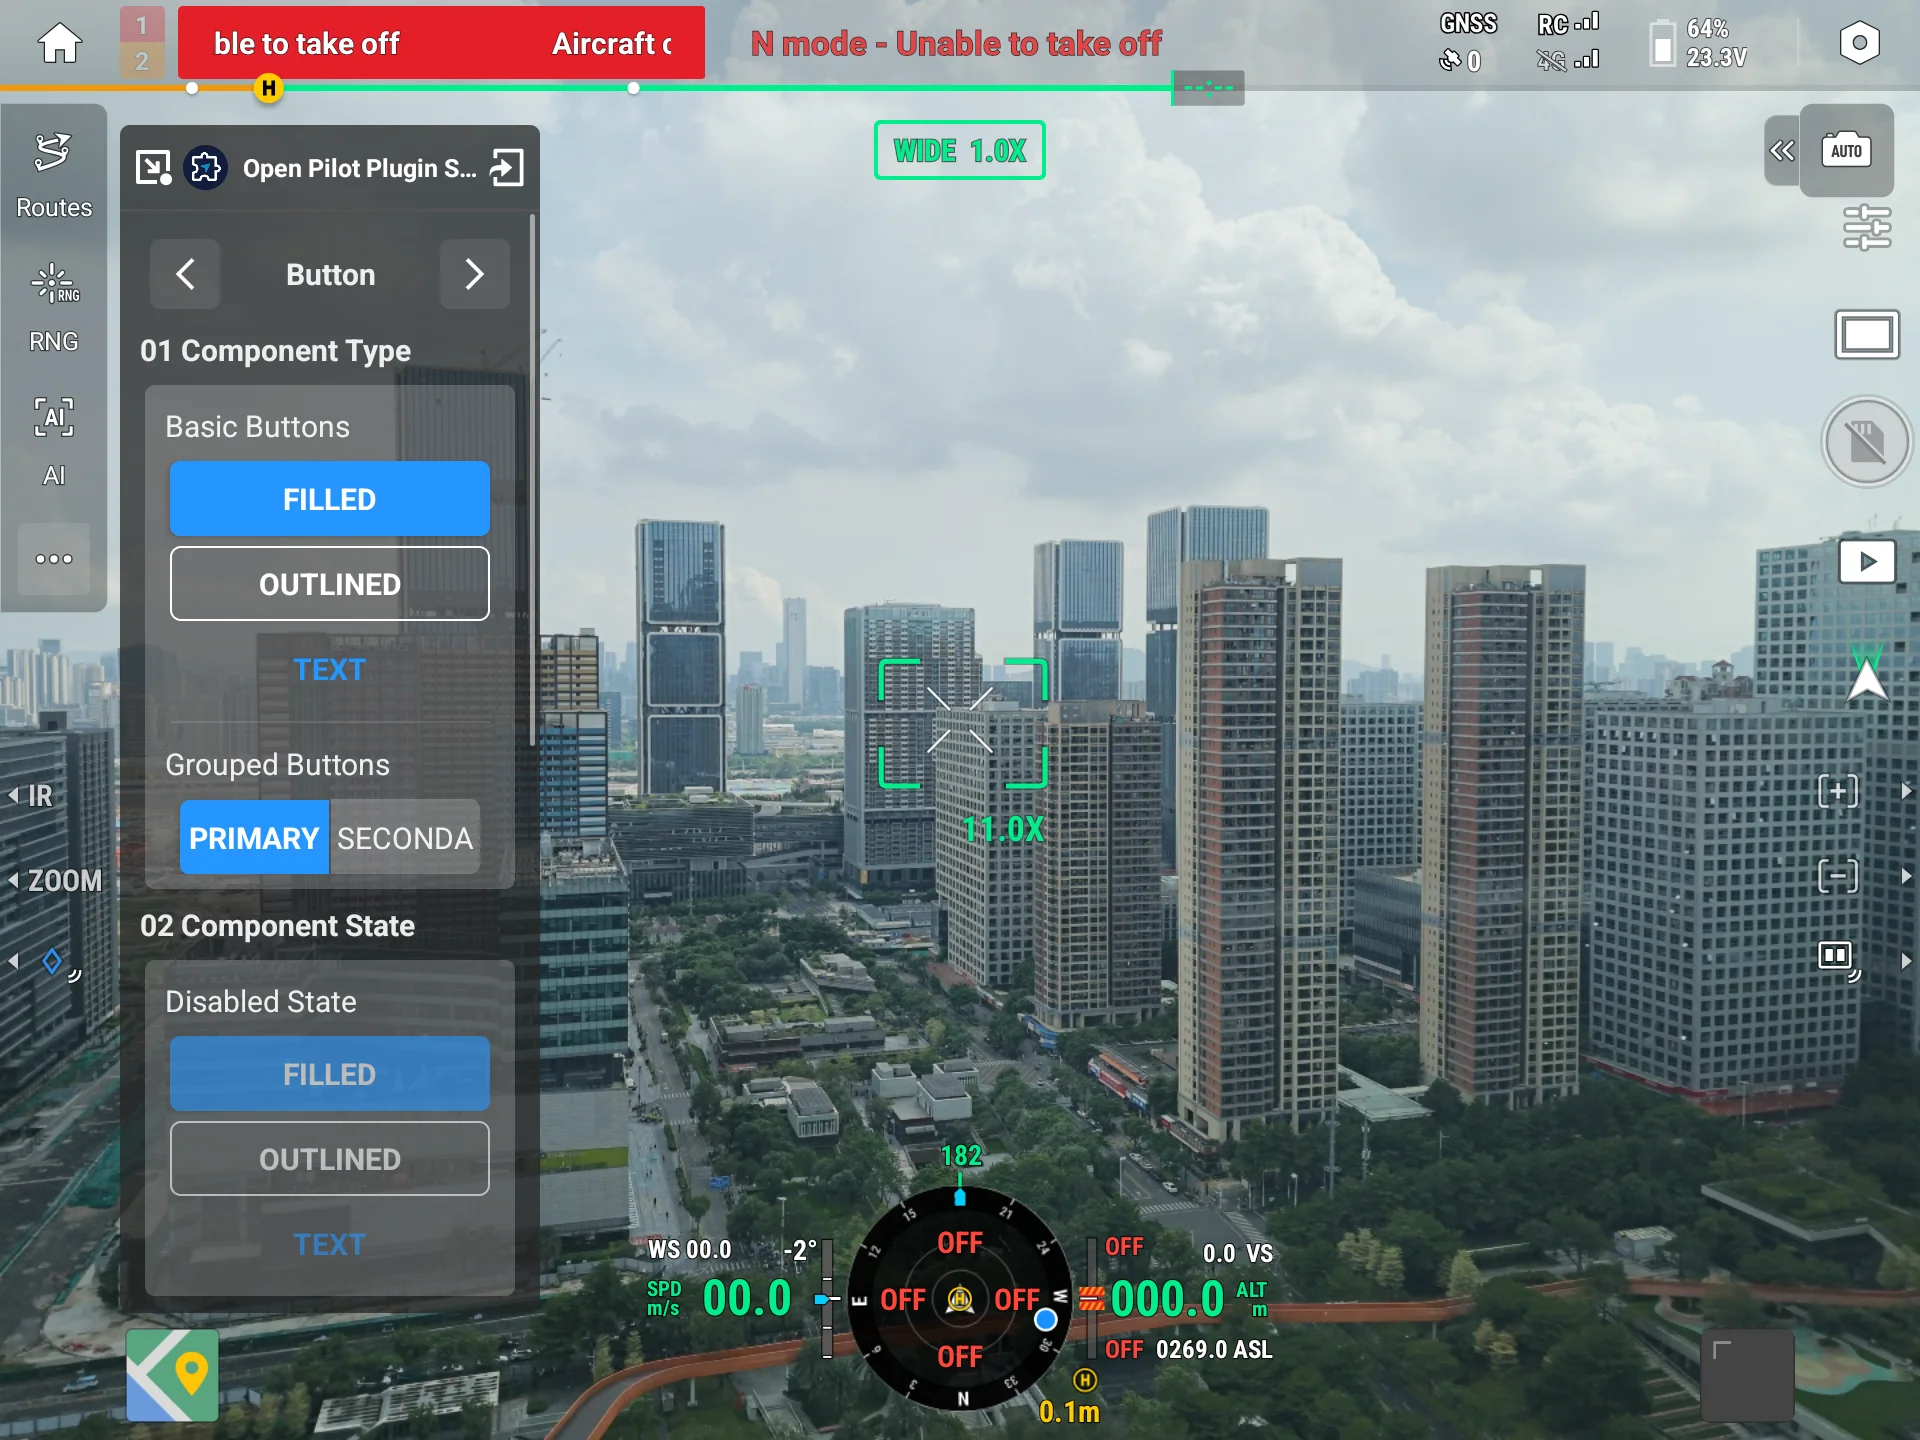
This module demonstrates how to overlay the plugin's own widgets on Pilot's UI. You can organize these remote widgets just like writing an Android layout—set text, color, size, and alignment, and update their properties at runtime. The module provides 11 widget types and 25 cases, presented in the left menu in three groups: "Basic Components / Data Input / Data Display".
6.1 Basic Components
| Widget | Demo highlights | Cases |
|---|---|---|
| Layout | Weight distribution and alignment for linear layout; four-corner and center positioning for relative layout | 5 |
| Text | Font size, bold, italic, color, underline, strikethrough, and truncation and scrolling | 3 |
| Button | Four button styles, tab-style button groups, and text properties | 3 |
6.2 Data Input
| Widget | Demo highlights | Cases |
|---|---|---|
| Input field | Style customization, plus input controls such as number, password, auto-grouping, and character limits | 2 |
| CheckBox | Checked state, disabled state, and color scheme | 1 |
| Switch | On/off state, thumb and track color scheme, and disabled state | 1 |
| Spinner | Default selected item and dropdown panel color scheme | 1 |
6.3 Data Display
| Widget | Demo highlights | Cases |
|---|---|---|
| Image | Background shape, six scale-fill modes, and tinting | 3 |
| WebView | Load a real web page inside the floating window | 1 |
| ListView | Multiple data rows, dividers, and click response | 1 |
| ProgressBar | Horizontal and circular forms, with progress, color, text, and success/failure states | 4 |
6.4 Experience Flow
- Select a widget type from the left menu.
- Select a case from the case list on the right; the card shows the case's effect preview.
- Tap "View Effect", the screen switches to Pilot, and the floating window presents the case's actual rendered result.
- Use the left/right arrows at the top of the floating window to switch to other widgets, or tap "Back to Plugin App" to return to the plugin.
7. AR Projection
This module demonstrates how to project points, lines, polygons, and circles into Pilot's AR view, used to annotate target positions, operation boundaries, and warning ranges on the real image. The position of every element is computed from the aircraft's real-time position, so the aircraft must be connected.
| Case | Effect you'll see |
|---|---|
| Point | Project 3 AR points each at 40m and 80m in front of the aircraft, 6 in total; after updating, demonstrates hiding text and icons by distance respectively, then restoring full visibility |
| Line | Project a polyline containing 6 points; after updating, it becomes a green dashed line |
| Polygon | Project an equilateral triangle and 3 vertices; after updating, it stretches into an 80m-tall triangular prism |
| Circle | Project a green circle with a 20m radius; after updating, it stretches into an 80m-tall green cylinder |
| Radar | Show or hide the AR radar's scan range on the screen |
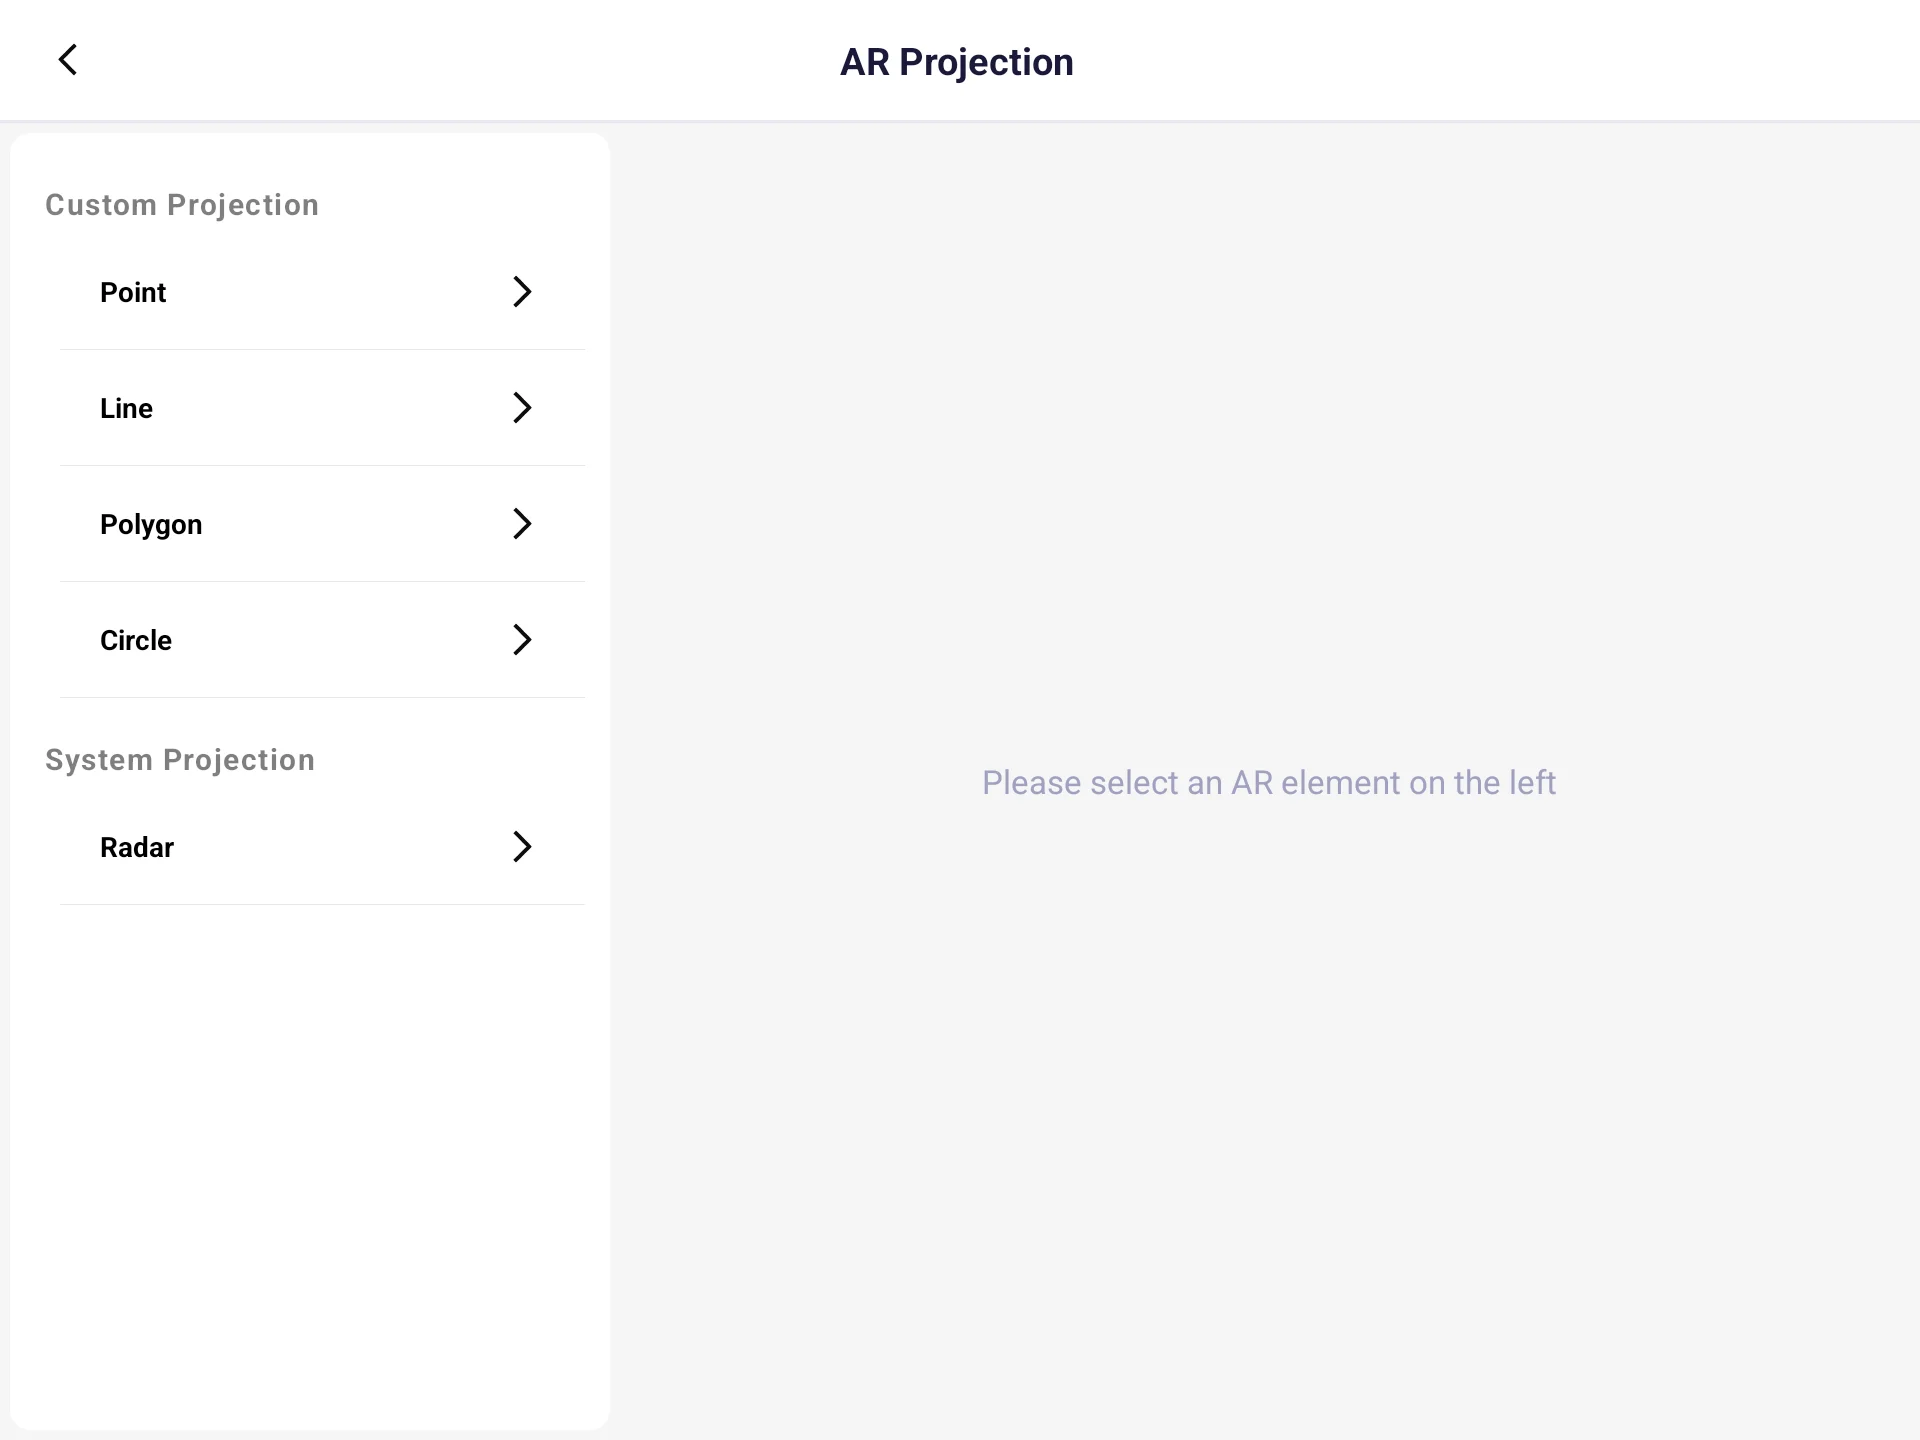
The left menu groups these five cases into "Custom Projection" (point, line, polygon, circle) and "System Projection" (radar).
7.1 Experience Flow
- Select an AR element from the left menu and tap "View Effect" to switch to Pilot.
- The floating window provides four buttons—query, upload, update, delete—for point, line, polygon, and circle, and two buttons—show, hide—for radar.
- Tap in the order "upload → update → delete", observe the elements appear, change, and disappear in the AR view; the result of each step is echoed in the floating window.
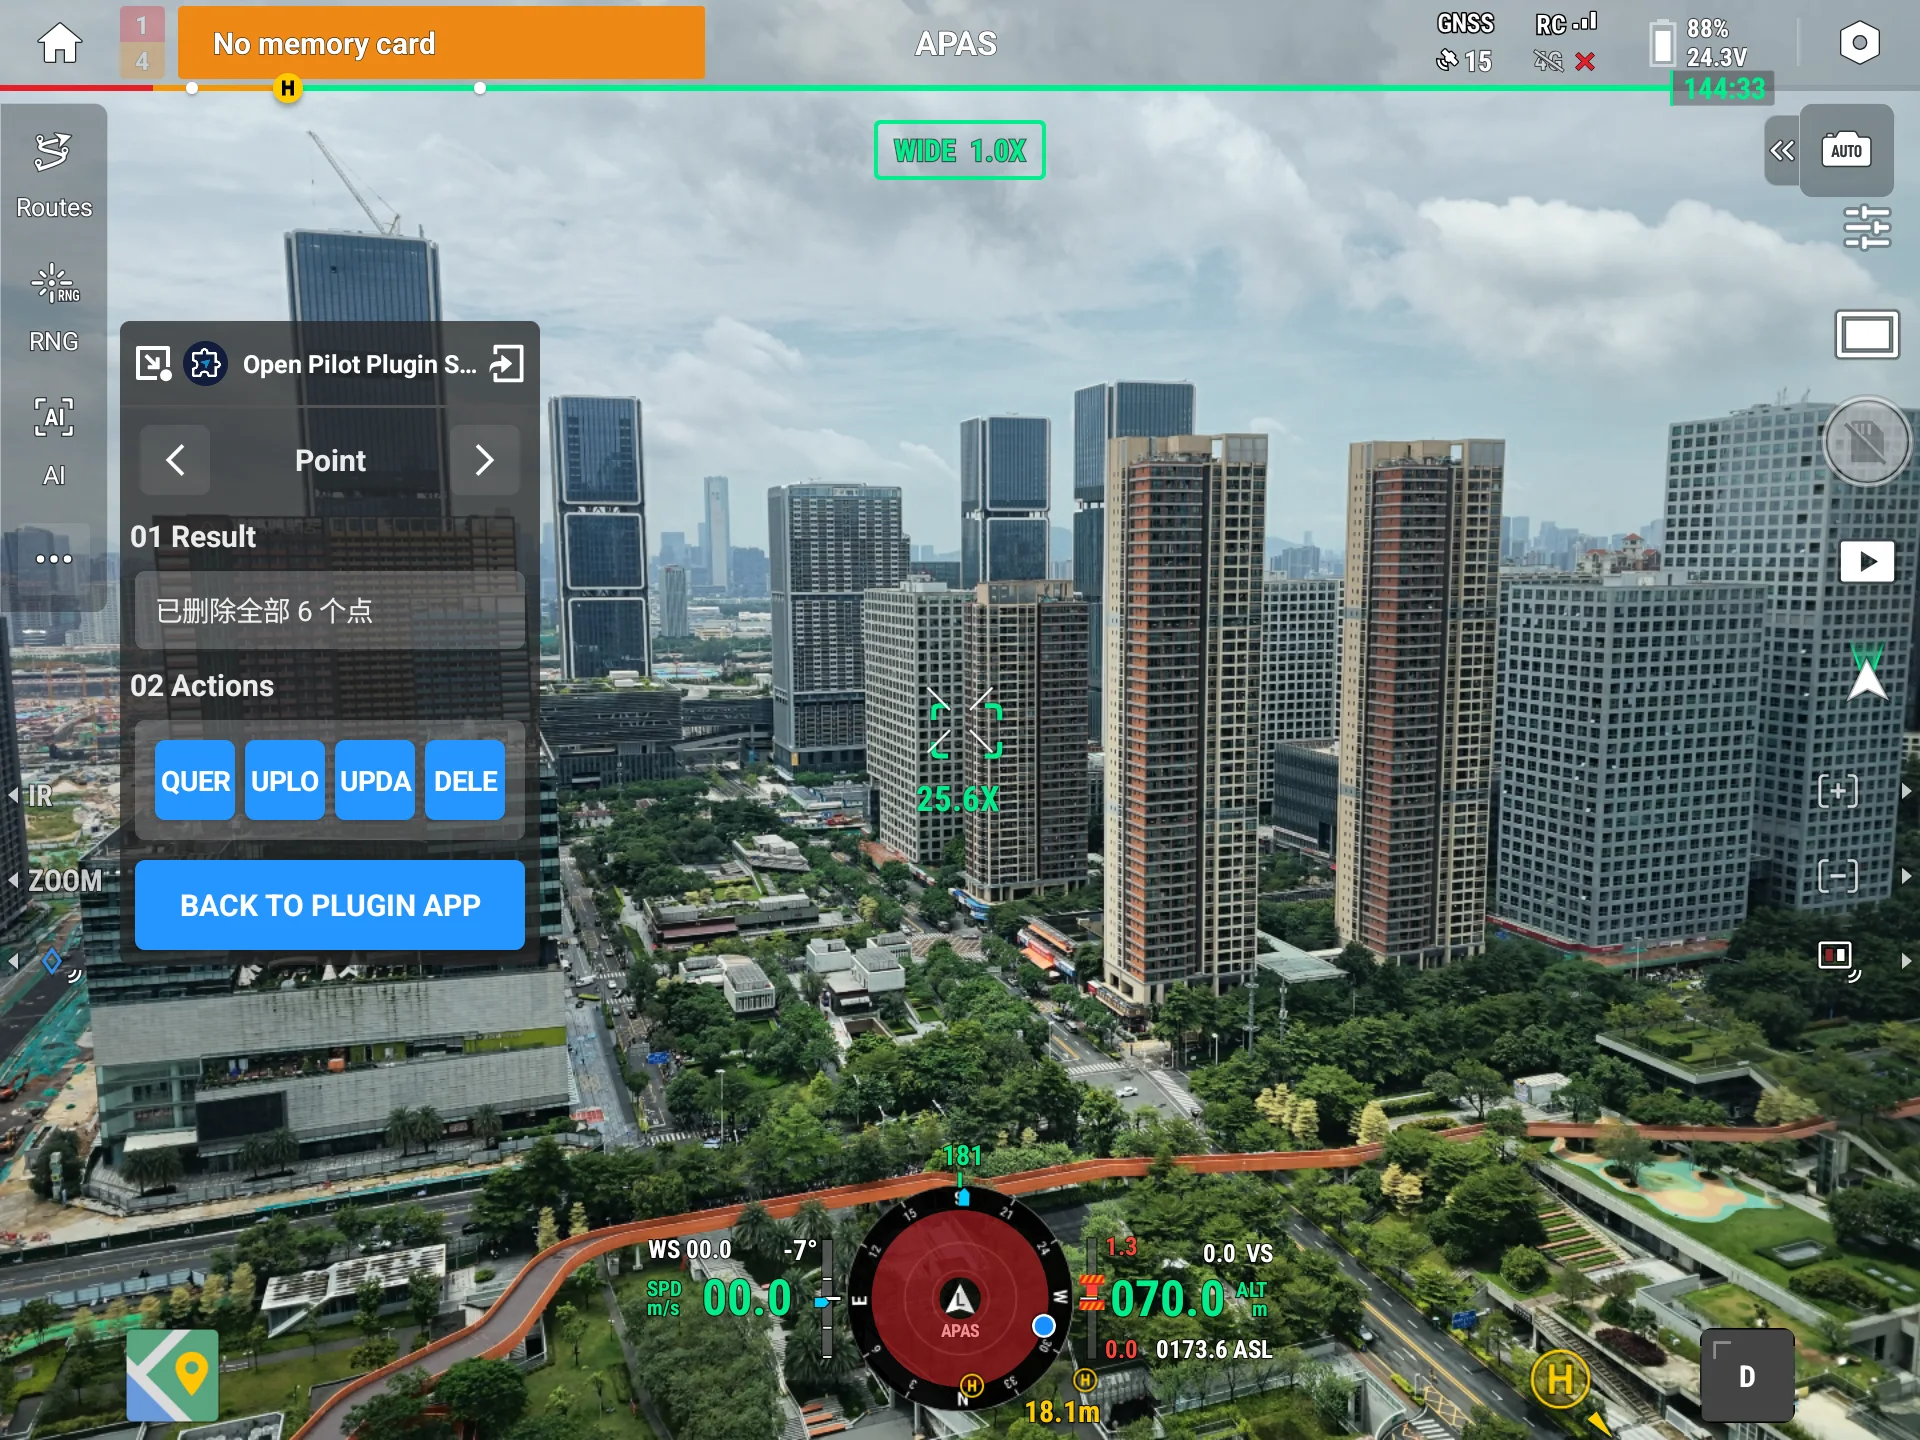
Note: An element must be uploaded before it can be updated or deleted. Uploading the same type of element again prompts you to delete the existing one first; if it prompts "Failed to get aircraft position", confirm the aircraft is connected.
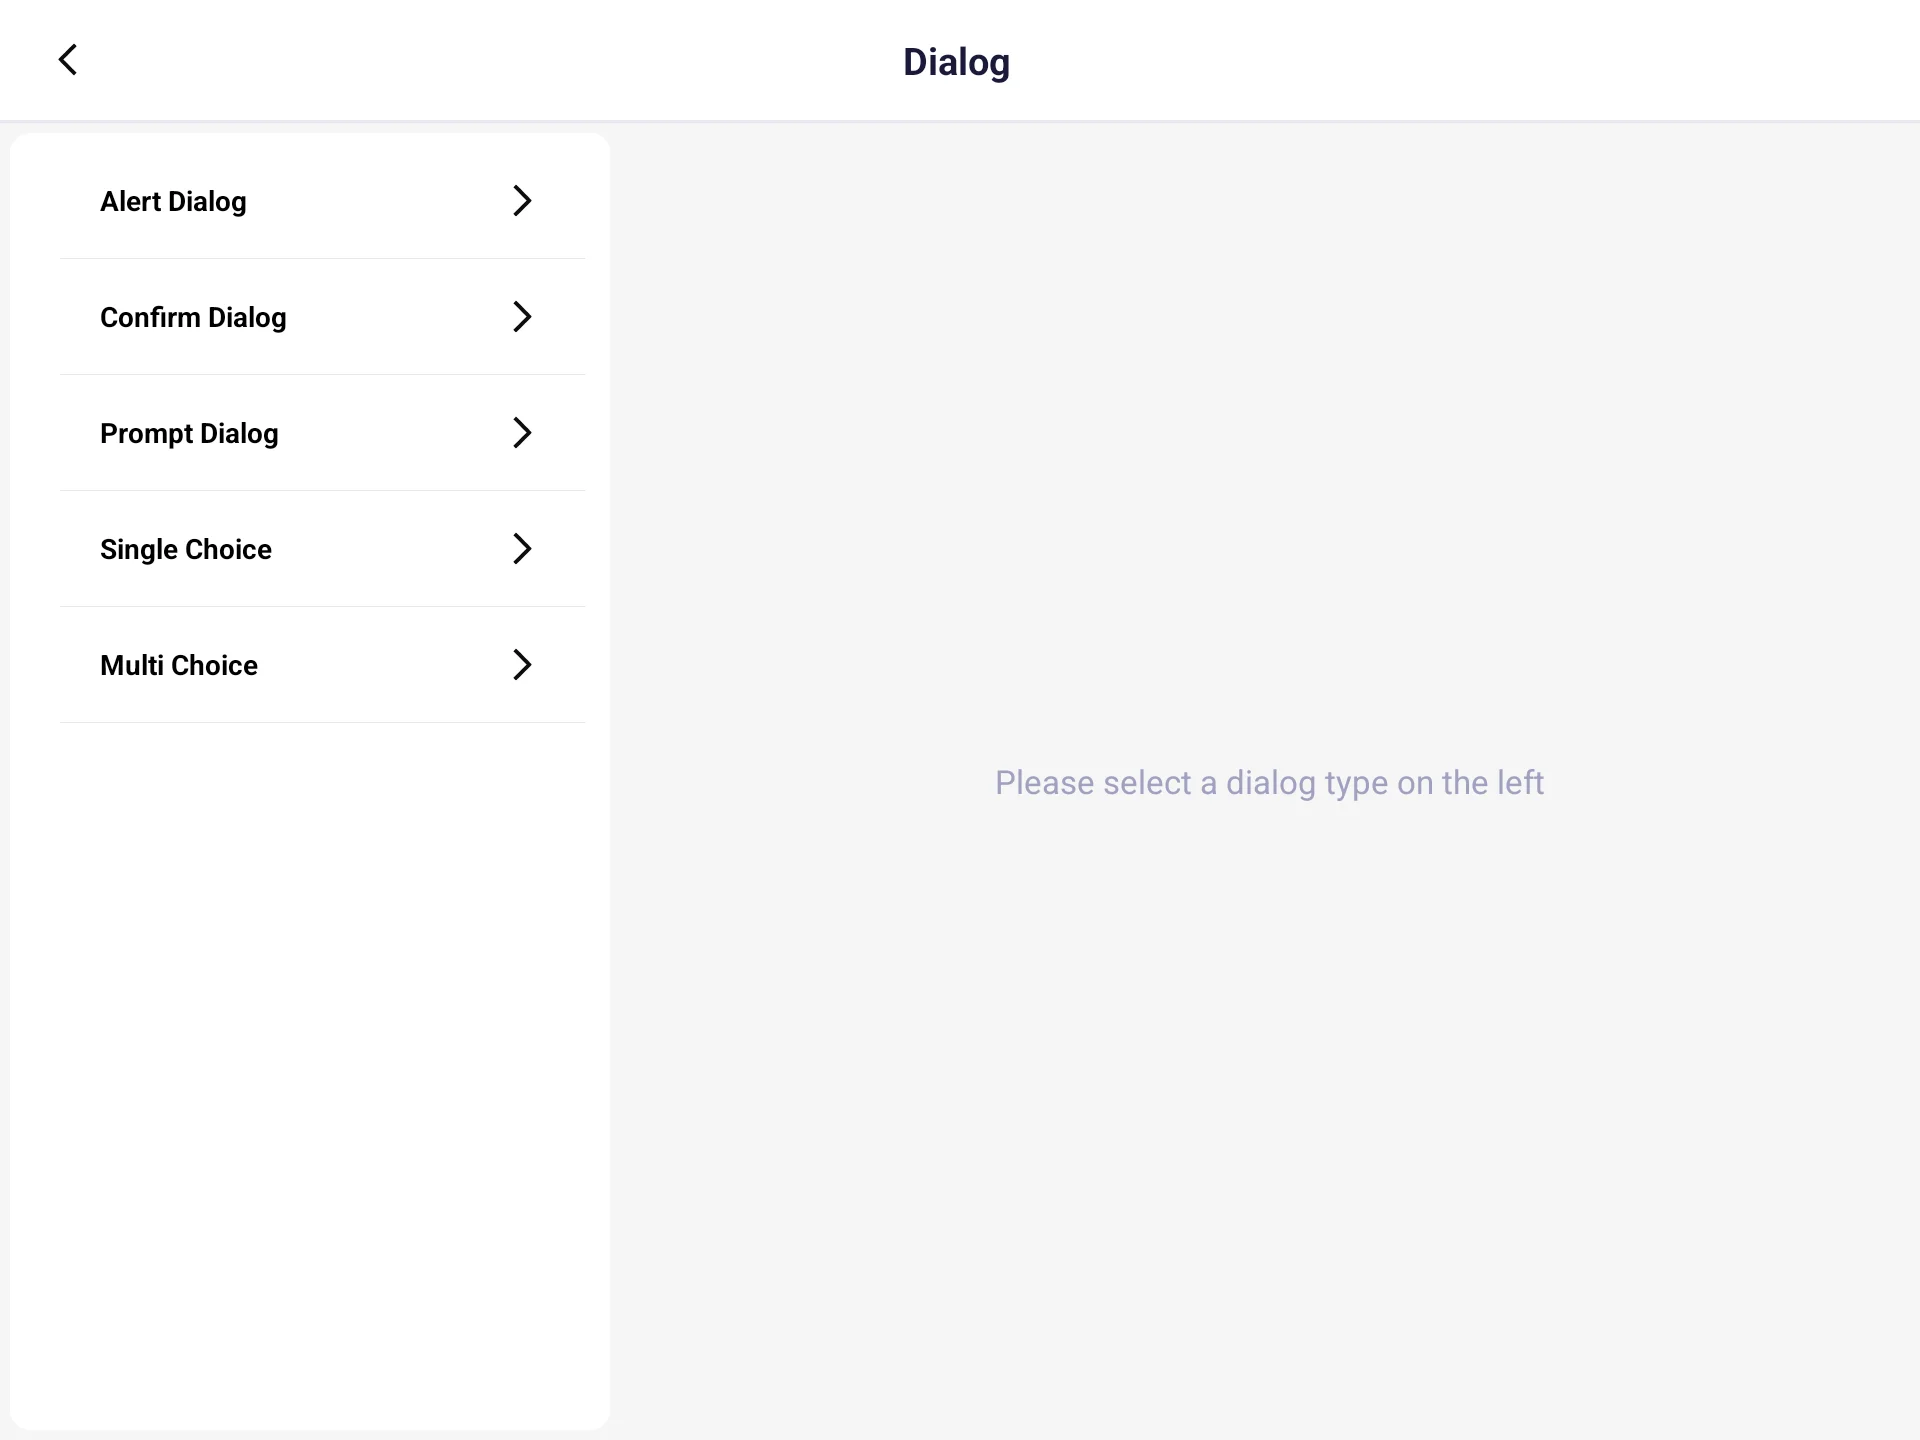
8. Dialog
This module demonstrates how to make Pilot pop up standard-style dialogs. Dialogs are drawn and presented uniformly by Pilot; the plugin only provides the title, content, and options, and the user's operation result is passed back to the plugin via a callback.
| Case | Effect you'll see |
|---|---|
| Tip dialog | Pop up a tip dialog with a single confirm button, for one-way notification |
| Confirm dialog | Pop up a confirm dialog with "Yes/No" buttons, returning the user's choice |
| Input dialog | Pop up a dialog with text input, returning the content the user entered |
| Single-choice dialog | Pop up an option list where the user can select only one item |
| Multi-choice dialog | Pop up an option list where the user can select multiple items at once |
8.1 Experience Flow
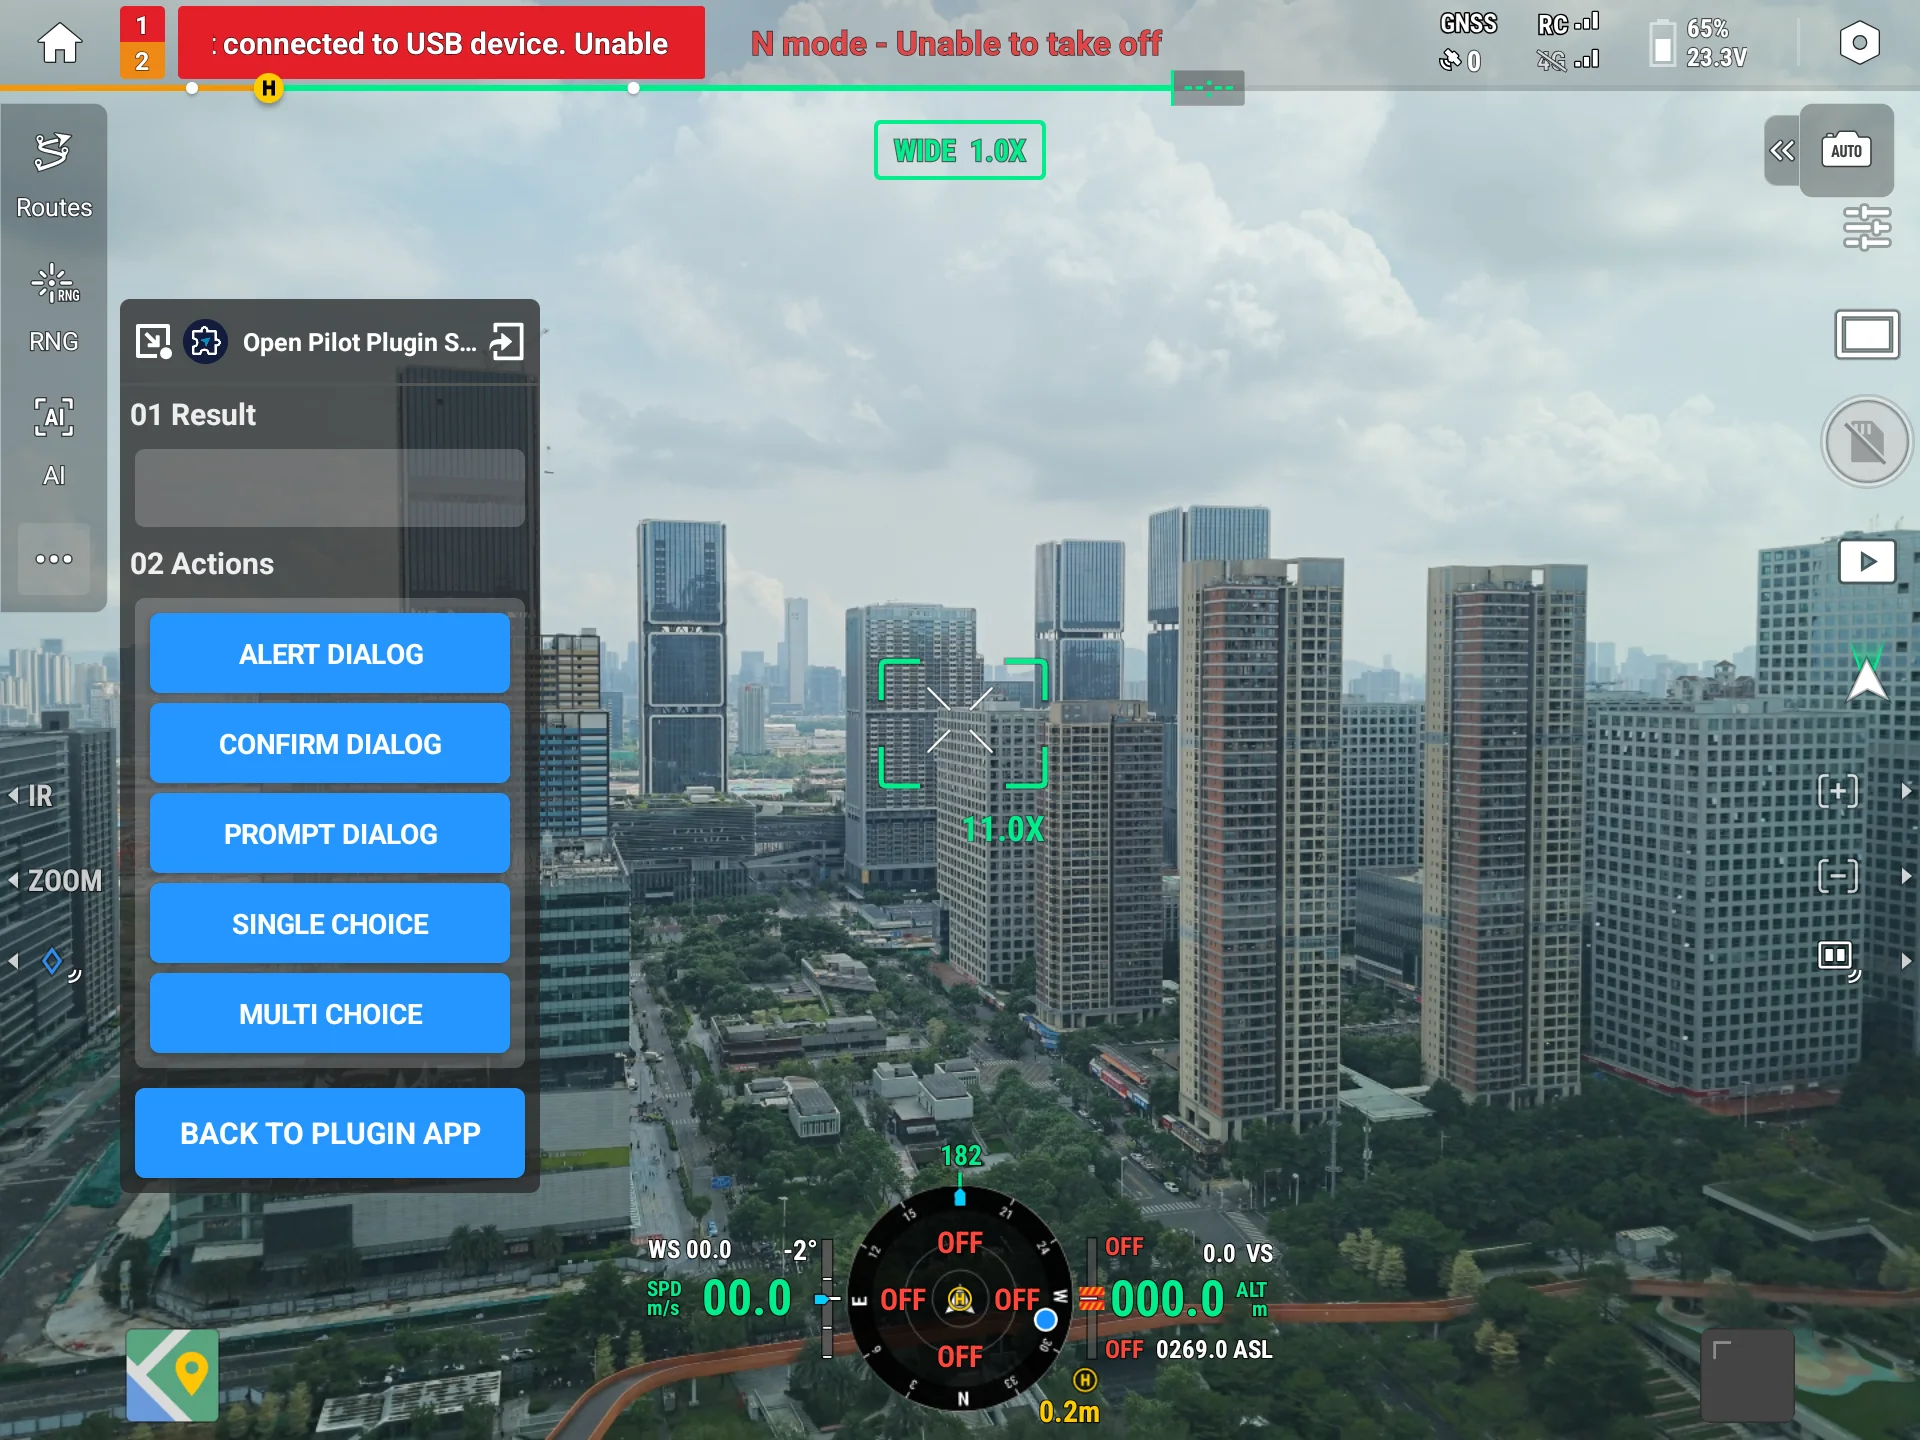
- Select a dialog type from the left menu and tap "View Effect" to switch to Pilot.
- Tap the corresponding button in the floating window, and Pilot immediately pops up that type of dialog.
- After the operation, the "Callback Result" area of the floating window shows which button you tapped, what you entered, and which items you selected.
Only one dialog can exist at a time. Popping up another while the previous dialog is not closed prompts "Dialog already exists".
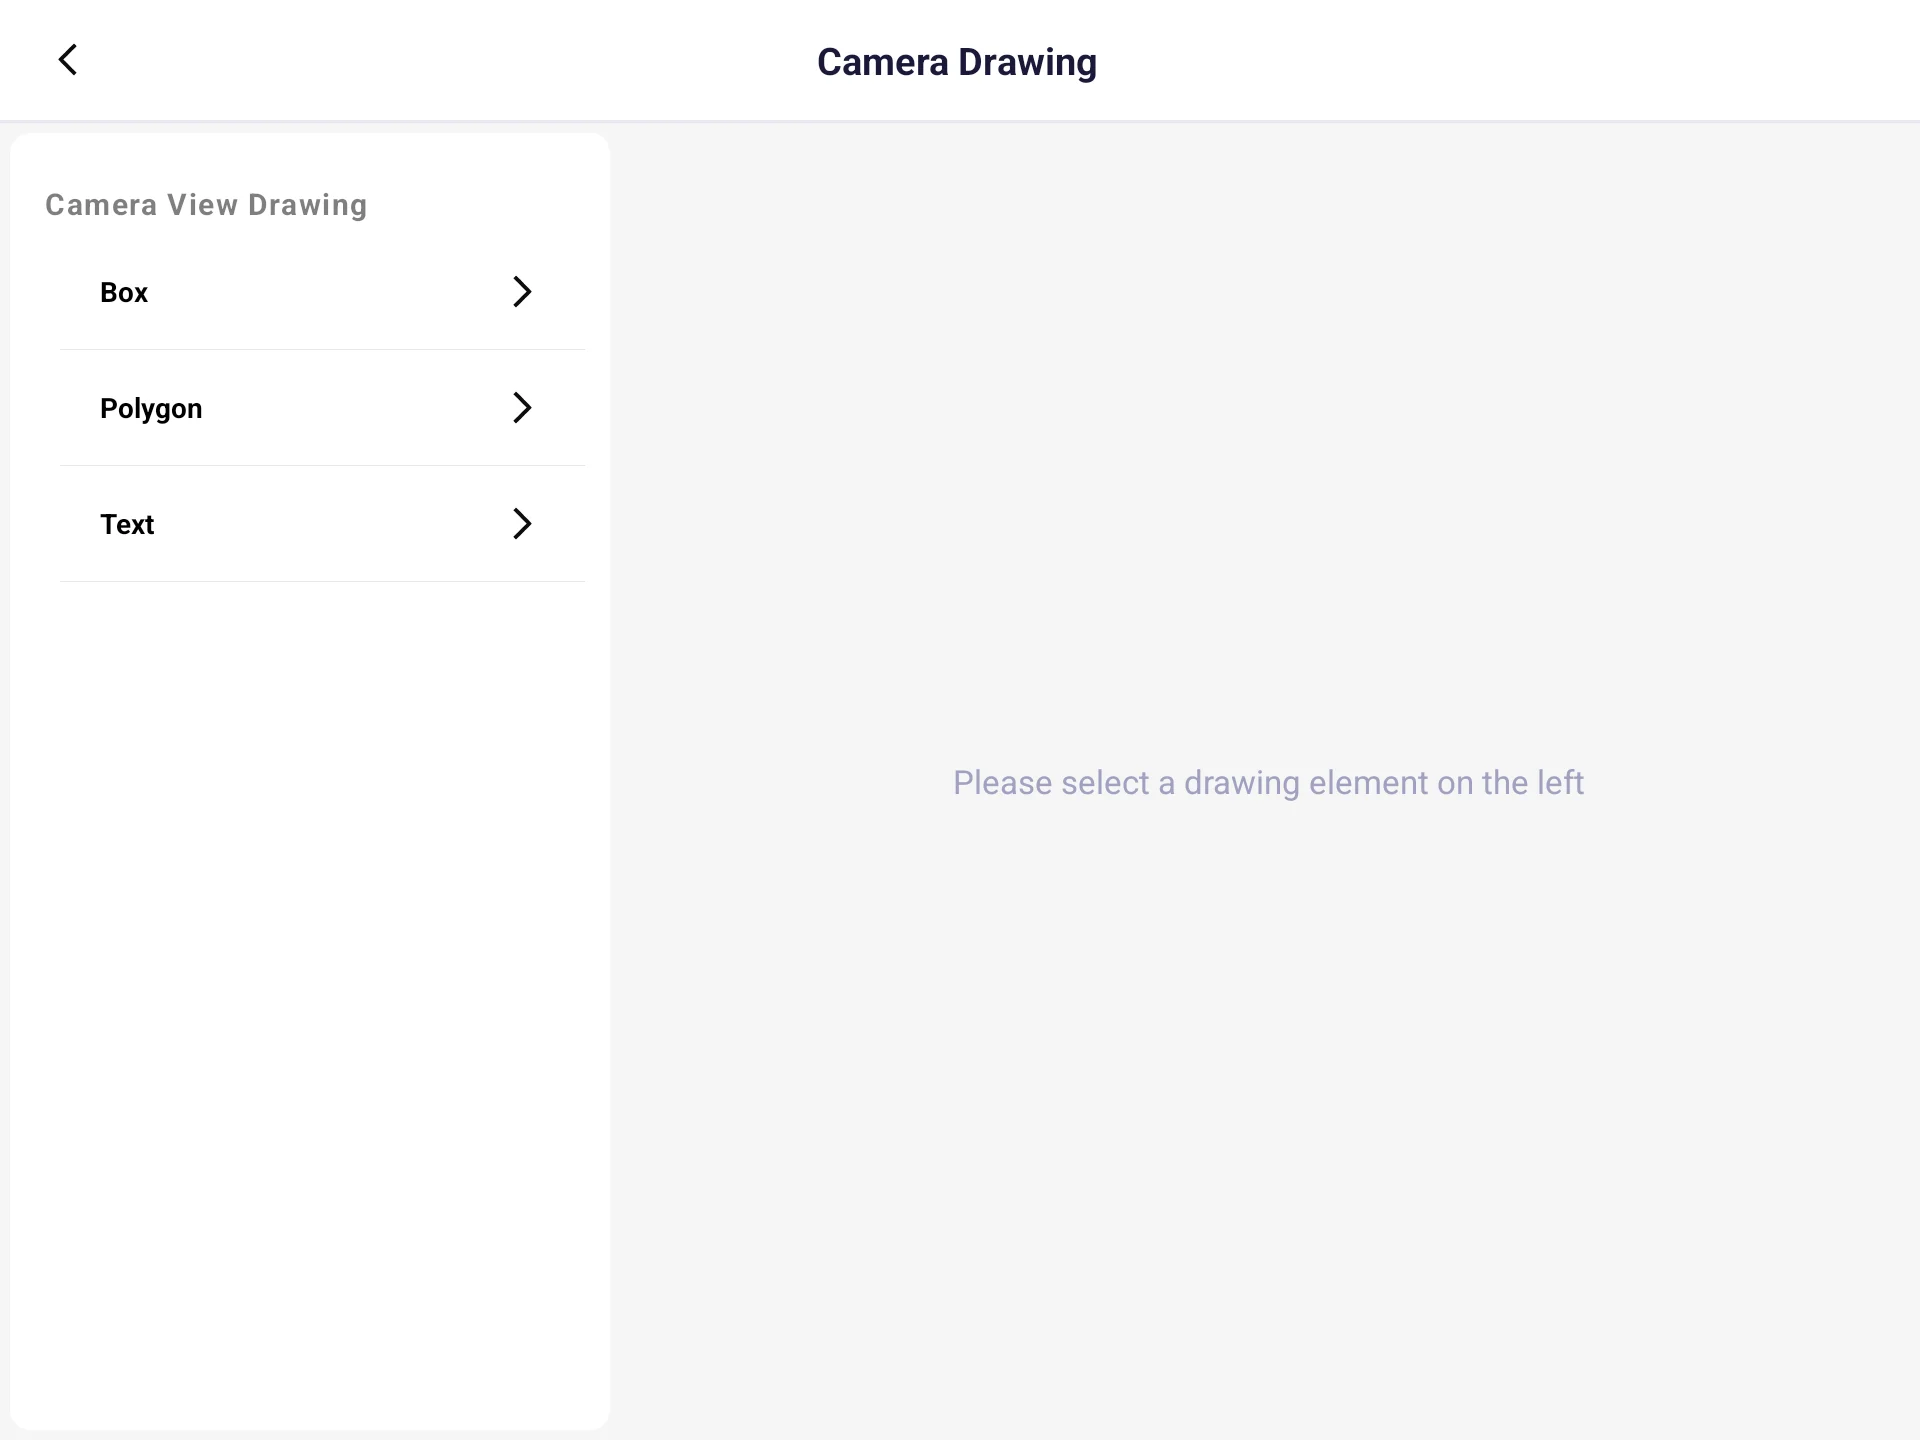
9. Camera View Drawing
This module demonstrates how to overlay graphics and text on Pilot's video feed, commonly used to visually present algorithm results such as target detection and obstacle recognition to the pilot.
| Case | Effect you'll see |
|---|---|
| Rectangle box | Overlay detection rectangle boxes on the video feed, used to frame recognized targets |
| Polygon | Overlay a solid polygon area on the video feed with a distance label, used to mark obstacles or operation areas |
| Text | Overlay custom text at a designated position on the video feed, used to show real-time status |
9.1 Experience Flow
- Select a drawing element from the left menu and tap "View Effect" to switch to Pilot.
- The floating window provides "Update" and "Clear" buttons: tap "Update" to draw the corresponding graphic on the video feed, and tap "Clear" to remove all content.
- Use the left/right arrows at the top of the floating window to switch to other drawing elements.
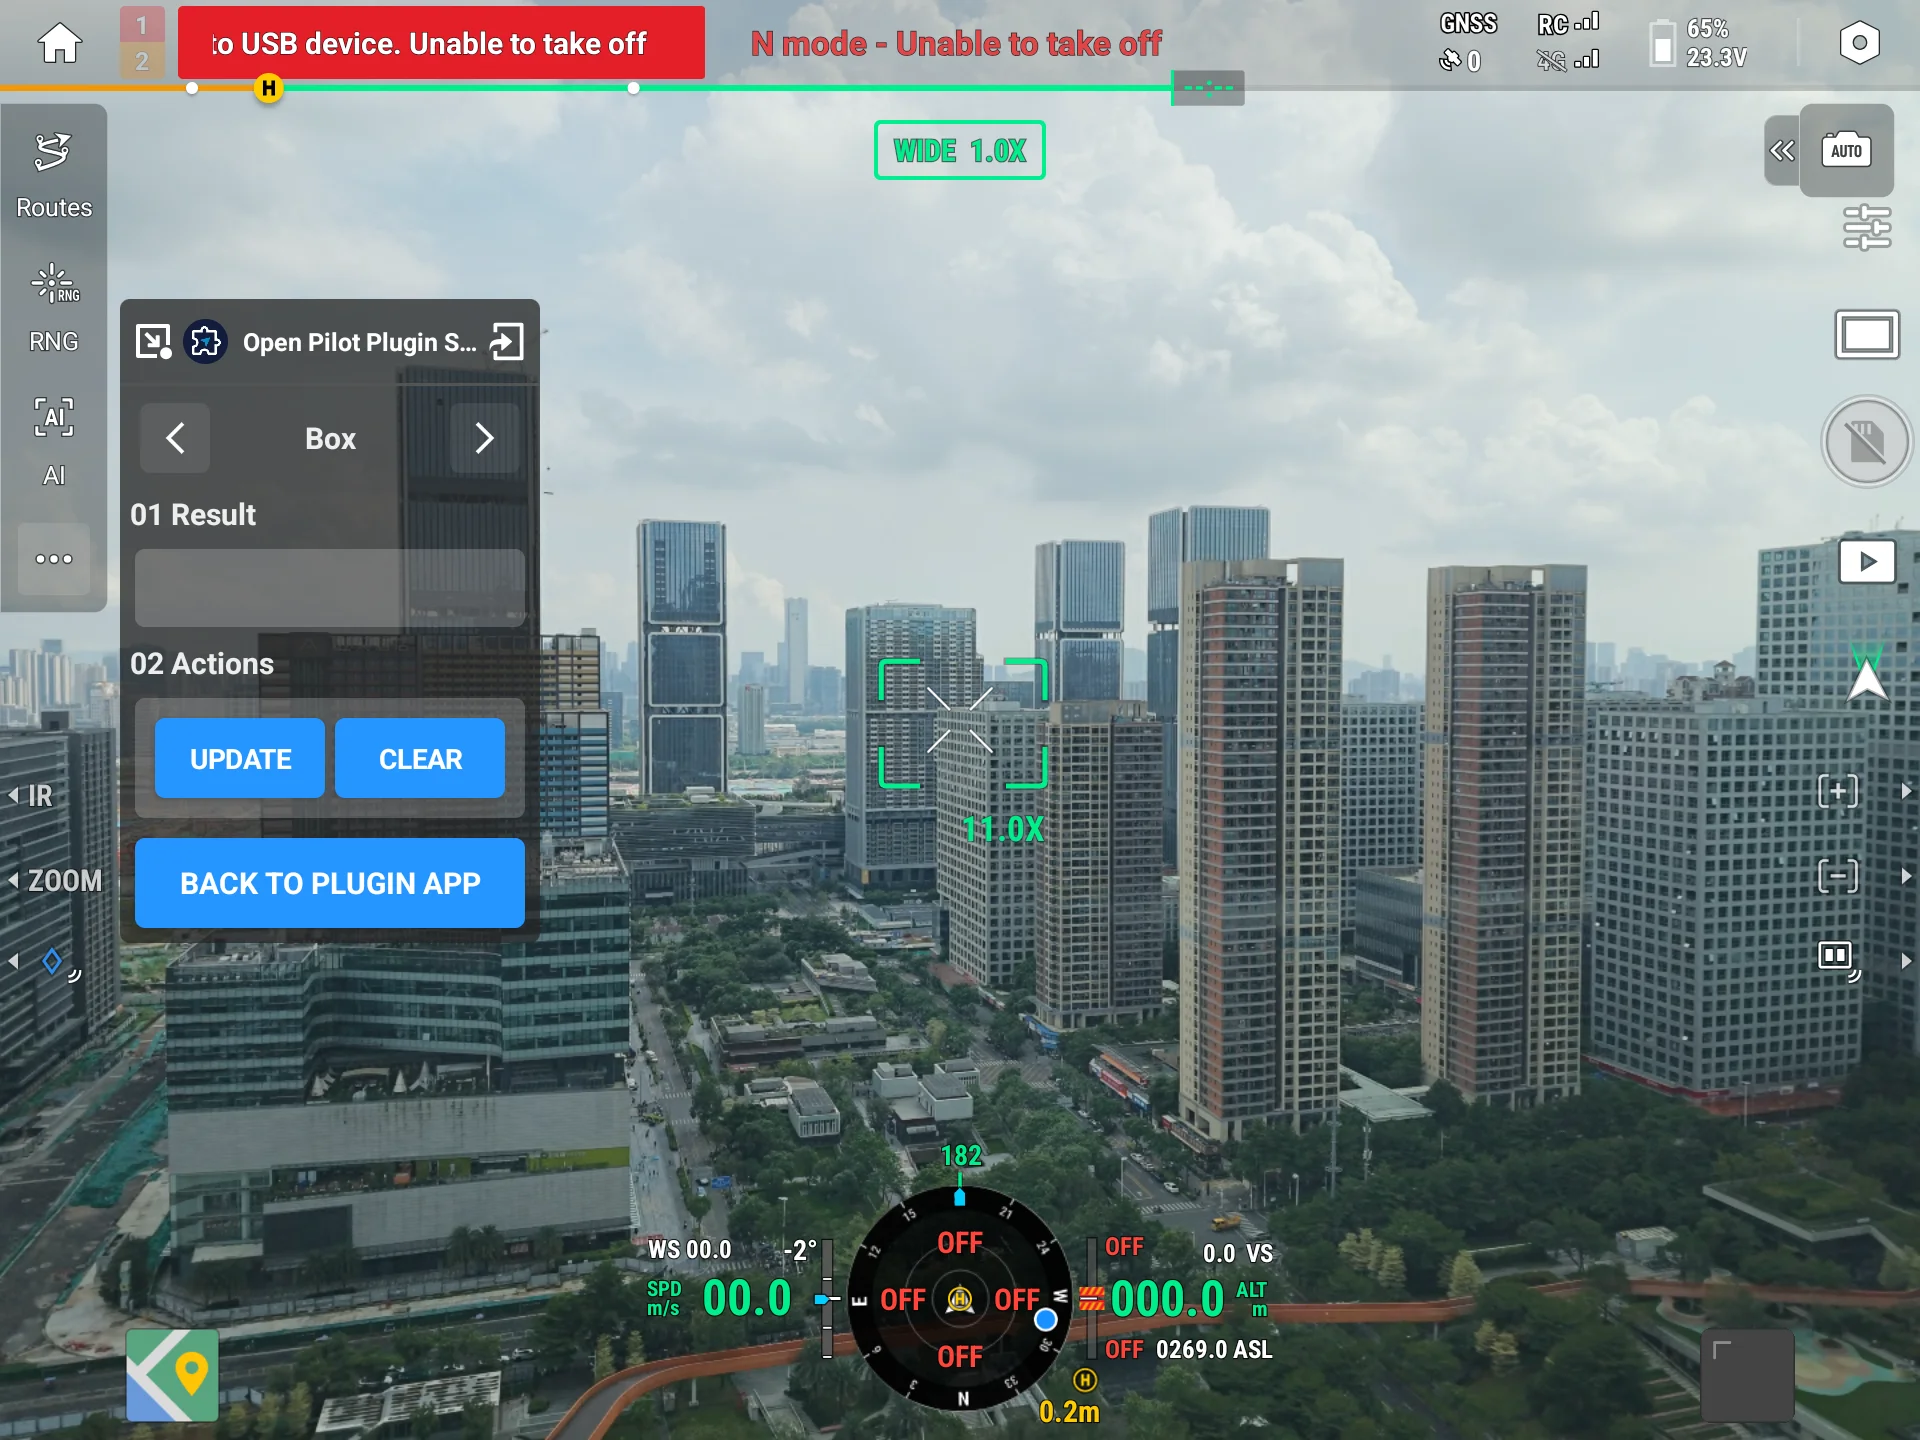
Note: Drawing of each element is a whole-list replacement. "Update" submits all the content to display currently; old graphics not in the submitted list disappear along with it. "Clear" is equivalent to submitting an empty list.
10. Page Navigation
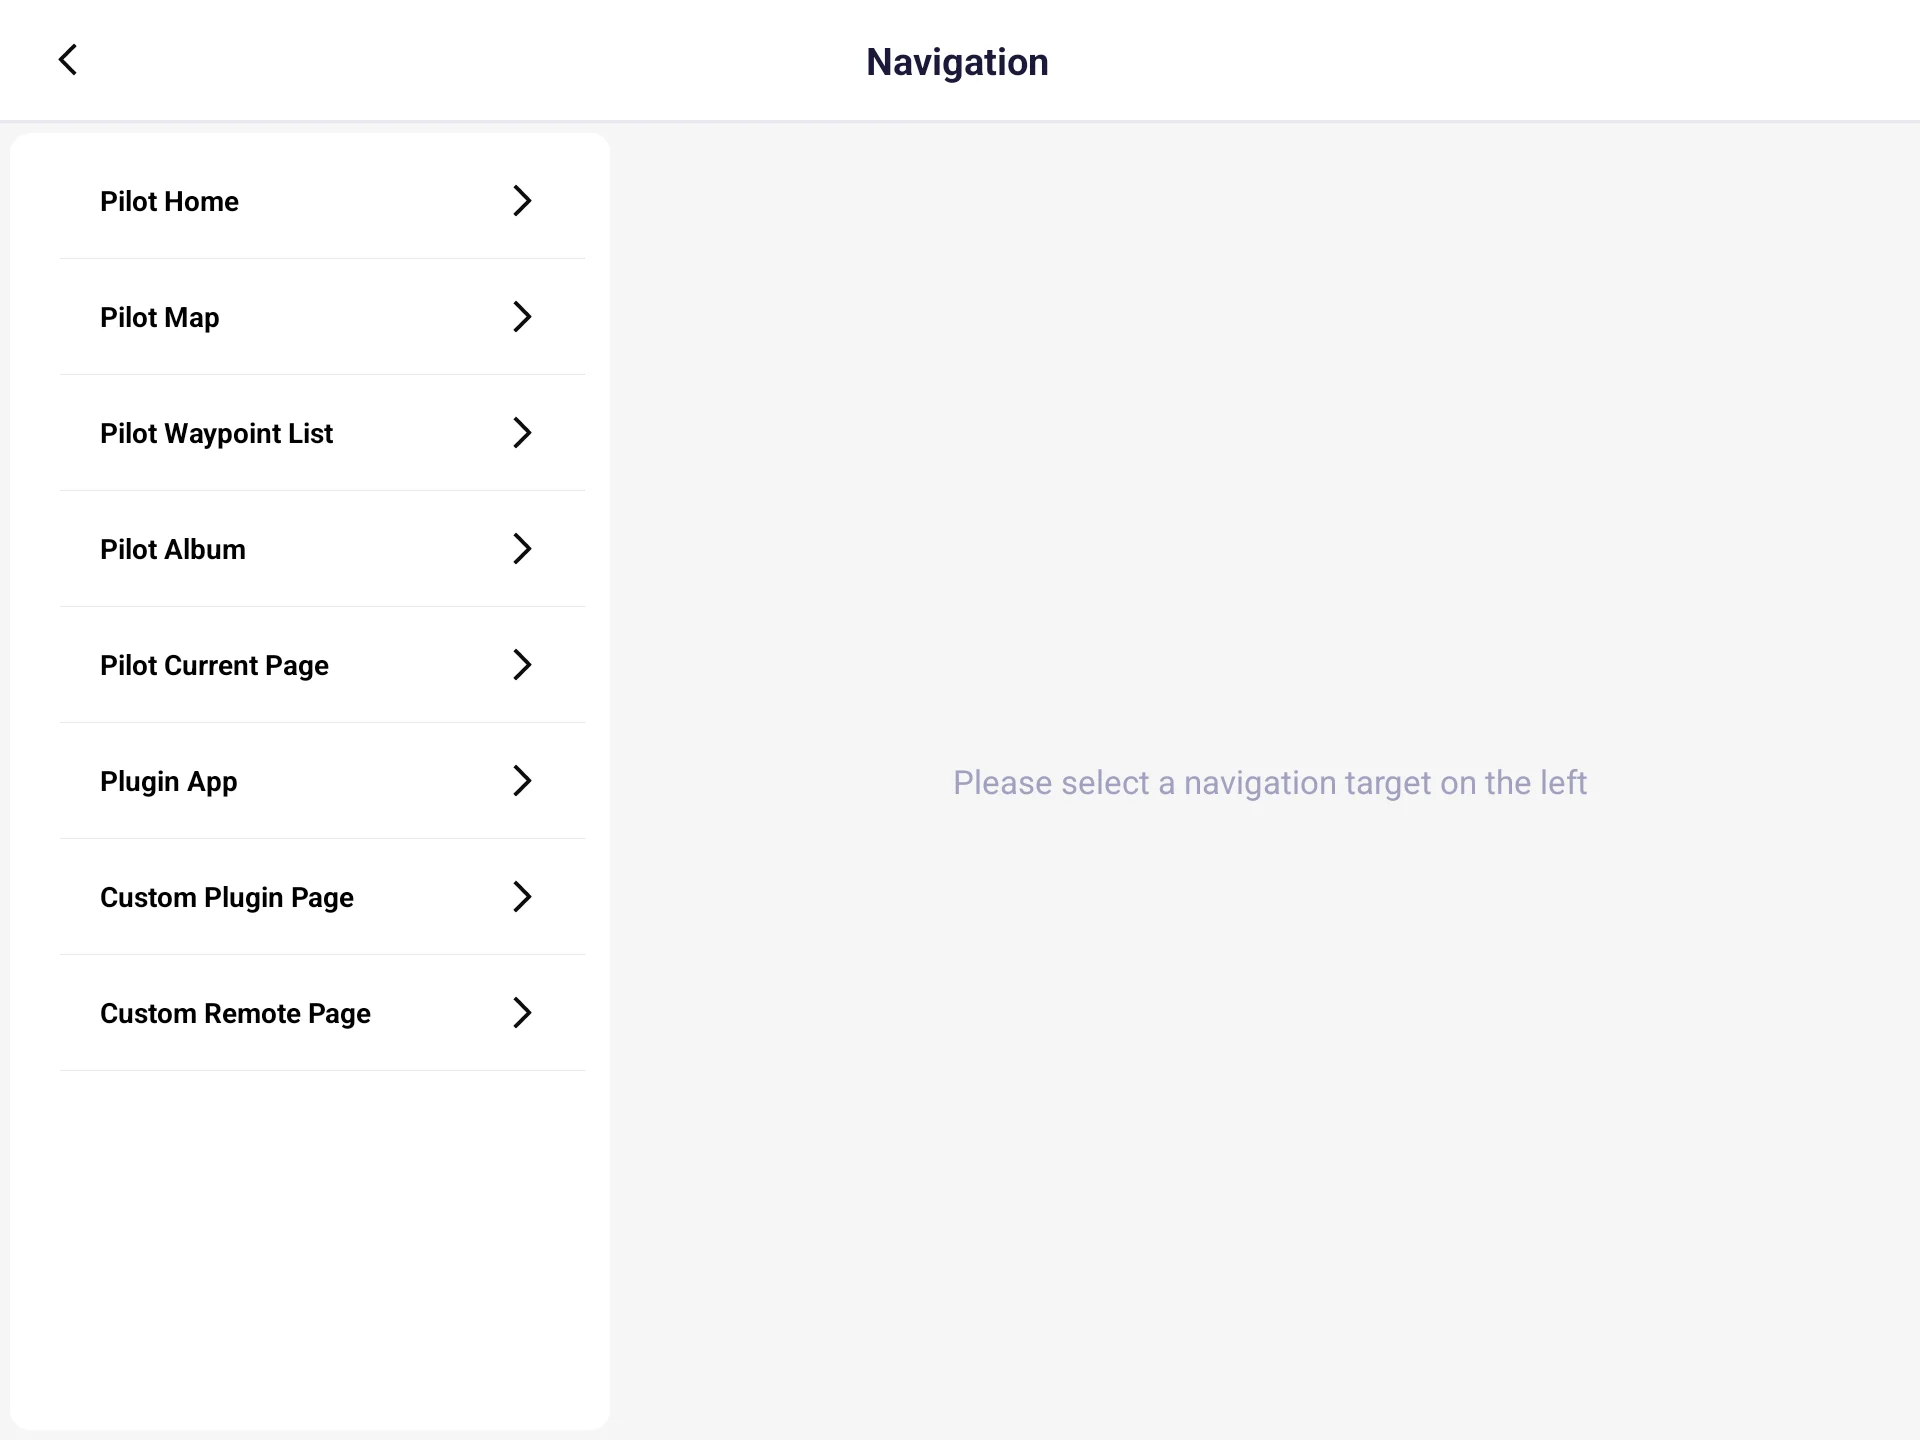
This module demonstrates how to control Pilot's page switching from the plugin, connecting the operation flows of the plugin and Pilot. The module covers all 8 navigation targets.
| Case | Navigation result |
|---|---|
| Pilot home | Switch to Pilot's home page |
| Pilot map page | Switch to Pilot's map page |
| Pilot wayline page | Switch to Pilot's wayline display page |
| Pilot album page | Switch to Pilot's album page |
| Pilot current page | Switch to Pilot, staying on the page it's currently on |
| "Plugin App" | Navigate from Pilot back to the plugin's home page |
| Custom plugin page | Navigate from Pilot back to the page the plugin is currently on |
| Custom remote page | Navigate to a custom remote page of the plugin |
10.1 Experience Flow
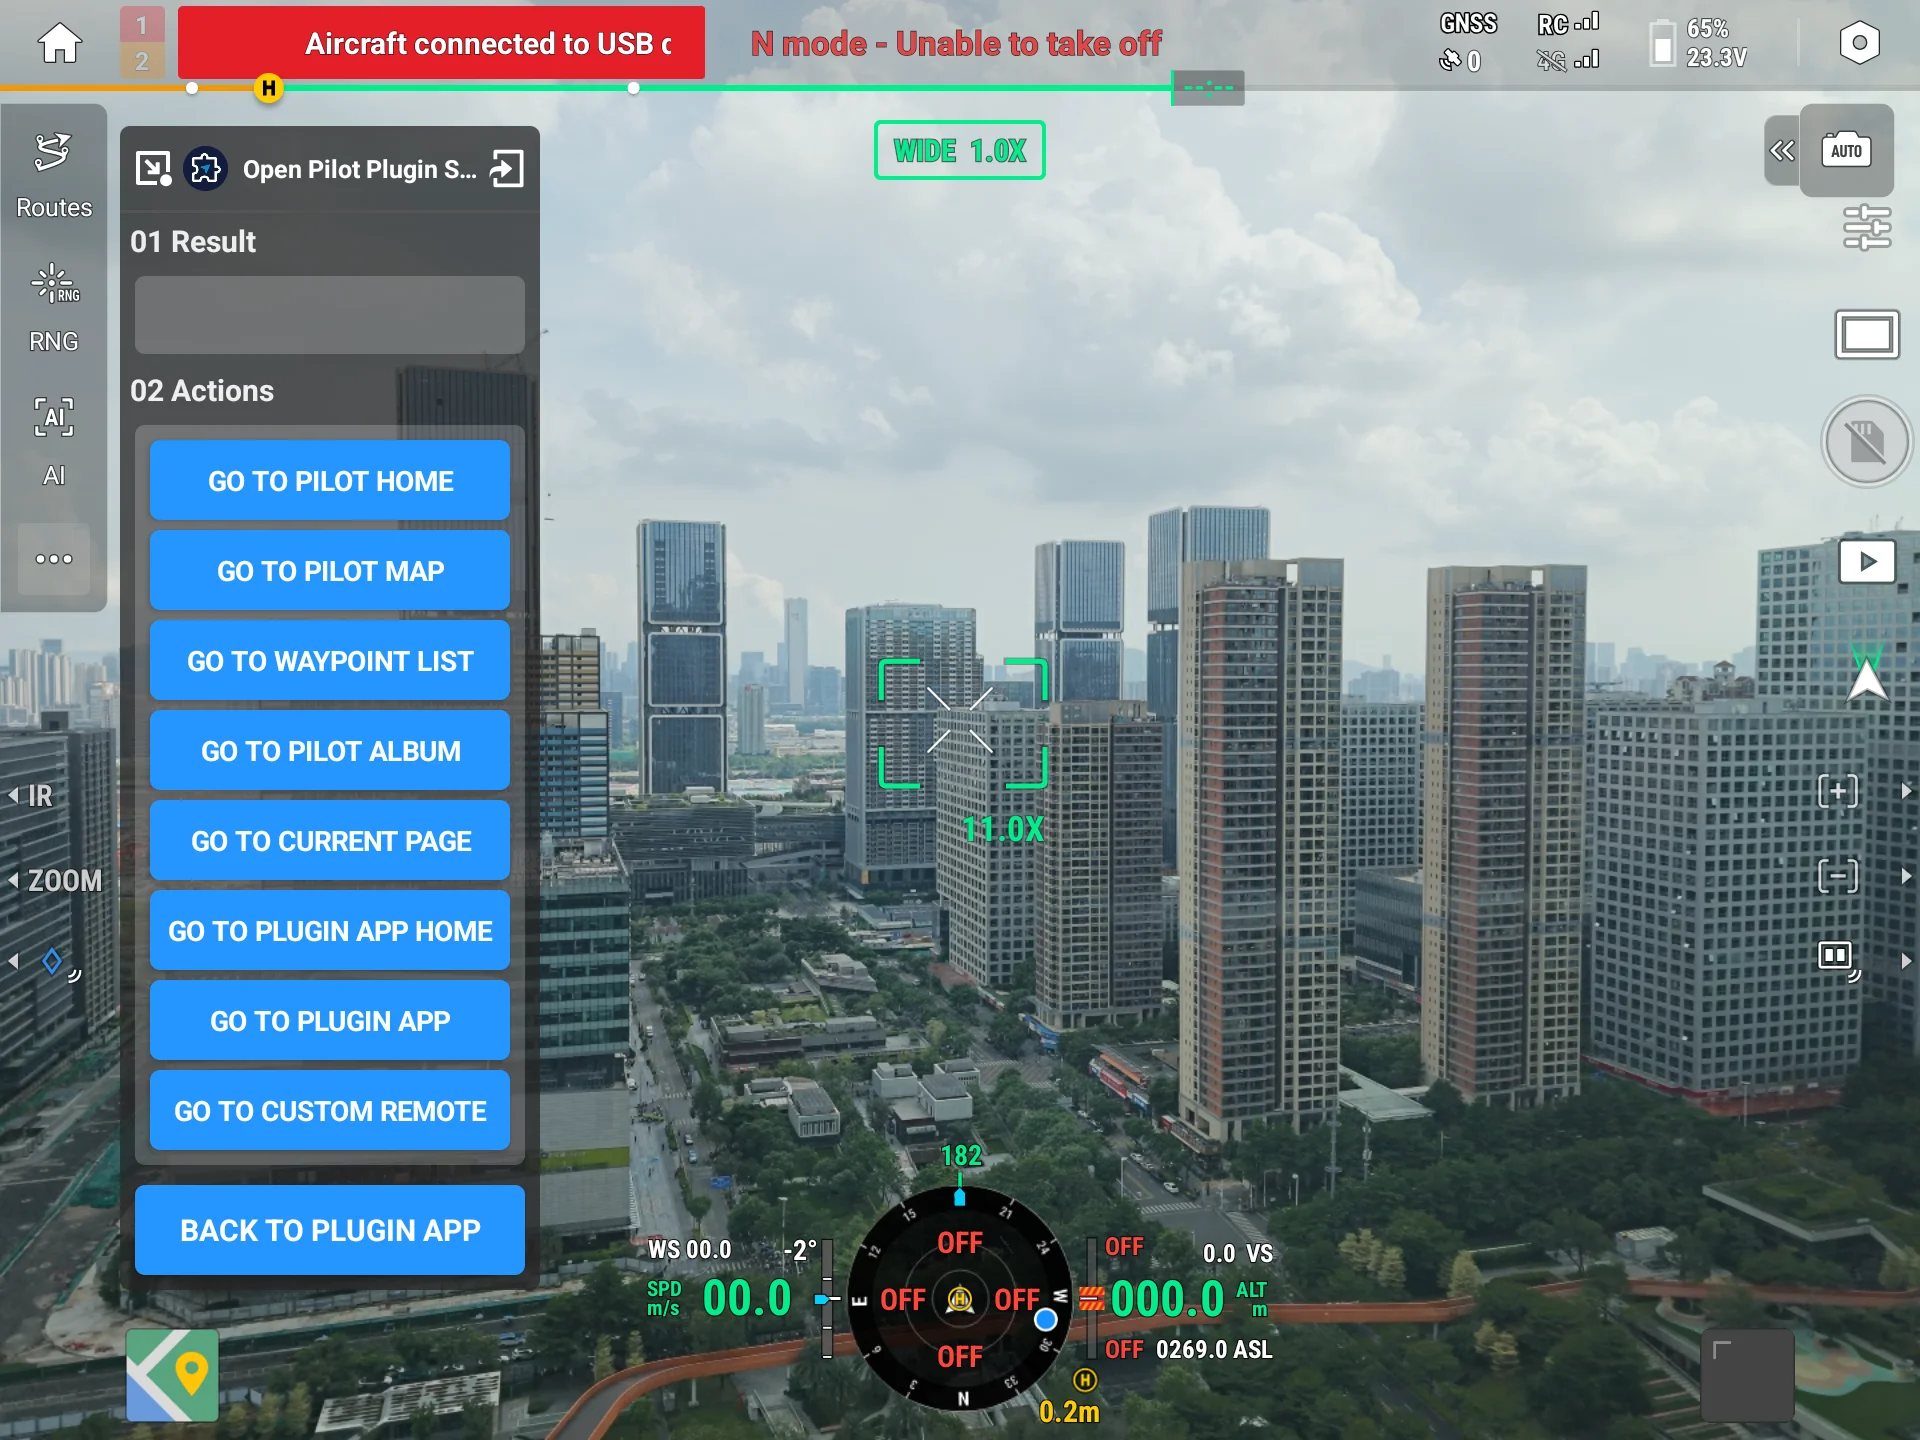
- Select a navigation target from the left menu and tap "View Effect" to switch to Pilot.
- Tap the corresponding button in the floating window, and Pilot immediately navigates to the target page.
- Use the "Back to Plugin App" button in the floating window to return to the plugin and try other targets.
11. Wayline Mission
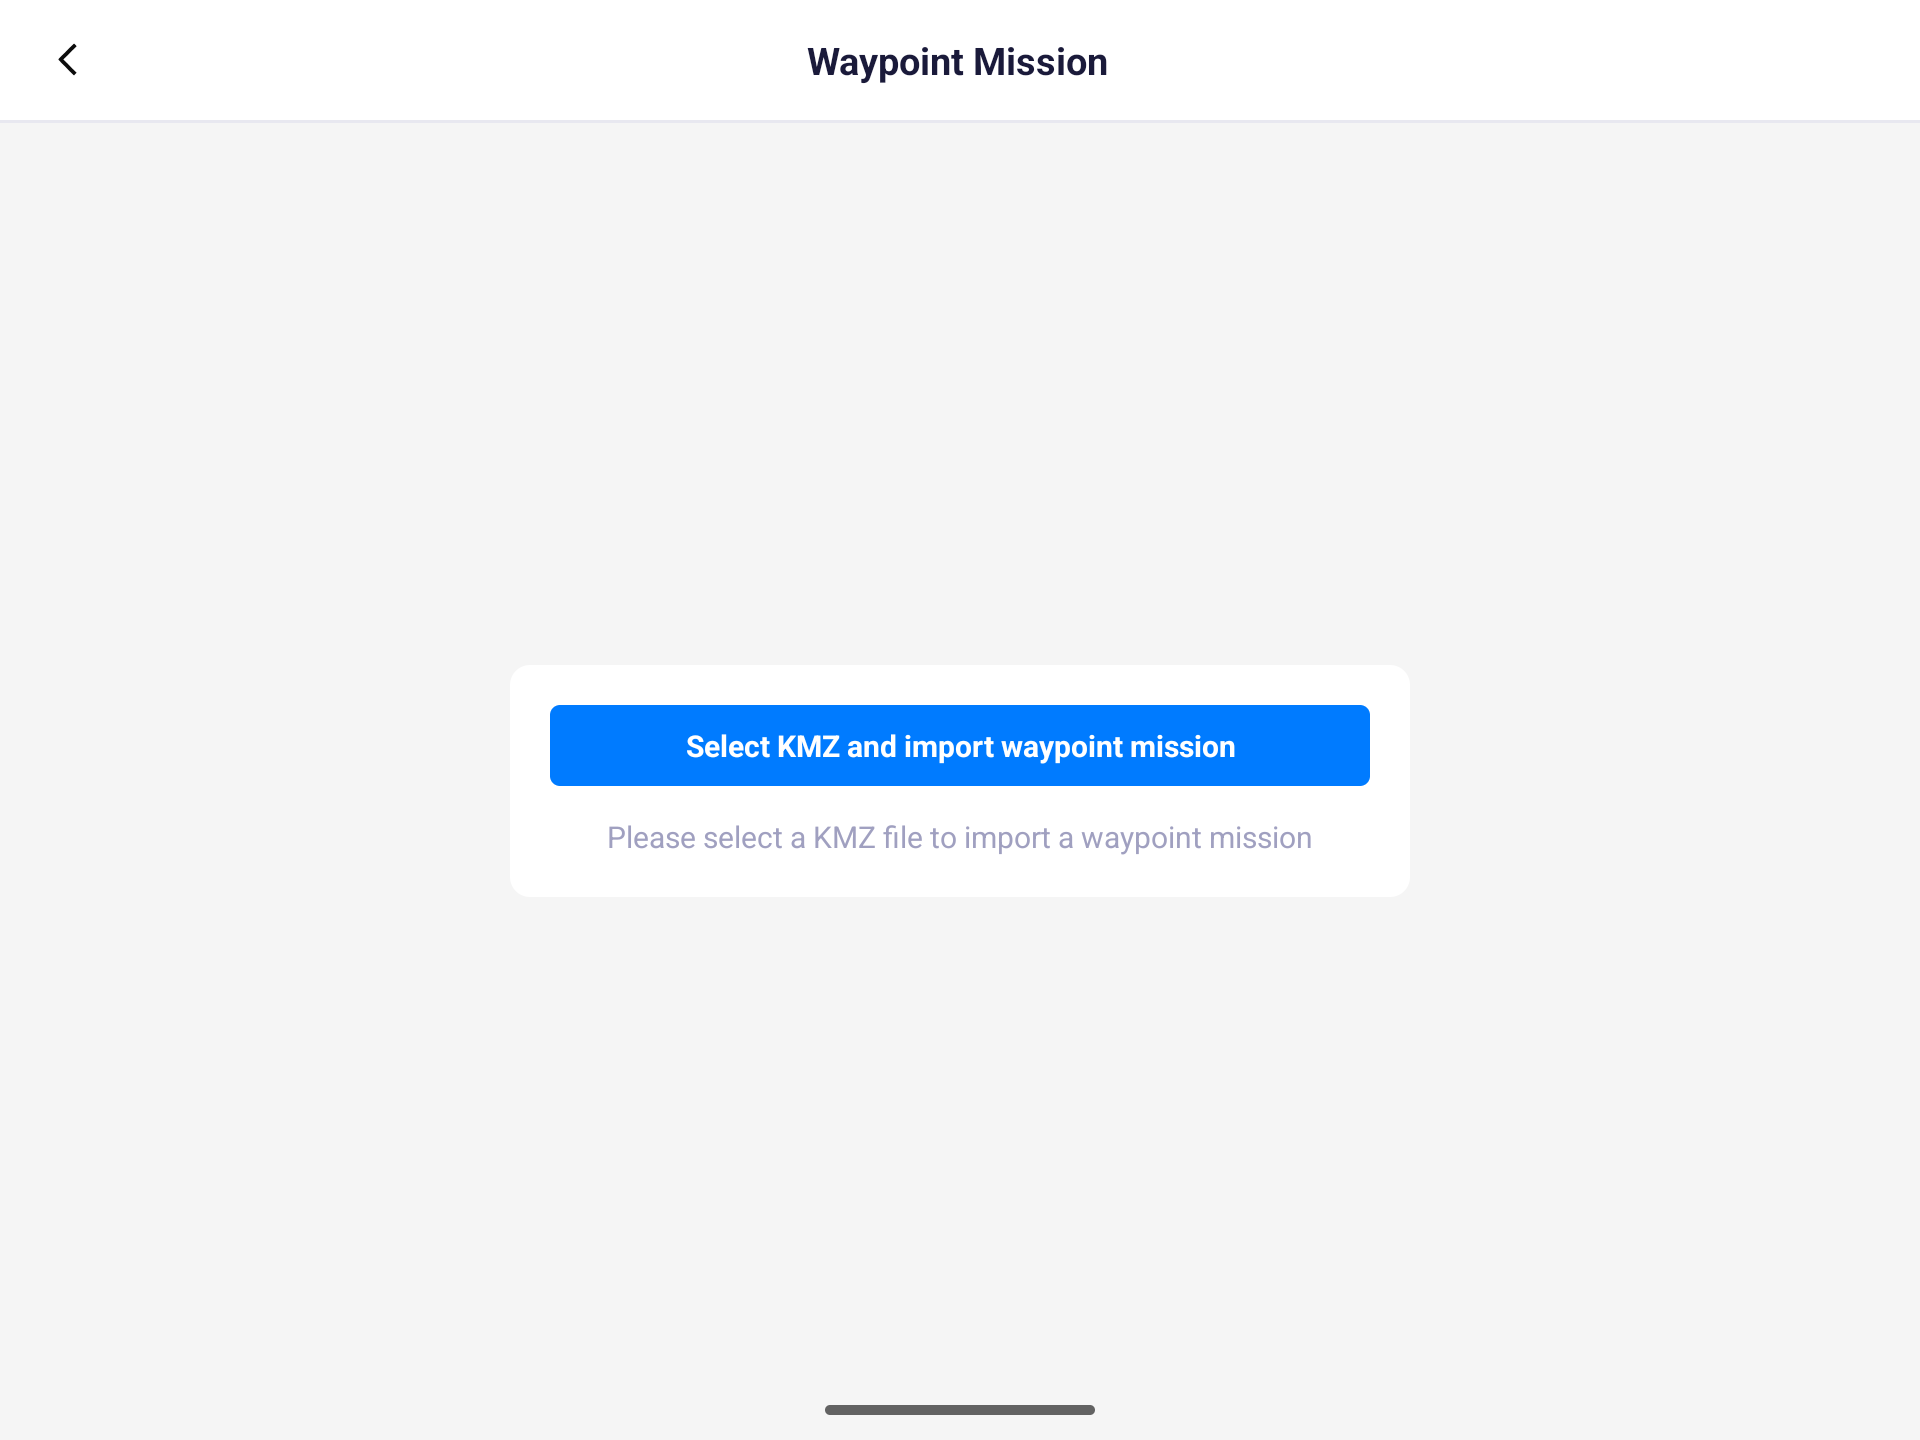
This module demonstrates how to import a local KMZ wayline file into Pilot. After importing, you can see the wayline on Pilot's wayline page.
| Case | Effect you'll see |
|---|---|
| Import KMZ wayline | Select a KMZ file from local storage and push it to Pilot; the page shows the import progress and final result in real time |
11.1 Experience Flow
- Enter the "Wayline Mission" module from the main screen.
- Tap "Select KMZ and import wayline", and select a KMZ file in the system file picker.
- The page shows the import progress percentage, and prompts success or failure when done.
Note: Wayline Mission is the only module that doesn't use the floating window; all operations are done within the plugin page, with no switch to Pilot.
12. FAQ
| Symptom | Cause and handling |
|---|---|
| The module cards on the main screen don't respond to taps | The connection or registration is not complete. Check whether the top badge shows both "Connected" and "Registered" |
| The floating window content isn't the case I just selected | The floating window is globally unique and is redrawn by the new module when switching. Return to the plugin and tap "View Effect" again |
| The AR module prompts "Failed to get aircraft position" | The position of AR elements is computed from the aircraft's real-time position. Confirm the aircraft is connected and retry |
| The AR module prompts to delete before uploading | The same type of AR element can't be uploaded twice. Tap "Delete" to clear it first, then upload again |
| The dialog prompts "Dialog already exists" | The previous dialog is not closed yet. Close it in Pilot before popping up a new one |
| The Wayline Mission prompts a missing permission | The All Files Access permission was not granted. Follow the prompt to grant it in system settings and retry |
13. Get the Sample Source Code
The DJI Pilot Plugin Sample and related scenario projects are organized under the dev-sdk-main branch of the Mobile SDK V5 repository. The source root is SampleCode-V5.
| Project Source | Purpose |
|---|---|
| open-pilot-plugin-sample | Demonstrates custom UI components, AR projection, map widgets, dialogs, camera view drawing, page navigation, and wayline missions module by module, so developers can try the effects in Pilot and reference the interface implementations. |
| open-pilot-flighttask-sample | Demonstrates the complete workflow from Web-based task dispatch and work order reception on the remote controller to KMZ wayline execution and resource upload, with a DJI Pilot plugin and a Node.js demo backend as a reference for task management, wayline execution, and data synchronization. |
| open-pilot-gasdetection-sample | Receives gas measurements through the PSDK payload data channel and demonstrates inspection task dispatch, real-time monitoring and alerts, vessel recognition and following, and inspection record upload, with a reusable Android-side PSDK communication library. |
| open-pilot-patrol-sample | Demonstrates task dispatch, wayline inspection, target recognition and photo capture, map and AR markers, and resource upload, with a DJI Pilot plugin and a Node.js demo backend as a reference for intelligent inspection workflow orchestration. |