Gimbal Management
NOTE This article is Machine-Translated. If you have any questions about this article, please send an E-mail to DJI, we will correct it in time. DJI appreciates your support and attention.
Overview
Using the "Gimbal Control" function of the OSDK, developers could control the gimbal execute the action according to the logic designed by developer.
Concept
Gimbal Angle
Joint angle and attitude angle
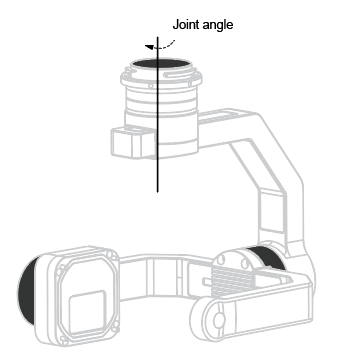
Figure 1 shows the joints of the gimbal. The joint of the gimbal is the motor to drive the payload. This tutorial uses the body coordinate system to describe the joint angle of the gimbal.
Figure1. Joint Angle
Attitude and attitude angle
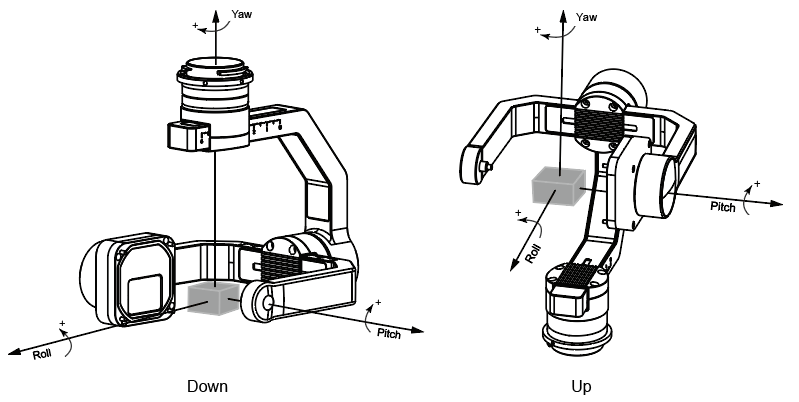
Figure 2 shows the attitude of the payload, according to the control command, the gimbal could spin the payload to a different position. This tutorial uses the geodetic coordinate system (NED, North East Coordinate System) to describe the attitude angle of the payload, this angle is also called Euler-Angle.
Figure 2 Attitude Angle
Gimbal Control
Control Method
There are three control methods:
-
Absolute Angle Control
According to the user's command, the gimbal will rotate from the current position to the specified position within a specified time. -
Speed Control
Users could control the rotation speed of the gimbal.NOTE
- In the Angle Control, the rotation time of the gimbal is limited by the maximum rotation speed and maximum acceleration of the gimbal, and the actual rotation angle is limited by the limit angle of the gimbal.
- In the Speed Control, the gimbal rotates for 0.5s according to the speed specified by the user. When the gimbal rotates to the limit angle, it will stop.
-
Gimbal mode
The current gimbal control function of OSDK only supports free mode, in this mode, when the drone's attitude changes, the gimbal will not rotate.
Gimbal’s Information
Applications developed based on the OSDK can obtain the current information of the specified Gimbal. For details, please refer to OSDK API Documentation.
Develop With GimbalManager
1. Initialization
Befor using GimbalManager developer need call the class GimbalManagerSyncSample to create the object of the GimbalManager and initialize the gimbal specified.
GimbalManagerSyncSample *g = new GimbalManagerSyncSample(vehicle); |
2. Obtain The Information
After initial the GimbalManager developer could obtain the information of the gimbal.
DSTATUS("Current gimbal %d angle (p,r,y) = (%0.2f°, %0.2f°, %0.2f°)", PAYLOAD_INDEX_0, |
3. Route The Gimbal
Using the interface GimbalManagerSyncSample to control the attitude of the gimbal.
GimbalModule::Rotation rotation; |
4. Gimbal Reset
The application developed based on OSDK support reset the pitch and yaw axes of the gimbal.
g->resetSyncSample(PAYLOAD_INDEX_0); |