Setting up Samples
Before you start
- Make sure you have followed the steps in the Hardware Setup guide to get your connections right.
- Follow the steps in the Environment Setup guide to get your software platform ready to run samples. If you are working with M210 and want the Advanced Sensing features, please also follow the M210 Onboard Computer Checklist to install extra dependencies.
- Before you run the samples, consult the checklists in the Running your Application guide.
Linux Onboard Computer
Building the OSDK and Samples
- Clone (or download as zip) the DJI OSDK from Github here.
- Open a terminal,
cdinto the onboardsdk folder and follow these steps to build the OSDK:
mkdir build |
If you want the Advanced Sensing features for the M210, replace cmake .. with cmake .. -DADVANCED_SENSING=ON in the above commands. For Waypoint mission V2, please add -DWAYPT2_CORE=ON.
- The above step builds the
osdk-corelibrary, as well as the Linux samples. Executables are located inside thebuild/binfolder.
Configuration
- Still inside the
buildfolder, copy the default user config file to your executable location:
cp ../sample/linux/common/UserConfig.txt bin/ |
- Open the UserConfig.txt file in a text editor and fill in your App ID, Key, Baudrate and Port name in the designated places.
Running the Samples
- Run your desired Linux sample (e.g. flight control sample) with the following command:
cd bin |
- Follow the interactive prompt to execute actions available in the sample.
ROS Onboard Computer
Building the ROS Nodes
- If you don't have a catkin workspace, create one as follows:
mkdir catkin_ws |
- Clone (or download as zip) the DJI OSDK-ROS from Github here in the
srcfolder. - Build the
dji_sdkROS package and thedji_sdk_demoROS package.
cd .. |
Configuration
- Remember to source your
setup.bash:
source devel/setup.bash |
- Edit the launch file and enter your App ID, Key, Baudrate and Port name in the designated places:
rosed dji_sdk sdk.launch |
Running the Samples
- Start up the
dji_sdkROS node:
roslaunch dji_sdk sdk.launch |
- Open up another terminal and
cdto your catkin_ws location, and start up a sample (e.g. flight control sample):
source devel/setup.bash |
- Follow the prompt on screen to choose an action for the drone to do.
STM32 Onboard Computer
Installing and Setting up the OSDK
-
Clone (or download as zip) the DJI OSDK from Github here.
-
Open the project located in
sample/STM32/OnBoardSDK_STM32/Project/OnBoardSDK_STM32.uvprojxin Keil uVision IDE. -
To build the code, developers need to input the correct APP KEY and APP ID obtained from DJI Developer site in
OnboardSDK_STM32/User/Activate.cppfile.
Building and Running the Samples
-
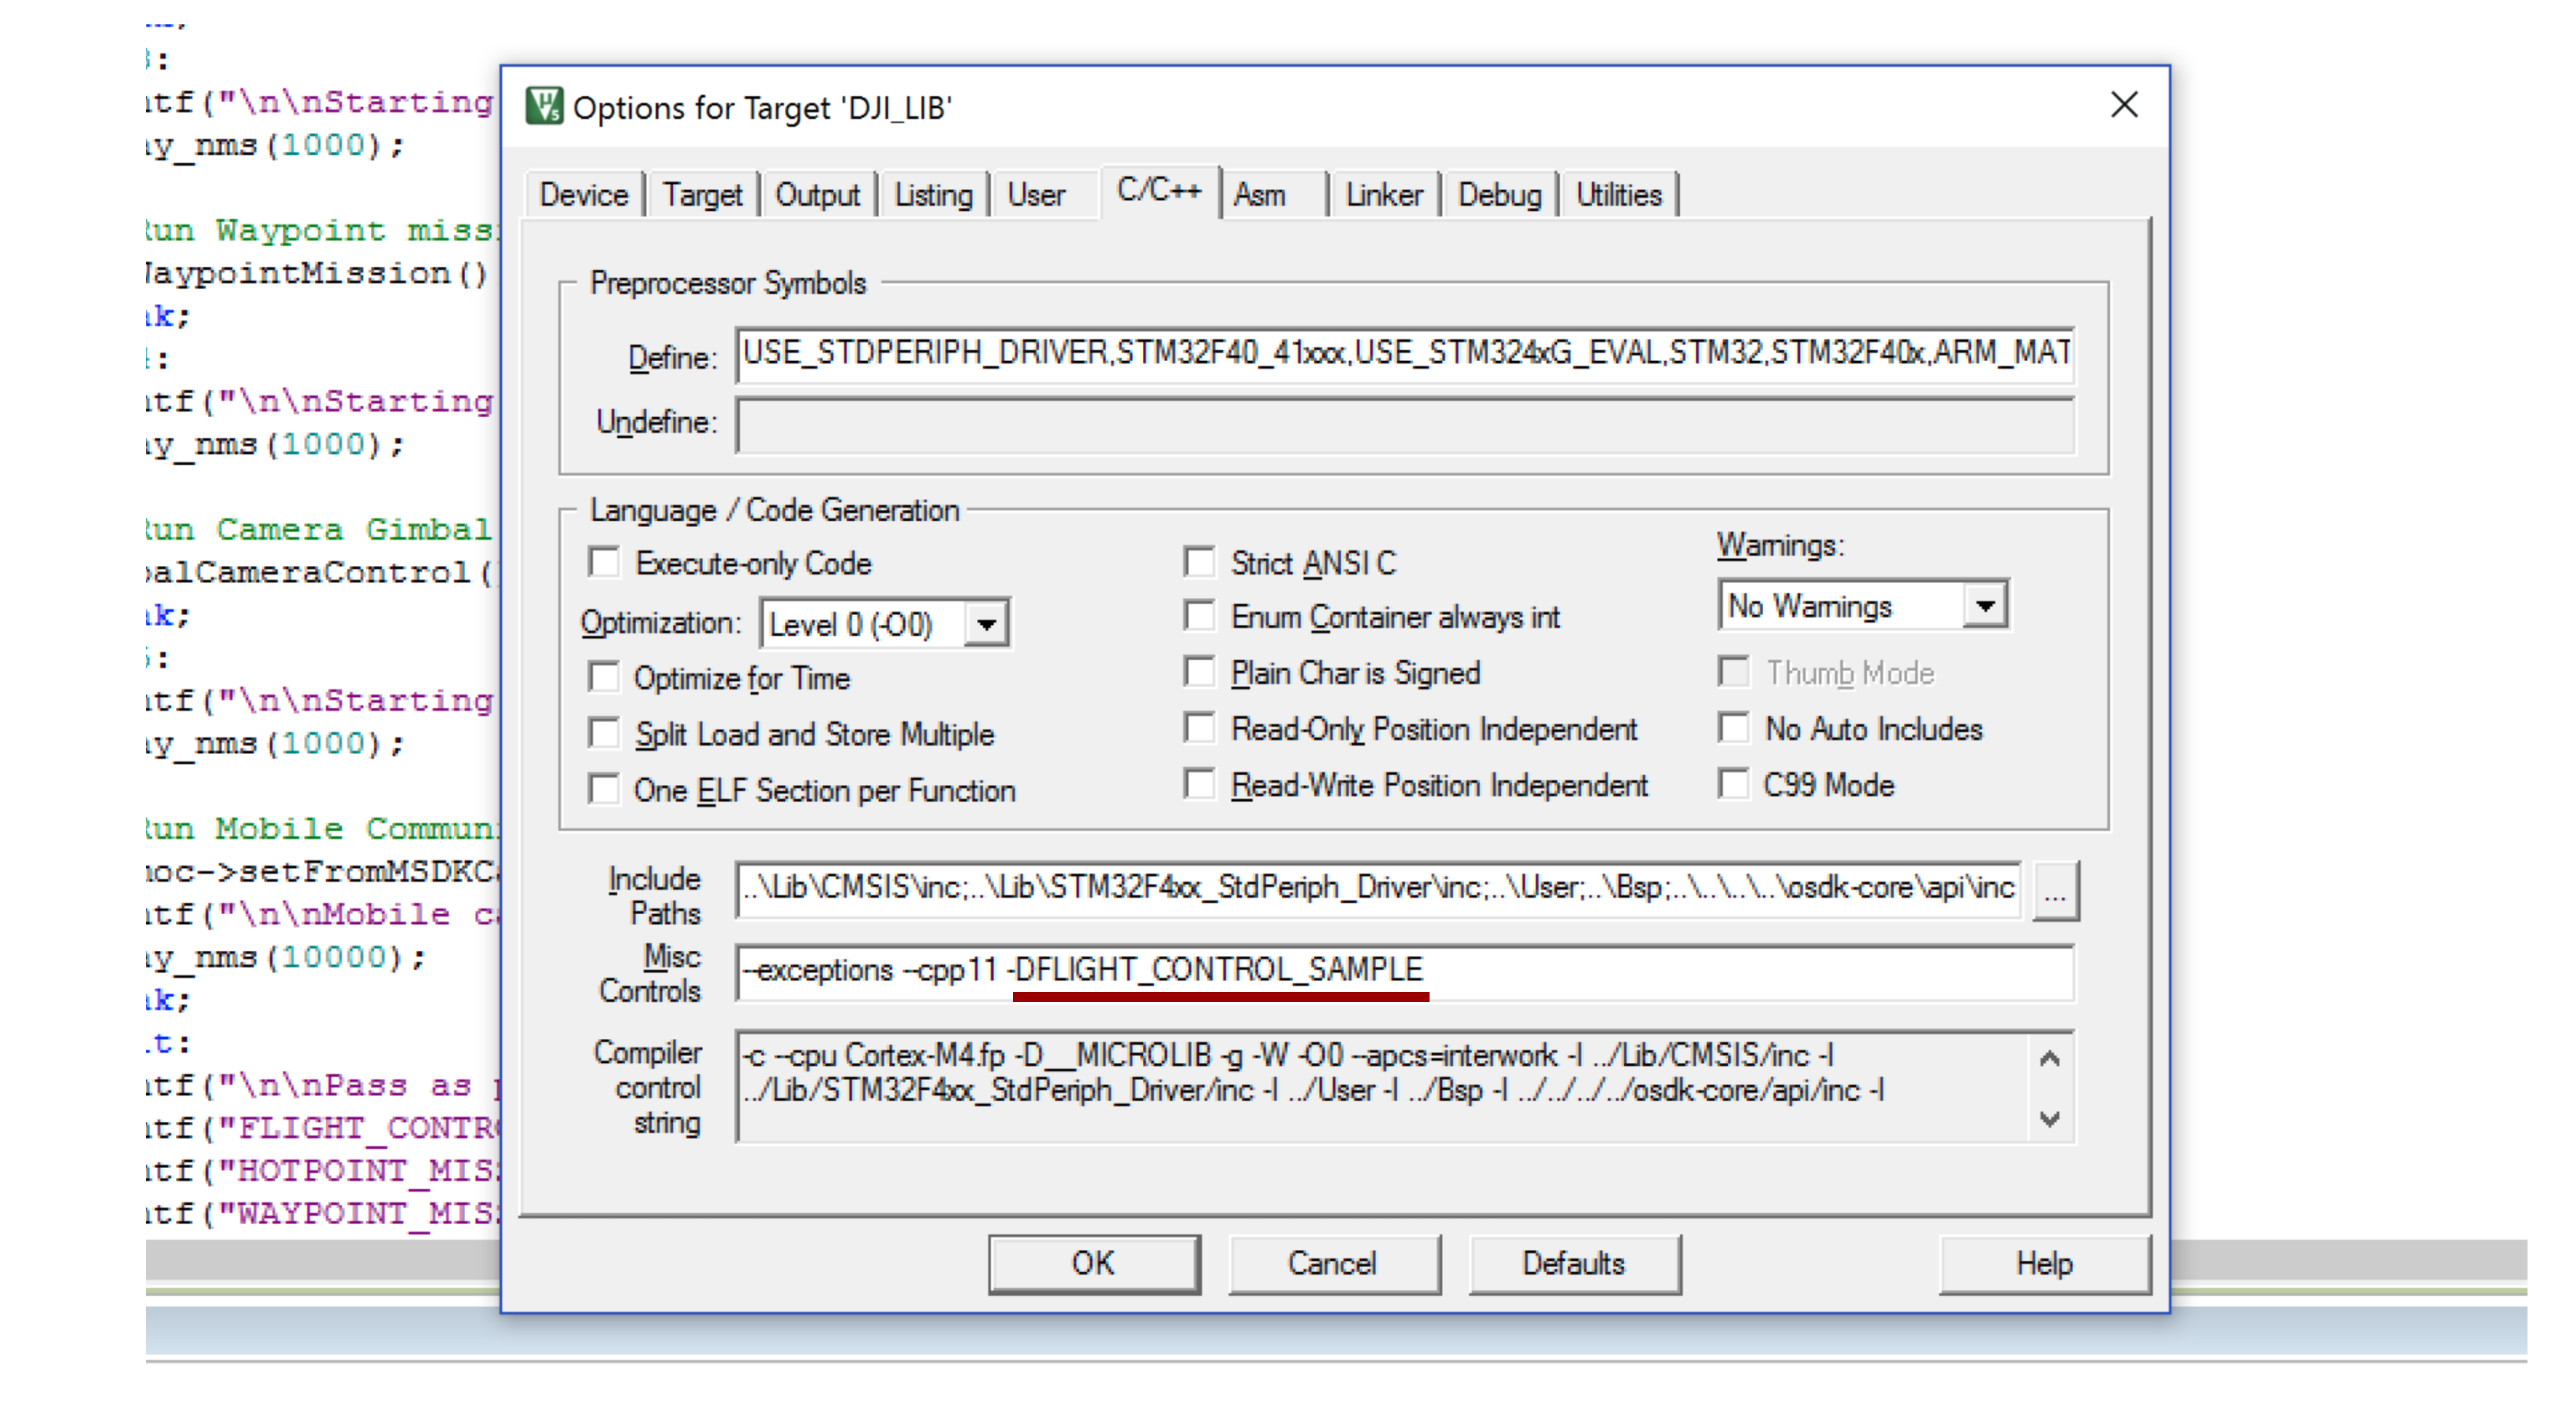
To choose which sample to run, you need to pass a preprocessor flag using Keil. See the image to find the location (underlined in red) you need to edit:
-
Use the menu item
Project->Build TargetandFlash->Downloadto build the project and flash to the STM32 board. -
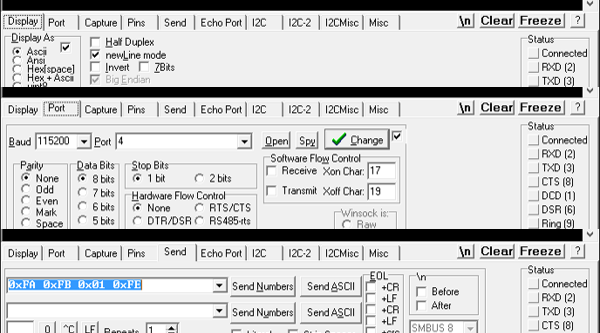
Set the baud rate of your serial terminal software (here we use the open-source RealTerm ) to be 115200, which is the one we use to configure USART2 in the example App. Configure the serial terminal to display the received information in Ascii mode.


QT
Project Setup
- In Qt Creator, click on the
Open Projectbutton, and navigate to thesample/Qt/djiosdk-qt-sample/directory. Select thedjiosdk-qt-sample.profile. - In the Configure Project dialog box, select the appropriate compiler and Qt version and click
Configure Project. - Next, click on the
Projectstab in the left-hand panel and select theRunsettings under theBuild and Runheading on the left. - Check the
Run in Terminalcheckbox. On Linux, you might need to direct Qt Creator to the pre-installedXTermterminal rather than gnome-terminal; go toTools->Options->Systemand change the path in theTerminalbox to/usr/bin/xterm -e. Following these steps, your project should be set up correctly. You can choose to enter your App ID and Key in the
 UserConfig.txtfile in the root of the folder to avoid entering it each time inside the application.
 Following these steps, your project should be set up correctly. You can choose to enter your App ID and Key in the
 Running the Application
Click the Run or Debug button in the bottom left corner to start up the application.
The startup screen should look like this:

-
First, select the serial port and hit the
Initialize Vehiclebutton. This sets up theVehicleobject, initializes all components and reads App ID and Key from the UserConfig.txt file. -
Next, you must activate the drone and optionally obtain control.
-
From here on, explore the various components by clikcing on the tabs at the top. For example, here is a screenshot of the Flight Control page:
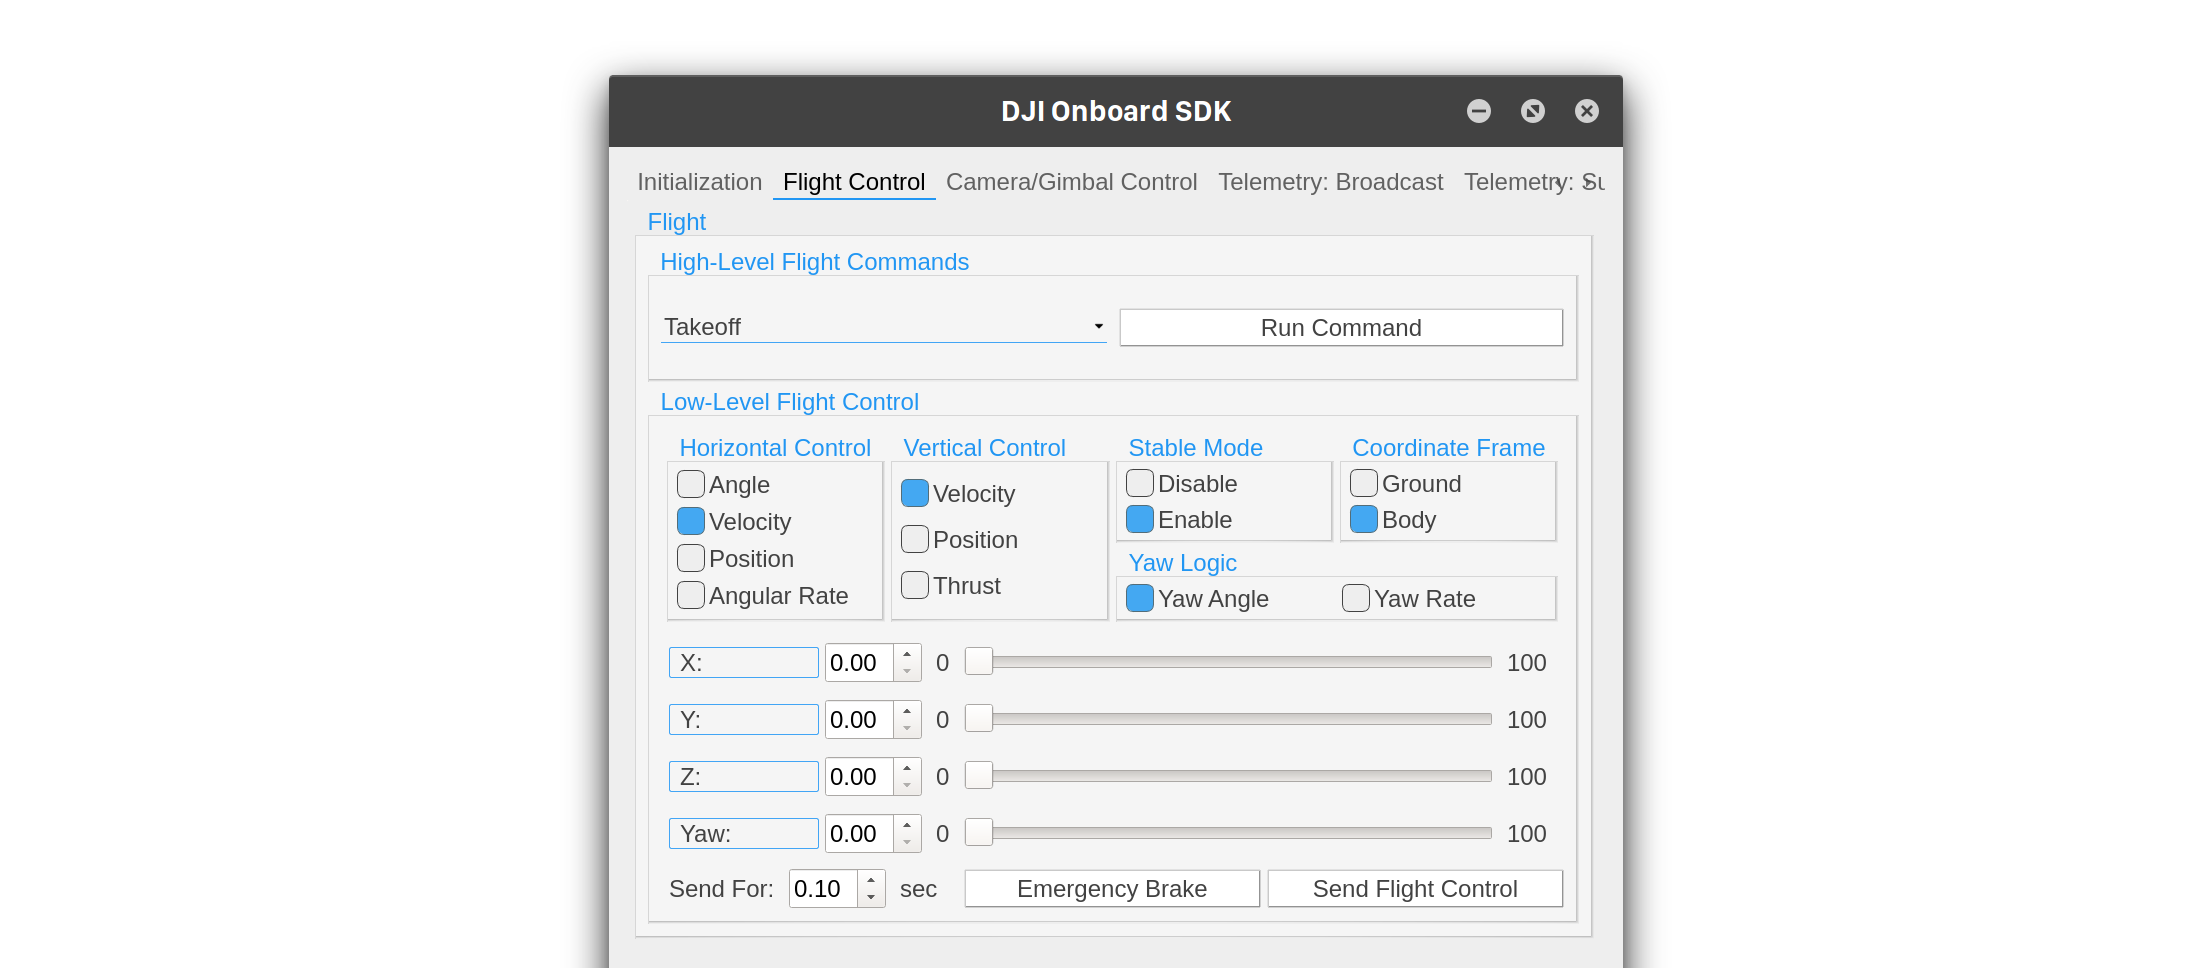
-
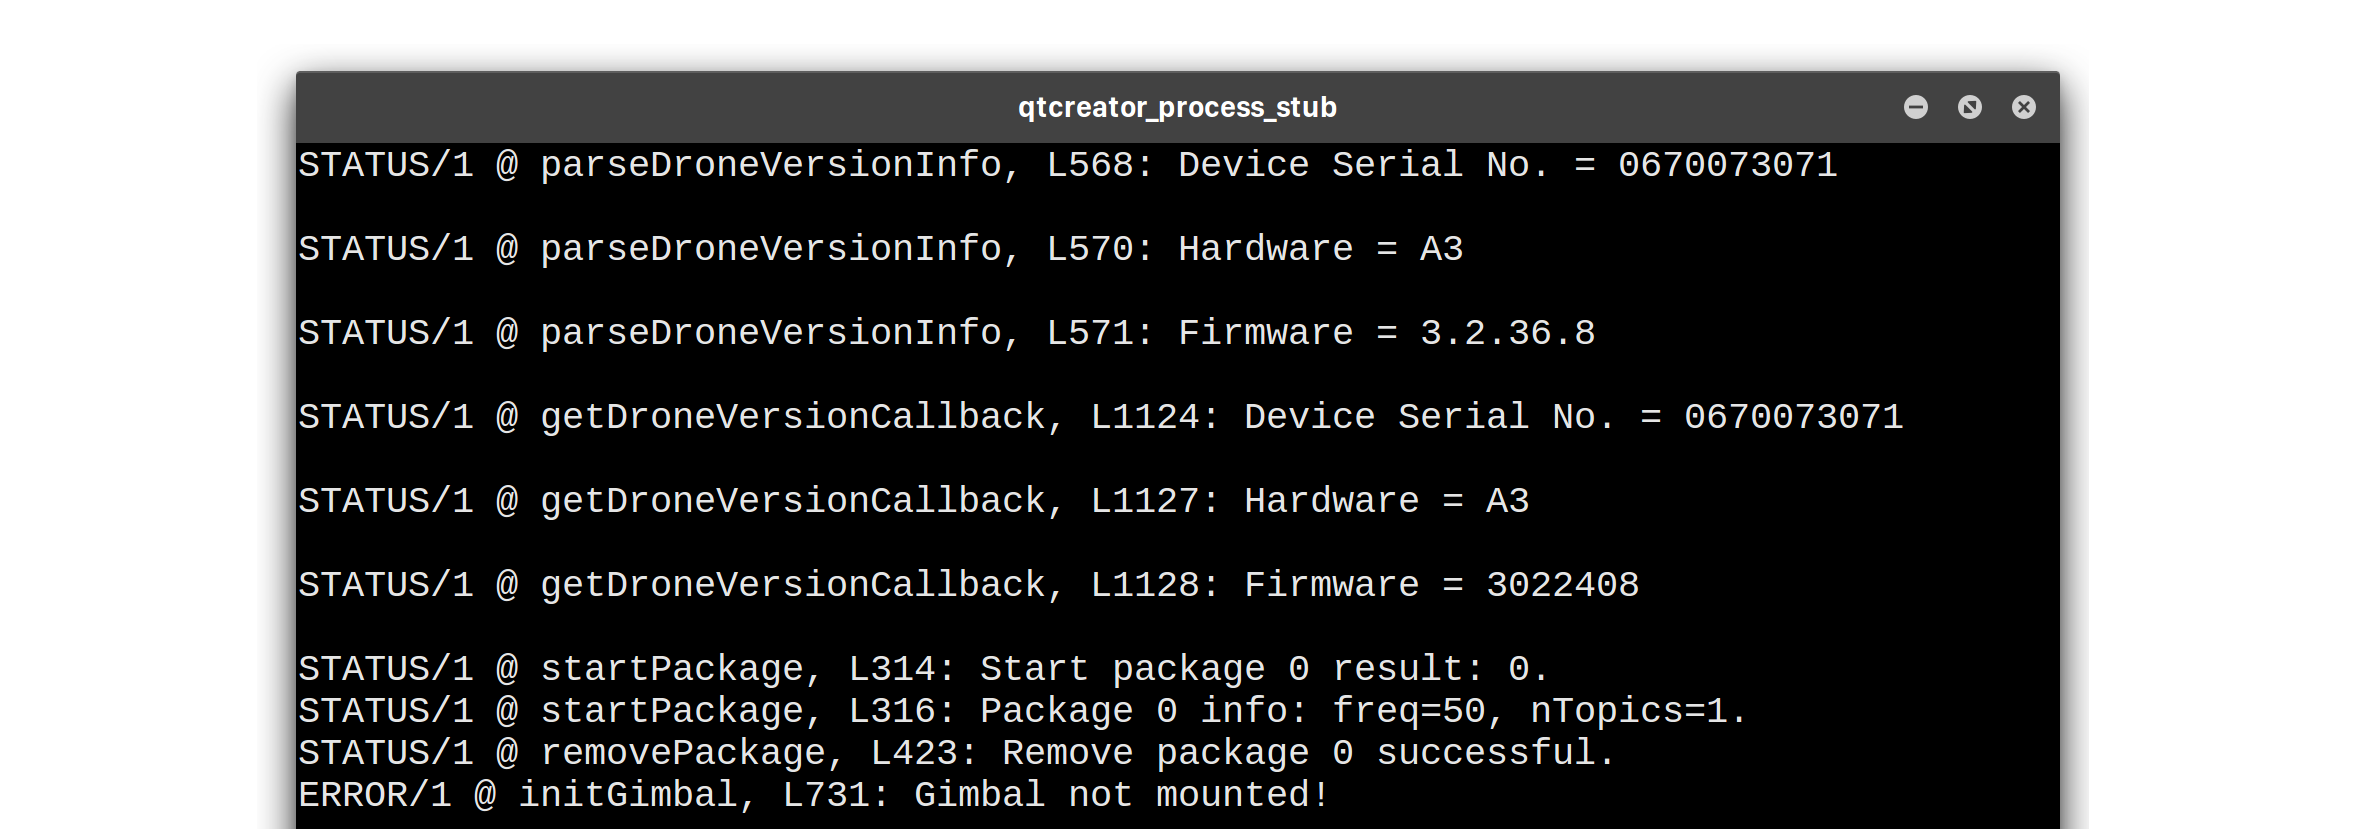
The terminal is your source of debug and status information; here is a screenshot of what that looks like.


If you are using XTerm on a HiDPI display, the fonts might be too small to read. In that case, hold down the Ctrl key and Right-click with a mouse on the XTerm window, and select TrueType Fonts.